Related Resources
Did you know that there are more than 70,000 tree species in the world?
From the giant sequoias of California to the rainbow eucalyptus of the Philippines, trees come in all shapes, sizes and colors.
Creating any tree drawing is fun, but if you’re a beginner, it’s best to start by sketching a simple deciduous tree. You know — the kind that sheds its leaves in autumn and produces pollen that causes allergies (Achoo!)
Runny noses aside, grab your pencil and paper, and let’s start:
And if following a video isn’t your ideal way to learn, keep reading to discover illustrations for every step.
The Tools You’ll Need To Draw A Tree
The tools that could make your tree drawing easier include:
- An H pencil: A hard lead is ideal when you work on a rough sketch and outline because it lets you create light strokes you can easily erase if needed or even build on at later stages of tree drawing.
- An HB pencil: Due to its not-too-dark-not-too-light lead, an HB pencil is great when adding details to your sketch. You can also use it to subtly shade your sketch!
- A B pencil: Speaking of shading, nothing beats a B pencil. A hard lead leaves a dark trace on paper and you can use it for parts of the tree that are in the shade.
- A kneaded eraser: Tweak it, compress it, do whatever you like with it — a kneaded eraser can handle it. Since you can easily adjust its shape, you can erase and also highlight whatever part of your drawing you like.
- Lightly textured sketch paper: Last but not least, a good choice of paper can make drawing more enjoyable. Need to test it to believe us? Just try sketching on lightly textured paper. Your strokes will glide right over it!
If your toolbox isn’t packed with all of the above, don’t worry. You don’t need them to slay your tree drawing!
These are just recommendations that could make learning how to draw a tree easier.
You can use whatever type of pencil(s) and paper you like. What matters the most is your desire to draw!

How To Draw A Tree In 8 Easy Steps
In this eight-step guide on easy tree drawing, we’ll show you how to:
- Draw the trunk
- Draw the branches
- Draw the crown
- Add details to the drawing
- Draw the surroundings
- Shade the drawing
Step 1. Set The Scene
Recommended tool: H pencil
Before we show you how to draw a tree, let’s set the scene and draw a landscape first. Imagine this tree growing in nature, with no buildings or cars in sight.
So, how about we set the scene by drawing some hills, hm?
All you have to do is draw two curved lines, each representing the outline of a hill.
One can be taller than the other, but make sure the lines touch, like this:

Step 2. Draw The Trunk
Recommended tool: H pencil
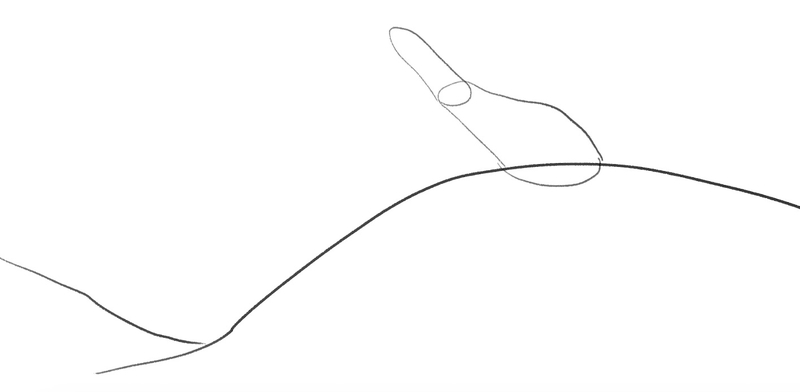
Tree trunks often have a straight cylindrical shape, but they can also grow sideways or twist as the years pass.
We’re going to show you how to draw a tree trunk leaning to the left.
Add a diagonal line on the left and draw it as long as you’d like the tree to be tall. Draw a round top and point the line downward, parallel to the left side.
As you reach the middle of the trunk, curve the line inwards to make a circle in the middle; but don’t lift your pencil, there’s no need to! Continue drawing the line downward and make the tree thicker the closer to the ground you get, like this:
Step 3. Draw The Branches
Recommended tool: H pencil
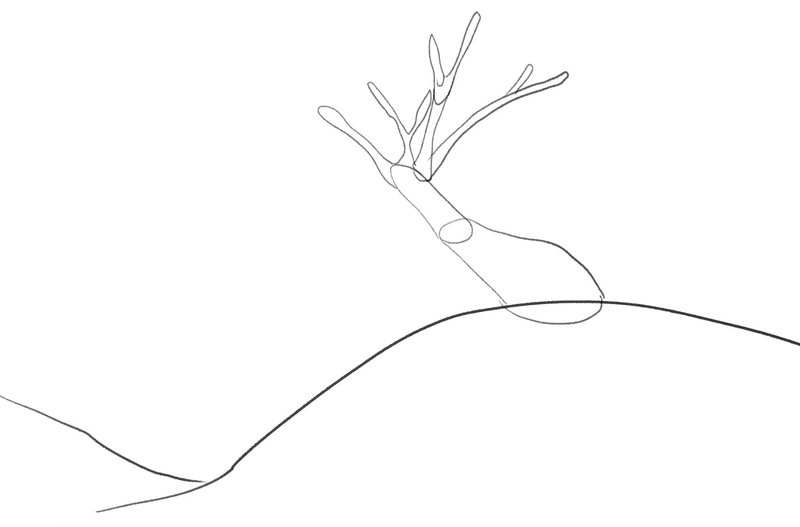
The branches are also shaped like cylinders and you can draw them using very few strokes.
You can start on the left, from the top of the tree trunk.
Add a line that looks like the continuation of the trunk’s left side. When you’re happy with how long the branch is, curve the line, draw an oval tip and bring the line back to the top of the trunk.
Now you can immediately continue sketching the next branch without interrupting the line.
Feel free to experiment with the shape and length of the branches. For example, you can draw some of them as a large and elongated letter “Y” while others can look a bit thicker and resemble a simple stick.
And since you’re still learning how to draw a tree, it’s okay if you draw a tree that doesn’t branch out too much. Our doesn’t either, check it out:
Step 4. Draw The Crown
Recommended tool: H pencil
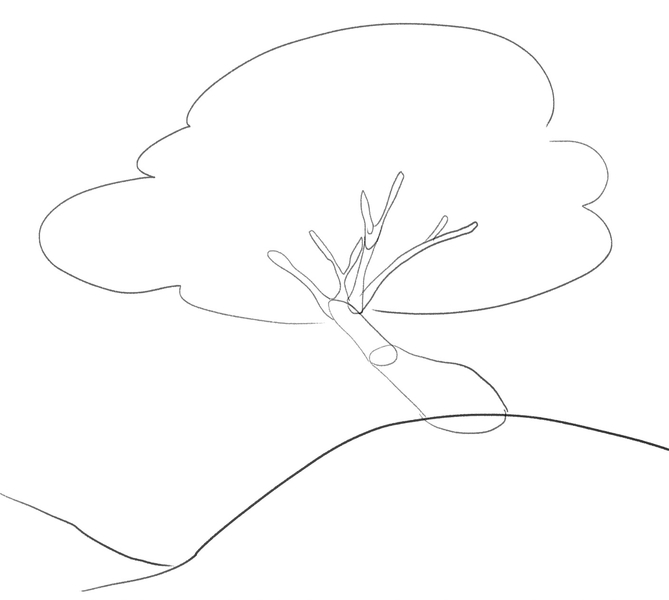
The last step to creating the tree outline is to add the crown.
The easiest way to draw it is to picture it as a cloud. The crown should be big, fluffy and rich.
So, start by drawing a line from the top of the tree trunk and make it parallel to the ground. Then, create arches all around the branches until the line touches the top of the tree trunk on the other side.
We’re drawing a big tree, hence the big space between the tallest branch and the crown outline:
Step 5. Outline The Tree
Recommended tool: HB pencil
The hardest part of drawing a tree is behind you!
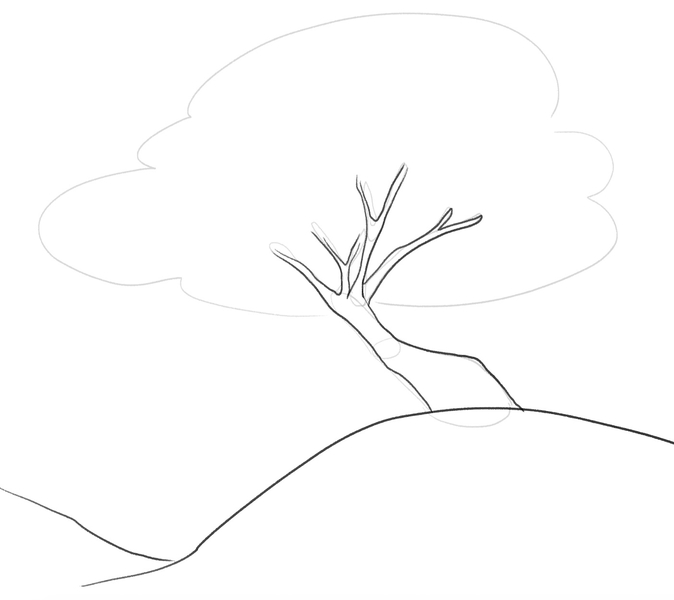
Now, we recommend switching to an HB pencil or simply applying more pressure to your pencil of choice to outline the tree.
Start from the trunk and the branches.
Right now, they don’t look like they’re connected, so let’s fix that first.
Go over the trunk, then move forward to outlining the branches to make your tree drawing cohesive:
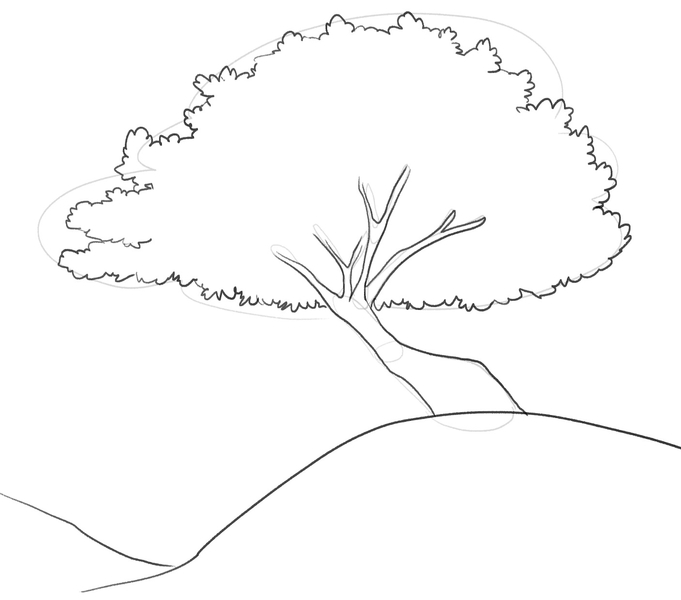
Next, go over the crown arches and make sure to use wavy lines to better depict the foliage:
Step 6. Add The Details
Recommended tool: HB pencil
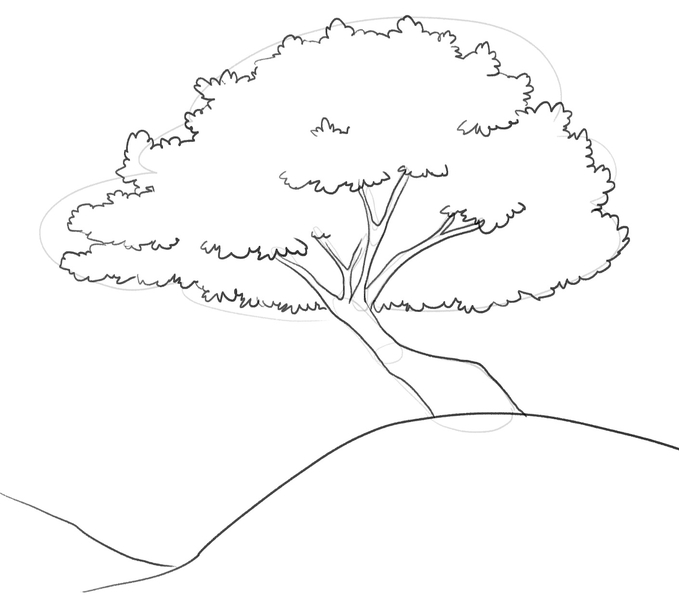
How about we add more foliage to the tree?
You don’t have to overdo it; instead, add wavy lines at the top of the branches and some in the upper part of the crown and on the sides. The tree immediately looks richer:
Now, let’s add some details to the tree trunk.
Trunks can have both smooth and rough outer bark (the outer layer of the trunk).
We opted for the latter just to make the drawing more interesting.
To add some texture to the bark, draw thin lines from the branches toward the ground. You can even have them intersect in the middle.
Oh, and you know how some birds, like woodpeckers and tawny owls, make their nests in tree trunks? Add a nest to your sketch by outlining a circle at the bend of the tree trunk, like so:
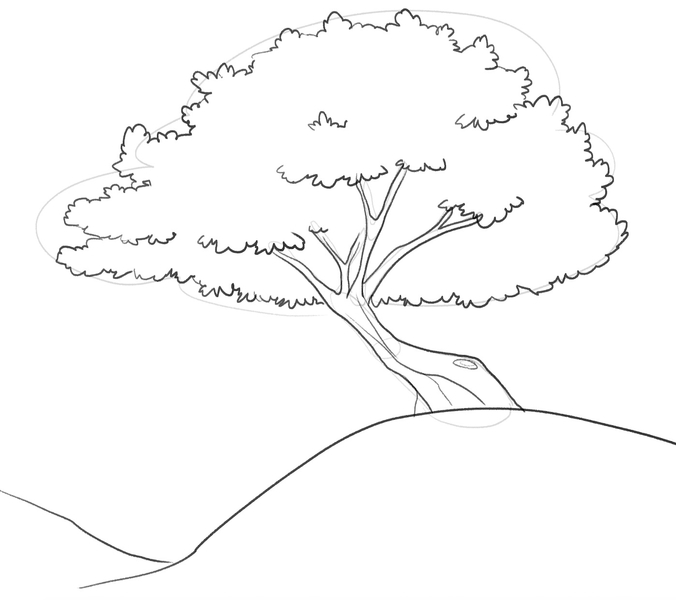
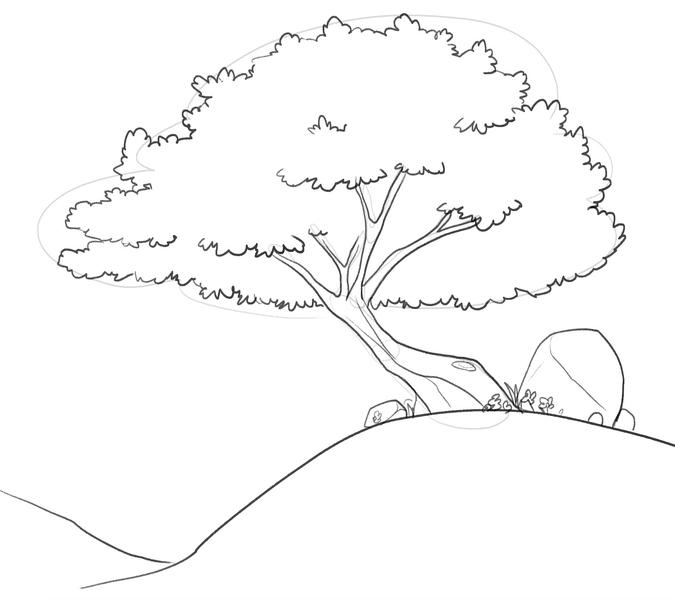
After you finish drawing details on the tree, it’s time to add more elements to the landscape.
The elements you’ll want to add will likely depend on the type of comic book you’d like to make, but we’re keeping it simple and sketching some stones and flowers since we’re still covering the basics of easy tree drawing:
Step 7. Erase Unneeded Lines
Recommended tool: kneaded eraser
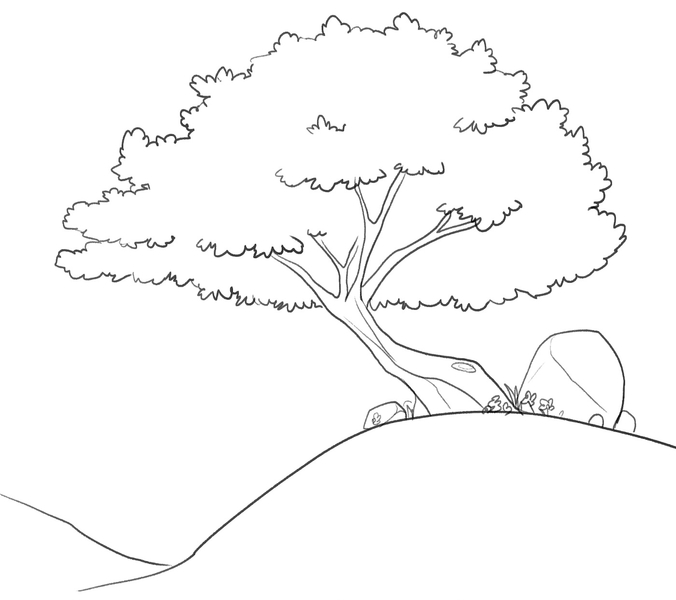
Here comes the part where you can finally remove the sketch lines on the inside of the tree that you no longer need.
Grab your eraser and work around your sketch, careful not to mess up the final outline:
Step 8. Shade Your Tree Drawing
Recommended tool: HB and B pencil
The last step to drawing a tree is to shade the sketch.
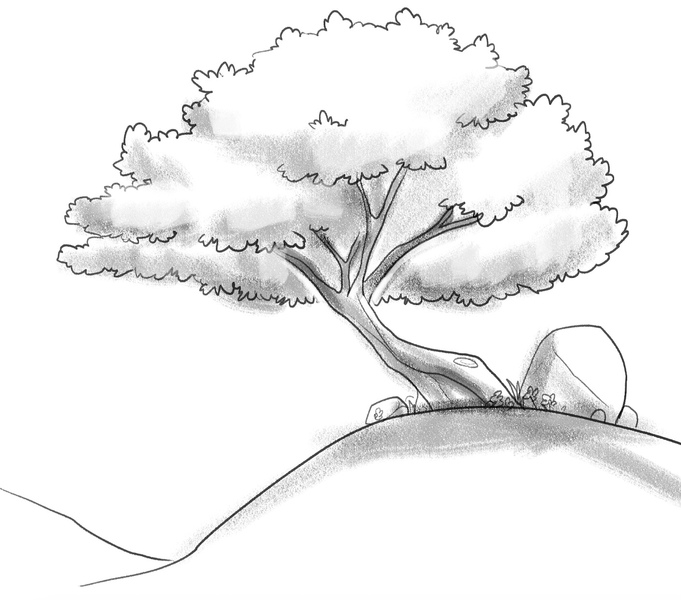
You can either combine the HB and B pencils, or you can stick to whatever lead you prefer to darken the tree trunk and the branches.
Add some shade around the wavy foliage on the tree crown and don’t forget to shade the ground under the tree and the stones.
The tree should cast a large shadow over everything that’s under its magnificent crown, like so:
Finished Your Tree Drawing? Try These Next!
Now that you slay at drawing trees, are you ready to practice drawing some more beautiful elements found in nature?
For starters, you can learn:
- How to draw a rose
- How to draw flowers
- How to draw a lotus flower
- How to draw strawberries
- How to draw a mushroom
We also have a bunch of guides on drawing animals:
We encourage you to explore BIOWARS’ vast collection of beginner-friendly tutorials and use them to improve your drawing skills!
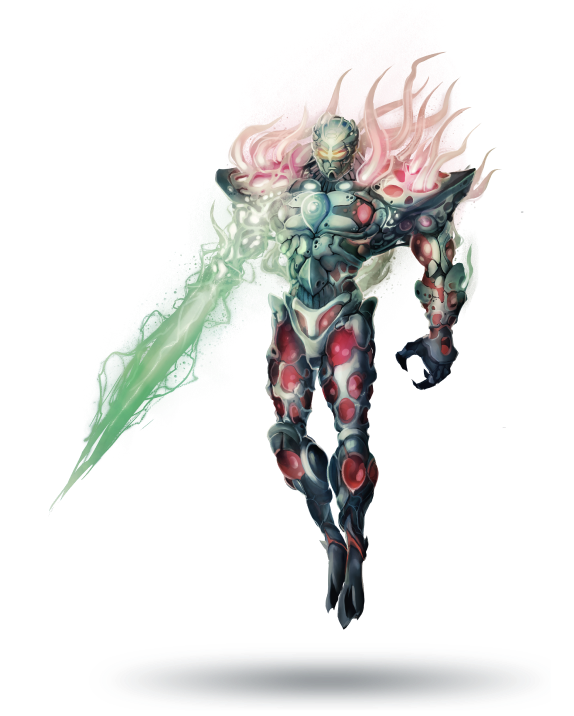
Meet The Artist
Goncalo Lopes is the guy behind all BIOWARS how-to-draw tutorials.
He’s also responsible for the design of BIOWARRIORS and the ever-invading pathogens.
Aside from working on BIWOARS, Goncalo has vast experience in different types of projects, including Transformers, GI-Joe, TMNT, Adventure Time, Godzilla and many others! Some list, right?!
A Recap On How To Draw A Tree
To draw a tree, all you need is:
- A pencil (or a few)
- A piece of paper
- An eraser
- Patience
- And an expert guide
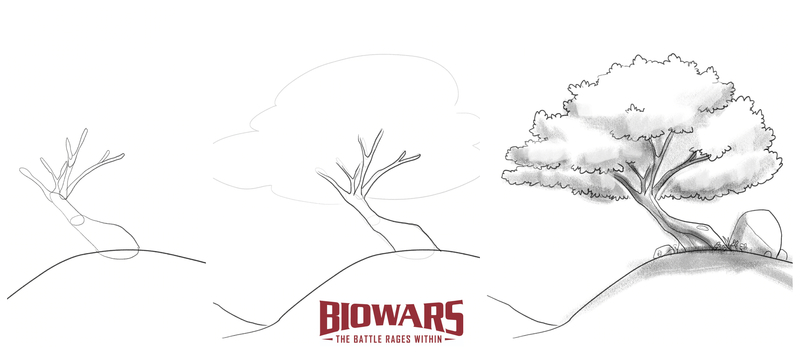
We got you covered on the last part; BIOWARS’ lead artist dissected the process of easy tree drawing into 8 steps, including:
- Sketching the tree trunk
- Drawing the tree branches
- Adding the tree crown
- Outlining all the elements
- Adding details to the drawing
- Enriching the landscape
- Removing unneeded elements
- Shading the tree drawing


