Related Resources
Did you know that tigers have a unique stripe pattern? Just like no one else in the world has the same fingerprints as you, no two tigers have the same stripes.
The distinctive appearance of these majestic felines complements their untamed power, making tigers some of the most beautiful and regal species in the animal kingdom.
Capturing a tiger’s grace on paper and adding a piece of wilderness to your sketch or a comic book can be challenging if you’re a beginner trying to master the art of tiger drawing on your own. That’s why this beginner-friendly guide is just what you need to learn how to easily draw a tiger in only five steps:
Let’s start!
Sketching Tools For Easy Tiger Drawing
The tools you can use for your tiger drawing include:
- An H pencil: Using an H pencil is a good choice when sketching because its hard lead allows for greater control. That way, you can create precise and fine lines and define the shapes of your tiger drawing. Plus, the harder the graphite the less smudging there is, and it’s best to keep your outlines as clean as possible.
- An HB pencil: HB pencils have moderate hardness, which makes them versatile. You can use an HB pencil to create both relatively light and dark lines. We recommend using an HB pencil to add details to your drawing and lightly shade your sketch.
- A 4B pencil: A 4B pencil can make darker and softer lines compared to H and HB pencils. 4B pencils are great for shading your tiger drawing and adding depth to it.
- A kneaded eraser: Kneaded erasers are easy to stretch and tweak, so you can change their shape and size, depending on what you want to erase.
- Lightly textured paper: This kind of paper has a smooth surface, which makes drawing more comfortable.
Don’t worry if you can’t get your hands on all of these tools — you can use whatever pencil and paper you have at home!
What matters the most is that you’re dedicated to learning how to draw a tiger and that you keep on practicing!

How To Draw A Tiger In 5 Steps
The best way to learn how to draw a tiger is to break down the drawing process into smaller steps.
We’ll show you how to complete your drawing in just five steps.
1. Draw The Base
Recommended tool: H pencil
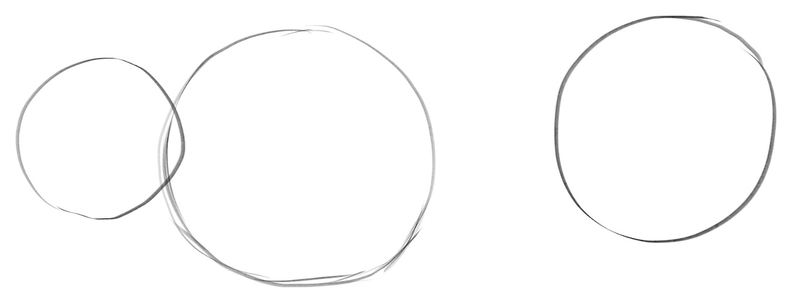
To create the outline of the tiger’s body, we’ll use circles!
Don’t worry — they don’t have to look perfect; ours don’t either.
Simply add three circles. The first one should be the smallest since that’s where the tiger’s head will be; the middle circle is the largest of the three — it’s for the chest and it needs to be attached to the head. As for the third circle, you should position it a bit further to the right and separate it from the two front circles, like so:
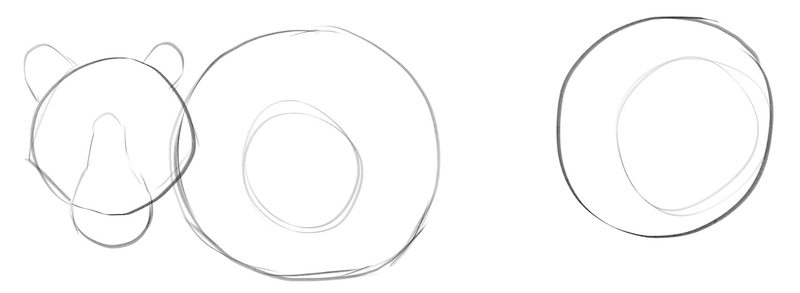
Next, we can start adding some simple details to the sketch.
Let’s start at the head.
Draw two small, rounded shapes at the top of the circle to position the tiger’s ears.
Then, draw a pear shape starting just above the center of the head and have it end below the tiger’s chin.
After that, draw round shapes within the remaining two circles, like this:
2. Draw The Legs
Recommended tool: H pencil
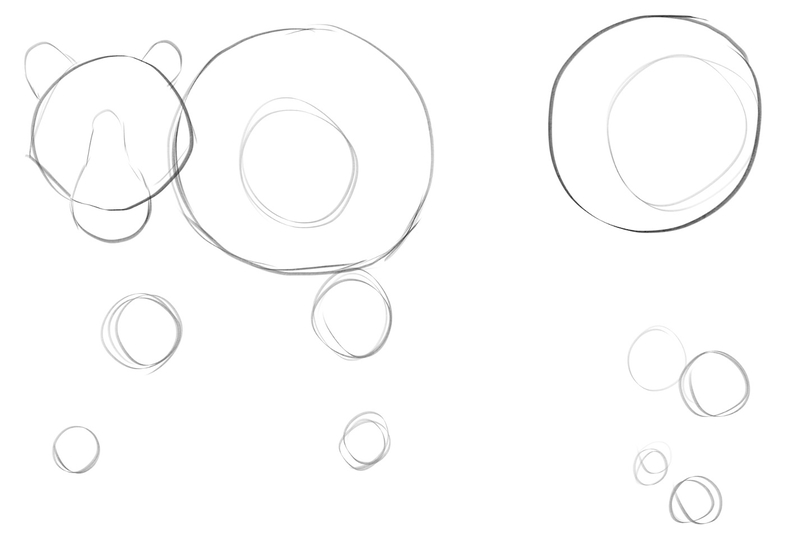
Once you draw the base for the tiger sketch, the next step is to add the legs.
We’ll use circles again for the base, and later connect them to form the legs.
At this point, we’ll sketch two circles for each leg, like this:
3. Create The Outline Of The Tiger’s Body
Recommended tool: H pencil
Next up, it’s time to connect the guidelines into a cohesive whole.
When drawing the legs, make sure to add the paws.
As for the tiger’s back, don’t use a straight line. First, connect the head with the middle circle using an angled line and extend it to the belly. Then, connect the circle in the middle with the one in the back, like this:
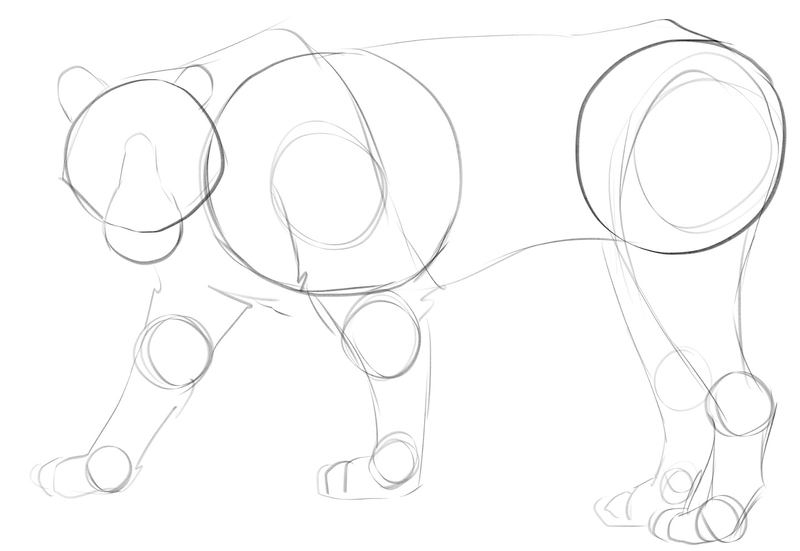
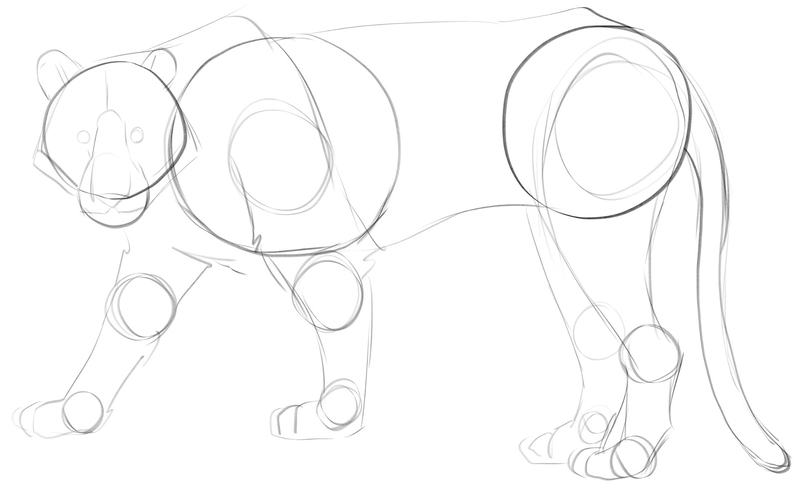
Next up, draw the tail from the circle in the back all the way to the paws.
Then, let’s work on the tiger’s head.
Draw the eyes and connect the nose with the top of the head.
After that, slightly extend the sides of the circle using short, straight lines and connect them with the bottom of the mouth, like so:
4. Enhance The Lines
Recommended tools: HB pencil, kneaded eraser
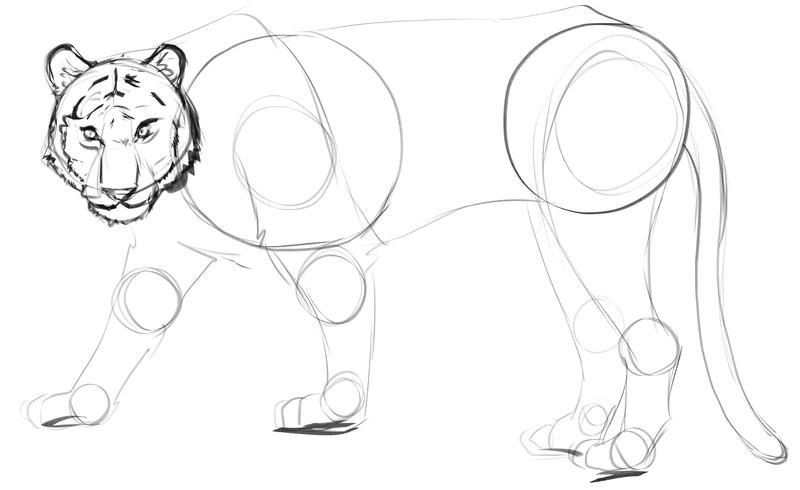
Once the rough tiger sketch is ready, it’s time to enhance the lines and make them darker.
We’ll use the HB pencil because its lead is darker compared to the H pencil.
Let’s start at the head.
At this point, you can relax your arm a bit — you don’t need to follow the guidelines exactly. Tigers have fur, so you can use zig-zag lines as you go over the jaw and the rest of the head.
Then, enhance the lines below the paws:
Next, go over the rest of the body, but make sure not to darken the guidelines since we’ll erase them soon:
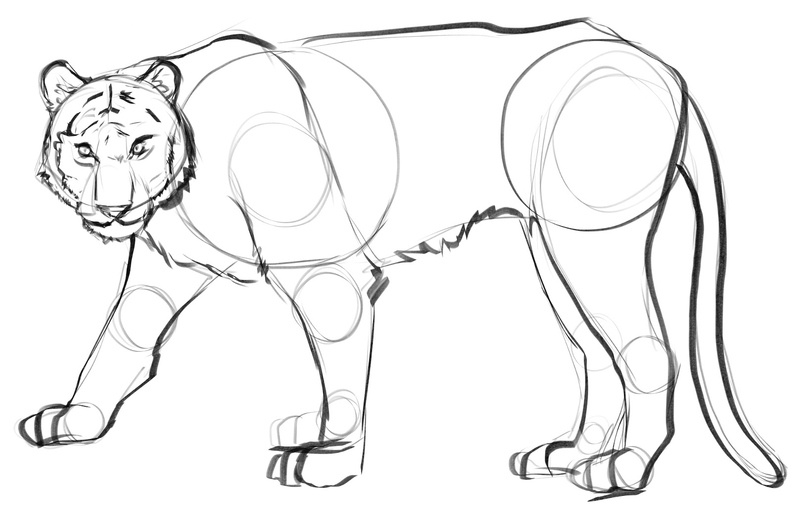
Before we add more details to the tiger drawing, let’s grab an eraser to remove the lines we no longer need.
Then, we can start adding the recognizable stripes of varying sizes all over the tiger’s body and add even more details to the head, including the whiskers, like this:
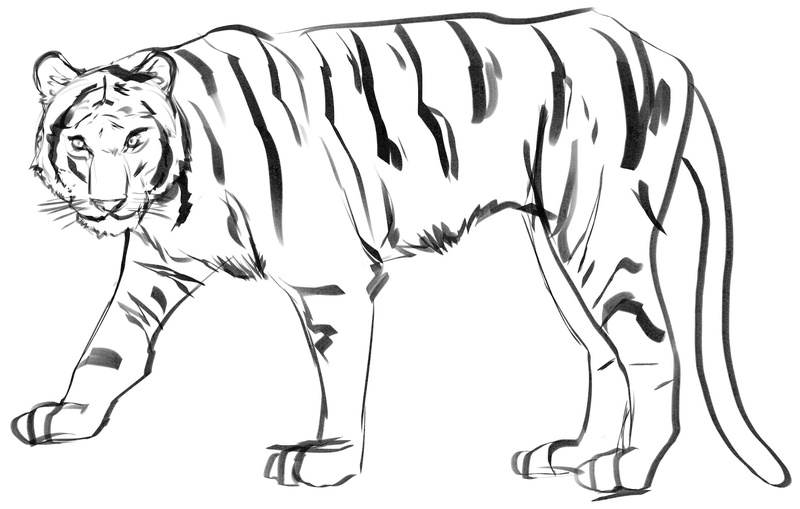
5. Shade Your Tiger Drawing
Recommended tools: HB pencil, 4B pencil, kneaded eraser
The final step to drawing a tiger is to shade the sketch to add depth and life to it.
We recommend combining an HB and a 4B pencil to create grey tones of different intensities.
Alternatively, you can simply apply more pressure to your pencil of choice to create darker greys.
Now, the tiger’s stripes need to be the darkest element on its body, so make sure they remain well visible.
You can then color the space between and around the stripes in a light shade of grey and add darker hues along the tiger’s belly, along its jaw and on its right legs, since these parts aren’t bathed in light.
To brighten parts of the tiger’s body that are exposed to the light, use your eraser:
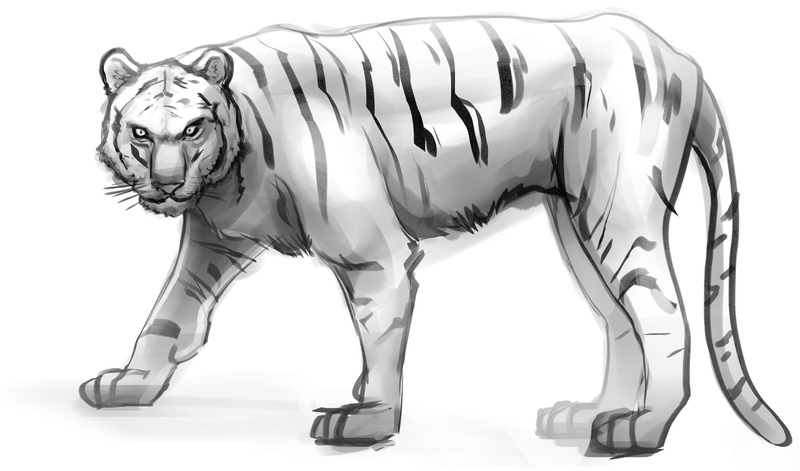
And that’s it!
Your tiger drawing is done in just five steps!
Finished Your Tiger Drawing? Try These Next!
Once you master the art of drawing a tiger, don’t stop here!
Keep your artistic journey alive and dive into the world of endless possibilities with our art tutorials.
You’re just one tutorial away from your next masterpiece — so keep exploring!
If you’d like to keep practicing how to draw animals, explore these guides:
- How to draw a deer
- How to draw a fish
- How to draw a horse
- How to draw a cat
- How to draw a dog
- How to draw a penguin
- How to draw a bat
- How to draw a wolf
We also have guides on easy landscape drawing, including:
And if you’re interested in learning how to draw people, check out these step-by-step tutorials:
- How to draw a mouth
- How to draw hands
- How to draw ears
- How to draw a face
- How to draw eyes
- How to draw a person
- How to draw a nose
We also encourage you to check out our YouTube channel and watch the beginner-friendly video guides created by our lead BIOWARS artist.

Meet The Artist
BIOWARS simple art guides are created by Goncalo Lopes — a professional artist who has worked on comics, games, TV series and films.
Some projects that he’s worked on include Transformers, GI-Joe, TMNT, Adventure Time, Godzilla and many others.
A Recap On How To Draw A Tiger
Learning how to draw a tiger isn’t about perfection.
Instead, it’s about expressing your creativity, practicing and refining your artistic skills.
Start slow and use geometric shapes to outline the tiger.
Then, connect the guidelines and start adding details to your tiger sketch.
Lastly, shade it to bring it to life and enjoy your masterpiece!

![Finished tiger drawing. Image used in the “Tiger Drawing In 5 Easy Steps [Video + Images]” blog post.](https://www.biowars.com/wp-content/uploads/2023/11/tiger-drawing-hero-image.jpg)


