Related Resources
For a snowflake to form, a super cold water droplet needs to fall on a dust particle or pollen in the sky.
And for you to capture this nature’s frozen masterpiece on paper, you just need a simple step-by-step guide to take you through the process of snowflake drawing.
That’s where we step into the picture!
We prepared a beginner-friendly guide on how to draw a snowflake for artists of all levels:
And if illustrations work better for you — keep reading to discover a set of images for every step!
The Tools You’ll Need For An Easy Snowflake Drawing
Although any pencil and paper will do, there are some tools that could make your snowflake drawing easier, including:
- An H pencil: When creating a rough snowflake sketch, it’s best to use pencils with hard, light leads, such as H pencils. The trace this lead leaves on paper is thin, allowing you to be precise while outlining. Plus, it’s easier to erase light strokes and build on them at later drawing stages.
- An HB pencil: The lead on these pencils is neither too dark nor too light. They’re great when enhancing the lines of your snowflake sketch, adding details and softly shading.
- A kneaded eraser: We recommend adding a kneaded eraser to your art supplies because you can easily change its shape to erase guidelines or mistakes. You can also use these erasers to highlight parts of your sketch.
- Lightly textured sketch paper: Lightly textured paper is always a good choice because your strokes will easily seamlessly over it and erasing mistakes is easier.
Regardless of the pencil and paper you decide to use, what matters the most is that you want to learn how to draw a snowflake and that you’re willing to practice!
How To Draw A Snowflake In 5 Steps
We’ll break the tutorial on how to draw a snowflake into five easy-to-follow steps.
Let’s begin.
1. Draw The Guidelines
Recommended tool: H pencil
Snowflakes are hexagonal.
This means that, despite each one being unique, they all have six sides or points.
We’ll use this info as the basis for our snowflake drawing.
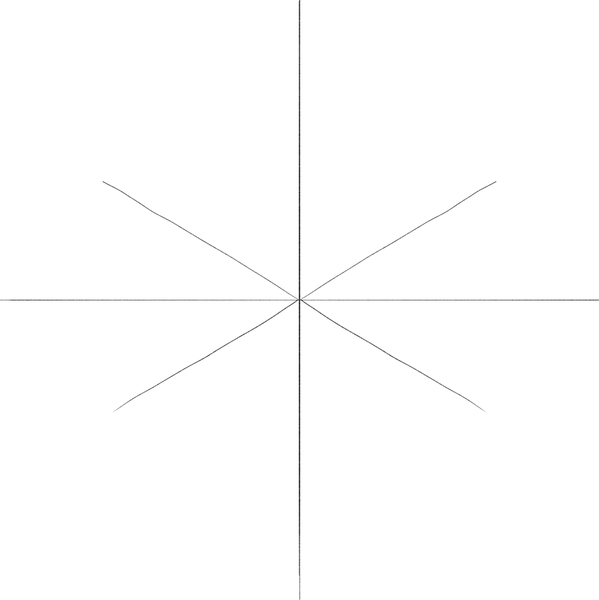
First, let’s draw four straight lines.
The horizontal and vertical lines need to be equal in size, and so do the diagonal lines:
2. Draw A Star
Recommended tool: H pencil
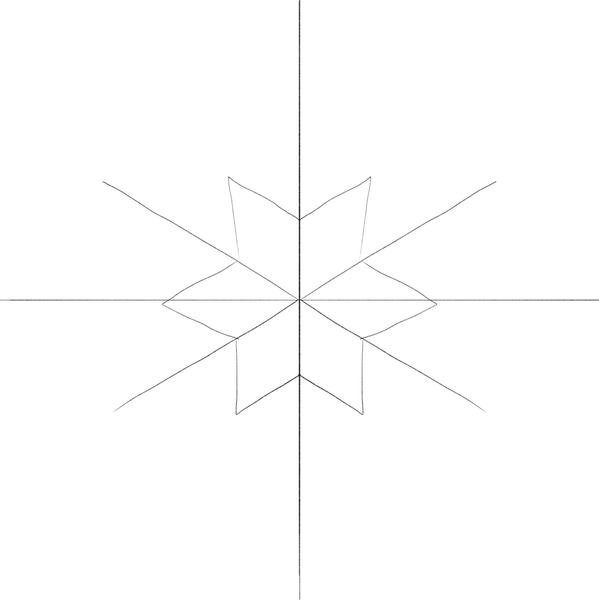
Next, let’s draw a star at the center of the center of the snowflake.
Since a snowflake has six points, the star will also have just as many.
To draw a star, sketch one of its points in the sections between the vertical line and diagonal lines.
Then, make the lines between the diagonal lines and the horizontal line meet exactly on the horizontal line, like so:
3. Draw Snowflake Ornaments
Recommended tool: H pencil
Once the base for the snowflake is ready, you can get creative and adorn it with whatever shapes you like.
But don’t forget that the ornaments need to be symmetrical and all sides should be ornated in the same way.
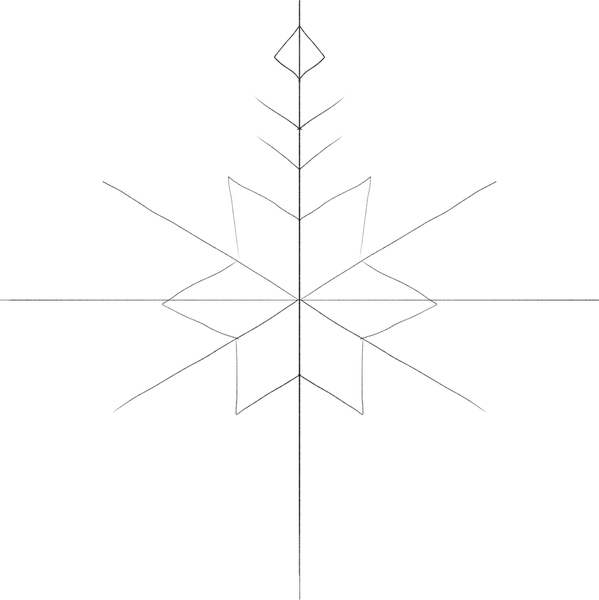
Let’s start at the top of the large, vertical line.
Remember, we’re still outlining so the final ornaments will look different than how they appear in this stage.
For starters, let’s add triangles to either side of the vertical line — close to the top.
Then, let’s sketch two short, diagonal lines between the triangles and the star. Make sure that the lines are evenly spaced out, like this:
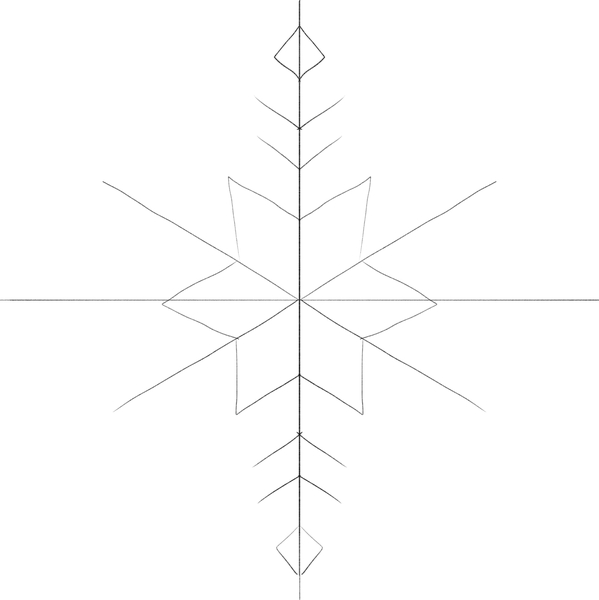
Next, repeat the process at the lower part of the vertical line, like this:
Now, draw the same shapes on the diagonal lines above the central horizontal line:
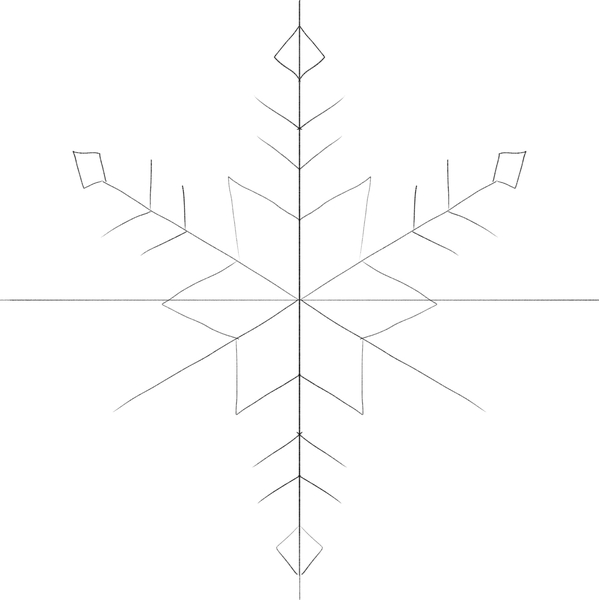
Do the same on the lower diagonal lines, like this:
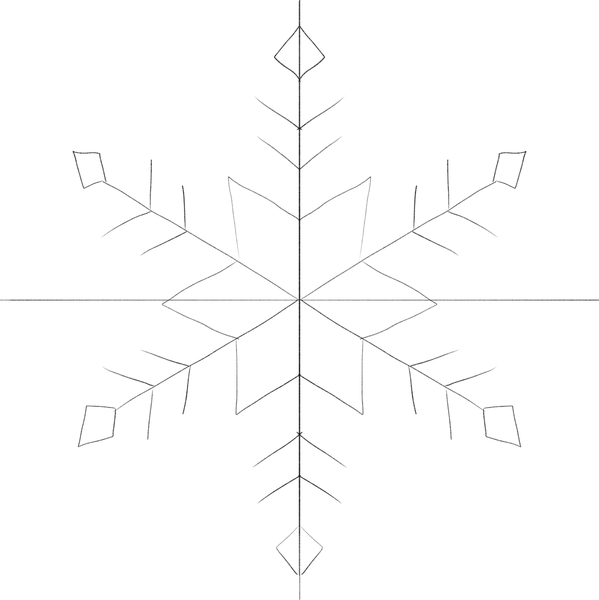
At this point, the outline of your snowflake is ready.
4. Outline The Snowflake
Recommended tool: HB pencil
Once you finish creating an outline for the snowflake, next up is to enhance the lines.
To do that, we recommend using an HB pencil because it has a slightly darker lead than an H pencil. If you don’t have an HB pencil, you can apply more pressure to your pencil of choice to create darker lines.
When enhancing the lines, it’s all about connecting the guidelines you drew earlier — the tips of the lines, to be more precise.
Check out the sketch below for a guideline on how to start:
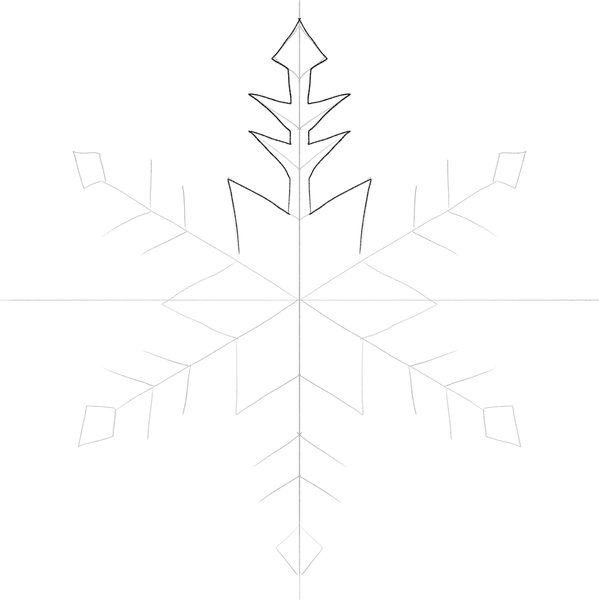
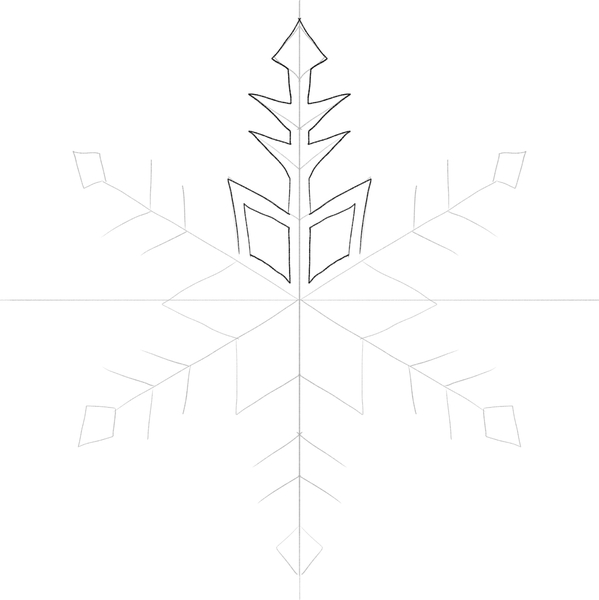
Now, let’s focus on the top two points of the star.
Inside each section, draw a rhomboid shape.
Just make sure that the rhomboids are equally distanced from the sides of the star, like so:
Now, let’s outline the ornaments around the bottom part of the vertical line.
Again, start by connecting the tips of the guidelines, like this:
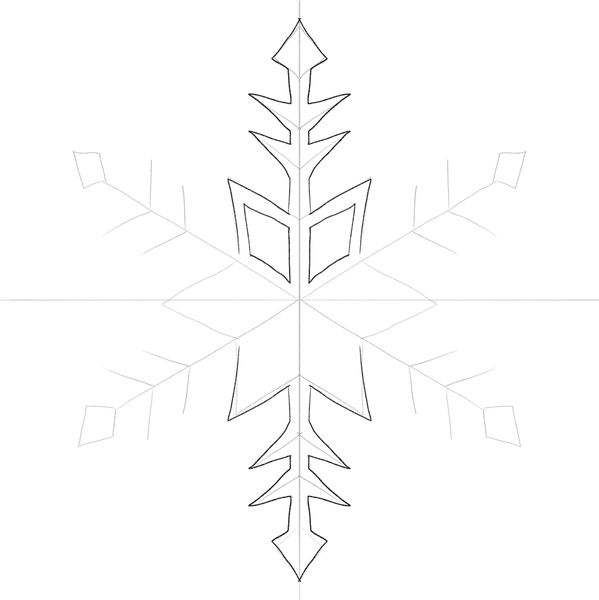
The next step is to draw the rhomboids inside the bottom sections of the snowflake star:
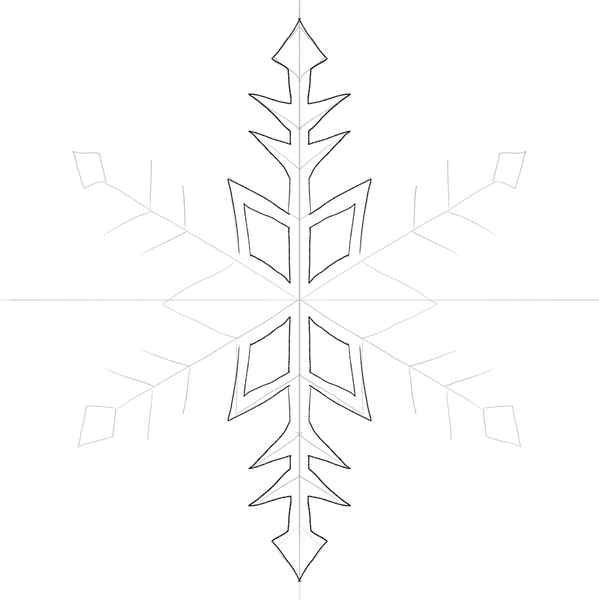
You know the drill by now.
Repeat the steps on the diagonal lines of the snowflake so that your sketch looks like this:
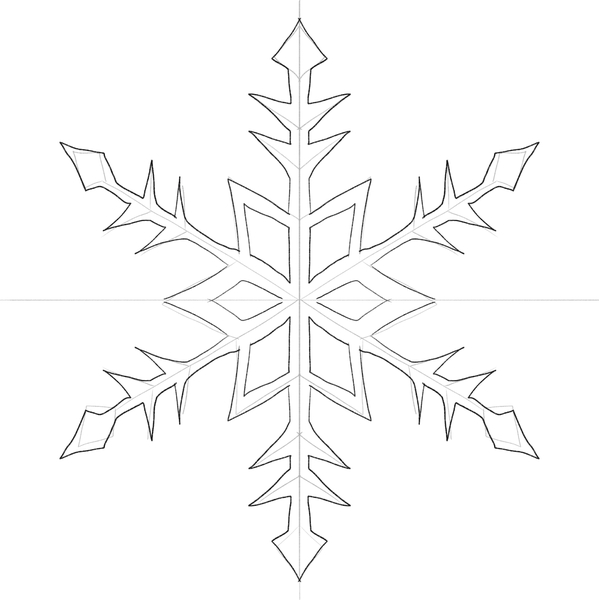
And that’s it — the outline for your snowflake is ready!
5. Finalize Your Snowflake Drawing
Recommended tools: H pencil, HB pencil, kneaded eraser
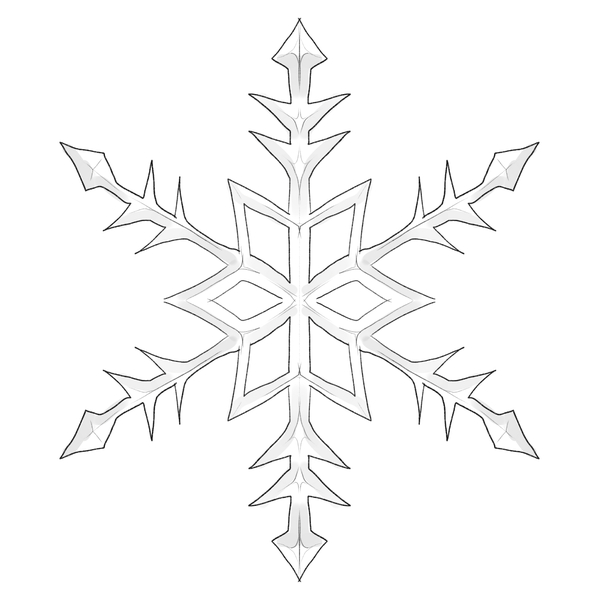
The final stage of drawing a snowflake is shading the outline.
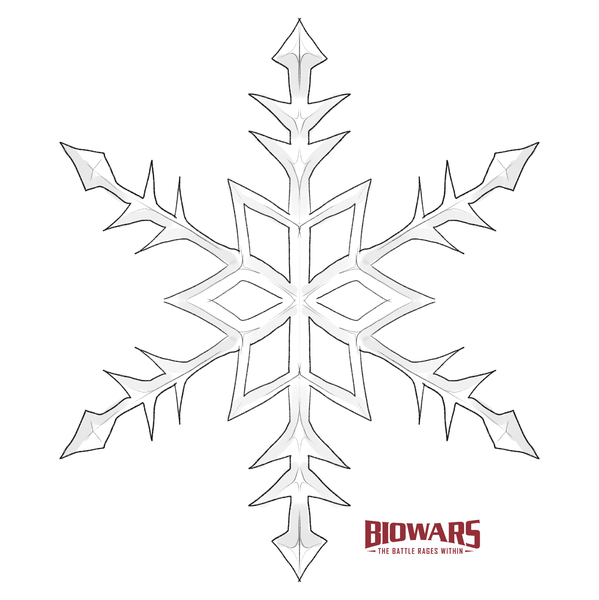
We want the snowflake to look like it’s 3D, so we’ll add more guidelines and slightly enrich the existing ones, like so:
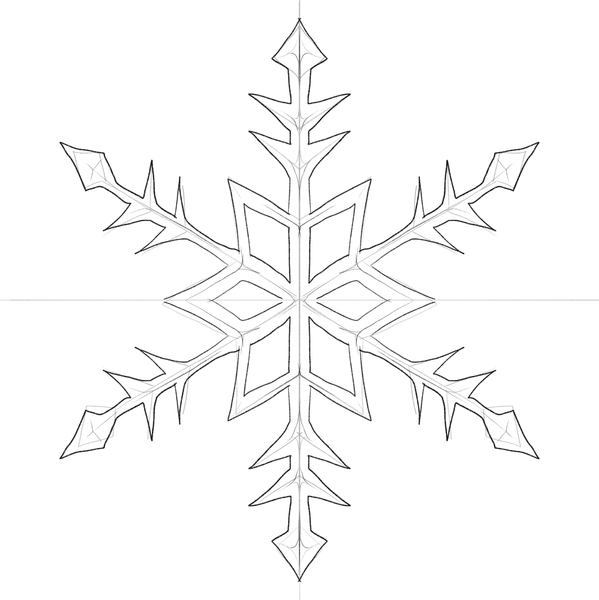
Grab your eraser now and carefully remove parts of the guidelines that you no longer need, like this:
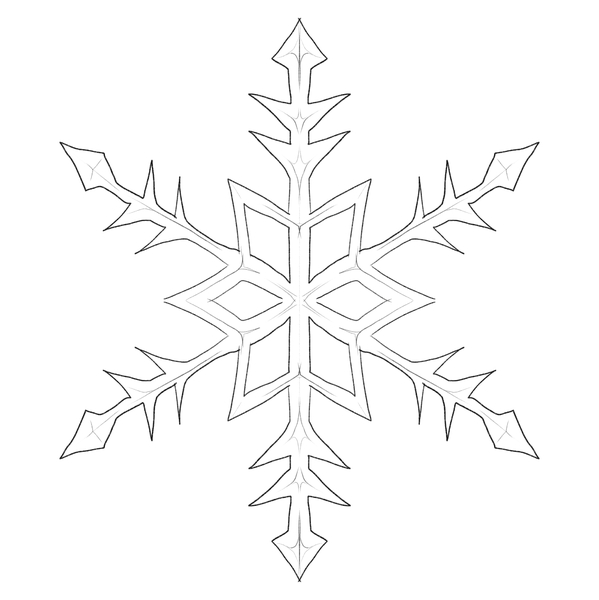
Using your HB pencil (or applying more pressure to your preferred pencil), shade the outer parts of the snowflake in grey hues:
Finished Your Snowflake Drawing? Try These Next!
How fun was drawing a snowflake?!
We invite you to continue creating your own winter wonderland — we’ll help you!
We’ve prepared guides on:
You can also explore our tutorials on:
And if you’d like to learn how to draw humans, we got that covered too:
- How to draw a person
- How to draw a face
- How to draw eyes
- How to draw hands
- How to draw a nose
- How to draw a mouth
Meet The Artist
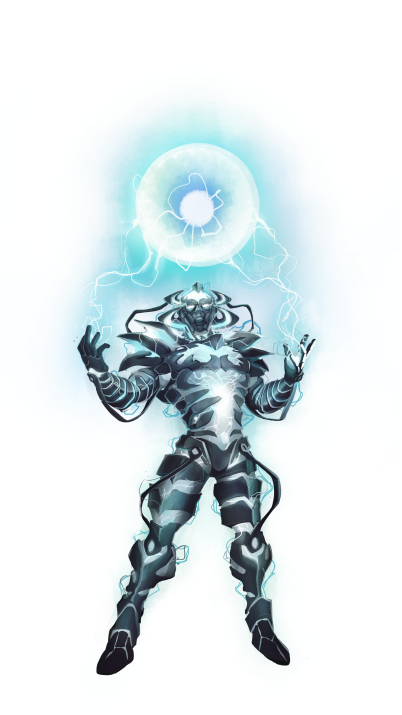
This guide on snowflake drawing was created by Goncalo Lopes — the lead BIOWARS artist stemming from Portugal.
Goncalo doesn’t have formal art training, but his passion for drawing and dedication to the craft led him to become a highly skilled and versatile artist.
He makes comic books and video games, does animation, and works on TV shows and films.
Some of the projects he has worked on include Transformers, GI-Joe, TMNT, Adventure Time, Godzilla and many others.
We hope that Goncalo’s story inspires you to continue practicing and perfecting your drawing skills.
As you can see, even if you’re not a trained artist, you can achieve *a lot* with hard work and dedication!
A Recap On How To Draw A Snowflake
When you’re learning to draw a snowflake (or pretty much anything else), the most important thing to do is to take it slow and sketch one element at a time:
- Start by drawing one large horizontal line, then draw a large vertical line through the middle. The two lines need to be the same size. Then, add two shorter diagonal lines that also pass through the center (where the horizontal and vertical lines meet). Make sure that the diagonal lines are the same size.
- Once the lines are in place, you can start adding ornaments to the sketch. But don’t rush it.
- Use triangles and short lines to first create the guidelines for the ornaments.
- Next, connect the lines to form interesting shapes that will enhance the look of the snowflake.
- And lastly, shade your snowflake to add more dimension to it and make it seem like it’s 3D.
Remember, whether you’re a seasoned artist or just starting to learn how to draw, the magic of it all lies in the process.
Keep exploring art and never stop sketching.
The more you draw, the better artist you’ll become.
And don’t sweat it if you don’t have prior formal art training and you want to become an artist.
Even the lead BIOWARS artist is self-taught and he has achieved some pretty big things in his career.
So, keep drawing and keep honing your skills!

