Related Resources
Some scientists believe that sharks have been around for over 450 million years.
These beautiful albeit sometimes dangerous animals have always embodied both power and mystery.
Their bodies are sleek and their presence commanding, and that’s the reason many beginners struggle to bring this awe-inspiring predator to life on paper.
In this blog, we’ll share the art of shark drawing step-by-step:
So, grab your pencils and let’s make a fin-tastic masterpiece together! (Keep reading, our tutorials are better than our jokes!)
The Tools You Need For Shark Drawing
To make shark drawing easier, you can try out these tools:
- An H pencil: A hard lead allows you to create light and fine lines, and that’s perfect for the outlining stage. These pencils allow for precise and controlled outlining, enabling you to easily and accurately define shapes.
- An HB pencil: HB pencils have a graphite core that strikes a balance between hardness and darkness. This means that the lines they produce are not too light or too dark, and as such, they’re ideal for adding details and softly shading your shark drawing.
- A 4B pencil: 4B pencils have a softer graphite core compared to HB pencils. The softness allows for smoother and darker shading, adding rich and deep tones to the artwork.
- A blending stump: Blending stumps are excellent for smoothing out harsh lines and easing transitions between different shades or colors. By gently rubbing the stump across the paper, you can achieve a seamless blend and create smooth gradients and soft transitions.
- A kneaded eraser: Unlike traditional erasers, kneaded erasers are pliable and can be molded into different shapes and sizes. This allows you to precisely erase small details or even add highlights to your sketch by removing a bit of pigment with the eraser.
You can grab all of the tools above, or simply use your favorite pencil and eraser and start drawing a shark!
How To Draw A Shark In 4 Steps
The easiest way to draw a shark is to sketch its body one part at a time.
We know that learning how to draw a shark’s head is one of the most challenging steps for most beginners, but don’t worry — we’ll show you a simple way to nail your shark drawing!
Let’s start with some basics.
Step 1. Draw The Base
Recommended tool: H pencil
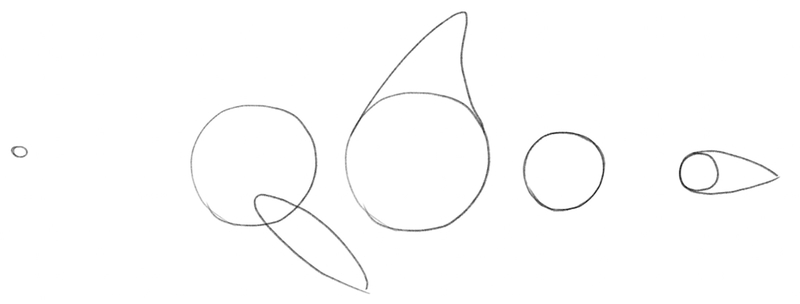
To create the base of the shark’s body, let’s draw three circles — one for the head, another for the belly, chest and back and one more in the back for the fins.
The circle in the middle should be the largest of the three because that’s the widest part of the shark’s body.
Don’t sweat it if your circles aren’t perfect — ours aren’t either. At this point, we’re creating guidelines that you’ll erase in the final stages of shark drawing:

Next, let’s continue adding circles to define the size of the shark’s body.
First, add a tiny circle up front — that’s where the shark’s nose will be.
Then, add one more circle at the back — we’ll add the caudal fin there later.
At this point, we know long the shark’s body will be. Now, it’s time to add some fins to the sketch.
For starters, let’s draw dorsal and pectoral fins.
The dorsal fin is attached to the shark’s back and the pectoral to its chest.
For the pectoral fin, sketch an elongated oval shape and angle it to the right.
Then, extend the circle we drew earlier for the caudal fin by adding a “V” shape to it.
As for the dorsal fin, you can draw a triangle-like form, but make sure its vertex isn’t too sharp. The right side should also be slightly bent inward, like so:
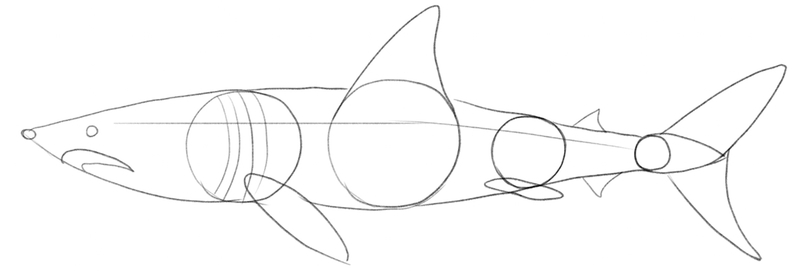
At this point, all the basic shapes are there, so let’s connect them to form an outline of the shark’s body.
Start at the nose and point a thin line over the top of each circle until you reach the caudal fin.
Do the same on the bottom side of the shark.
Your sketch should look like this:

Step 2. Add The Details
Recommended tool: H pencil
To finalize the outline, let’s add some details to the sketch.
For starters, draw a small circle just behind the nose — that’s where the shark’s eye will be.
For the mouth, draw a sickle shape below the eye.
Then, sketch a lateral line from behind the eye toward the caudal fin.
Let’s also add several gill slits, which allow sharks to take in oxygen and release carbon dioxide.
All that’s left to add at this point are the pelvic fin at the bottom of the shark’s body, and the second dorsal and anal fins in the back, like this:
Step 3. Finalize The Outline
Recommended tool: HB pencil, kneaded eraser
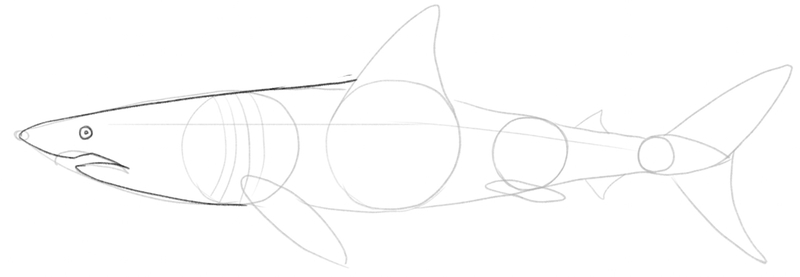
Once your rough shark sketch is ready, it’s time to enhance the lines and finalize the outline.
For this reason, we recommend grabbing an HB pencil, because of its slightly darker lead. (You can also use the same pencil as earlier and apply more pressure to it to create darker lines.)
Let’s start at the head.
You’ll want to follow the lines you drew earlier, but also add some details to enrich your drawing.
First up, let’s add a pupil inside the shark’s eye.
Then, as you get to its mouth, follow the sickle shape but don’t connect the lines at the bottom — we want to draw a shark with its mouth open, like this:
Continue enhancing the lines toward the back of the shark’s body.
Pay attention around the caudal fin — make sure its top is slightly indented, like this:
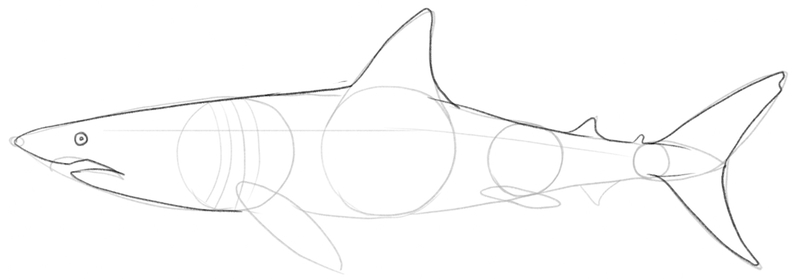
At this point, you can start erasing the guidelines.
When you remove them, add some final touches to your shark drawing, such as a nostril and lots of tiny, sharp teeth.
Add a few horizontal lines along the shark’s body, to give it more dimension:
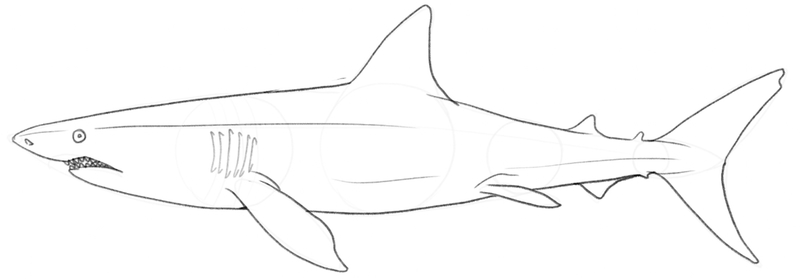
Step 4. Shade Your Drawing
Recommended tools: HB and 4B pencils, kneaded eraser, blending stump
To give volume to the sketch and make the shark appear more lifelike, we’ll shade the shark by using variations of light and dark hues.
Let’s start with an HB pencil since we want to first softly shade the artwork.
Apply some light pressure to your pencil and add short, angled straight lines along the shark’s head, belly, chest and on the right side of each fin.
Then, encircle the eyeball by adding a shape reminiscent of a human eye, like this:
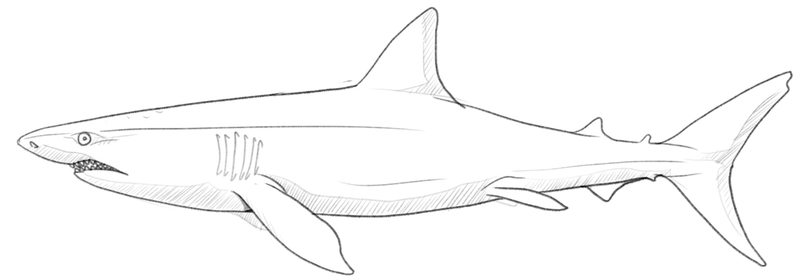
Now, the parts that you’ve softly shaded in the previous step are going to become the darkest areas of the shark’s body.
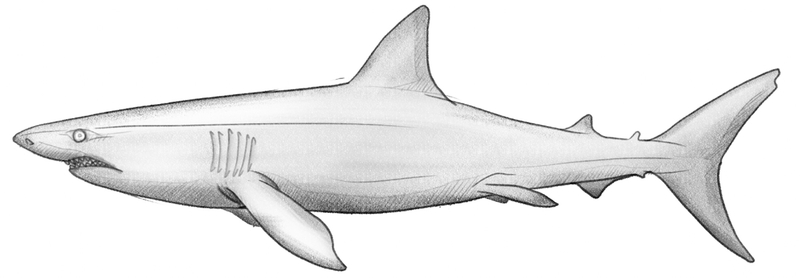
Grab a 4B pencil (or apply more pressure to your pencil of choice) and darken these parts.
Then, switch to an HB pencil to color the rest of the shark in lighter grey tones.
To soften the transitions between different shades of grey, we recommend using a blending stump.
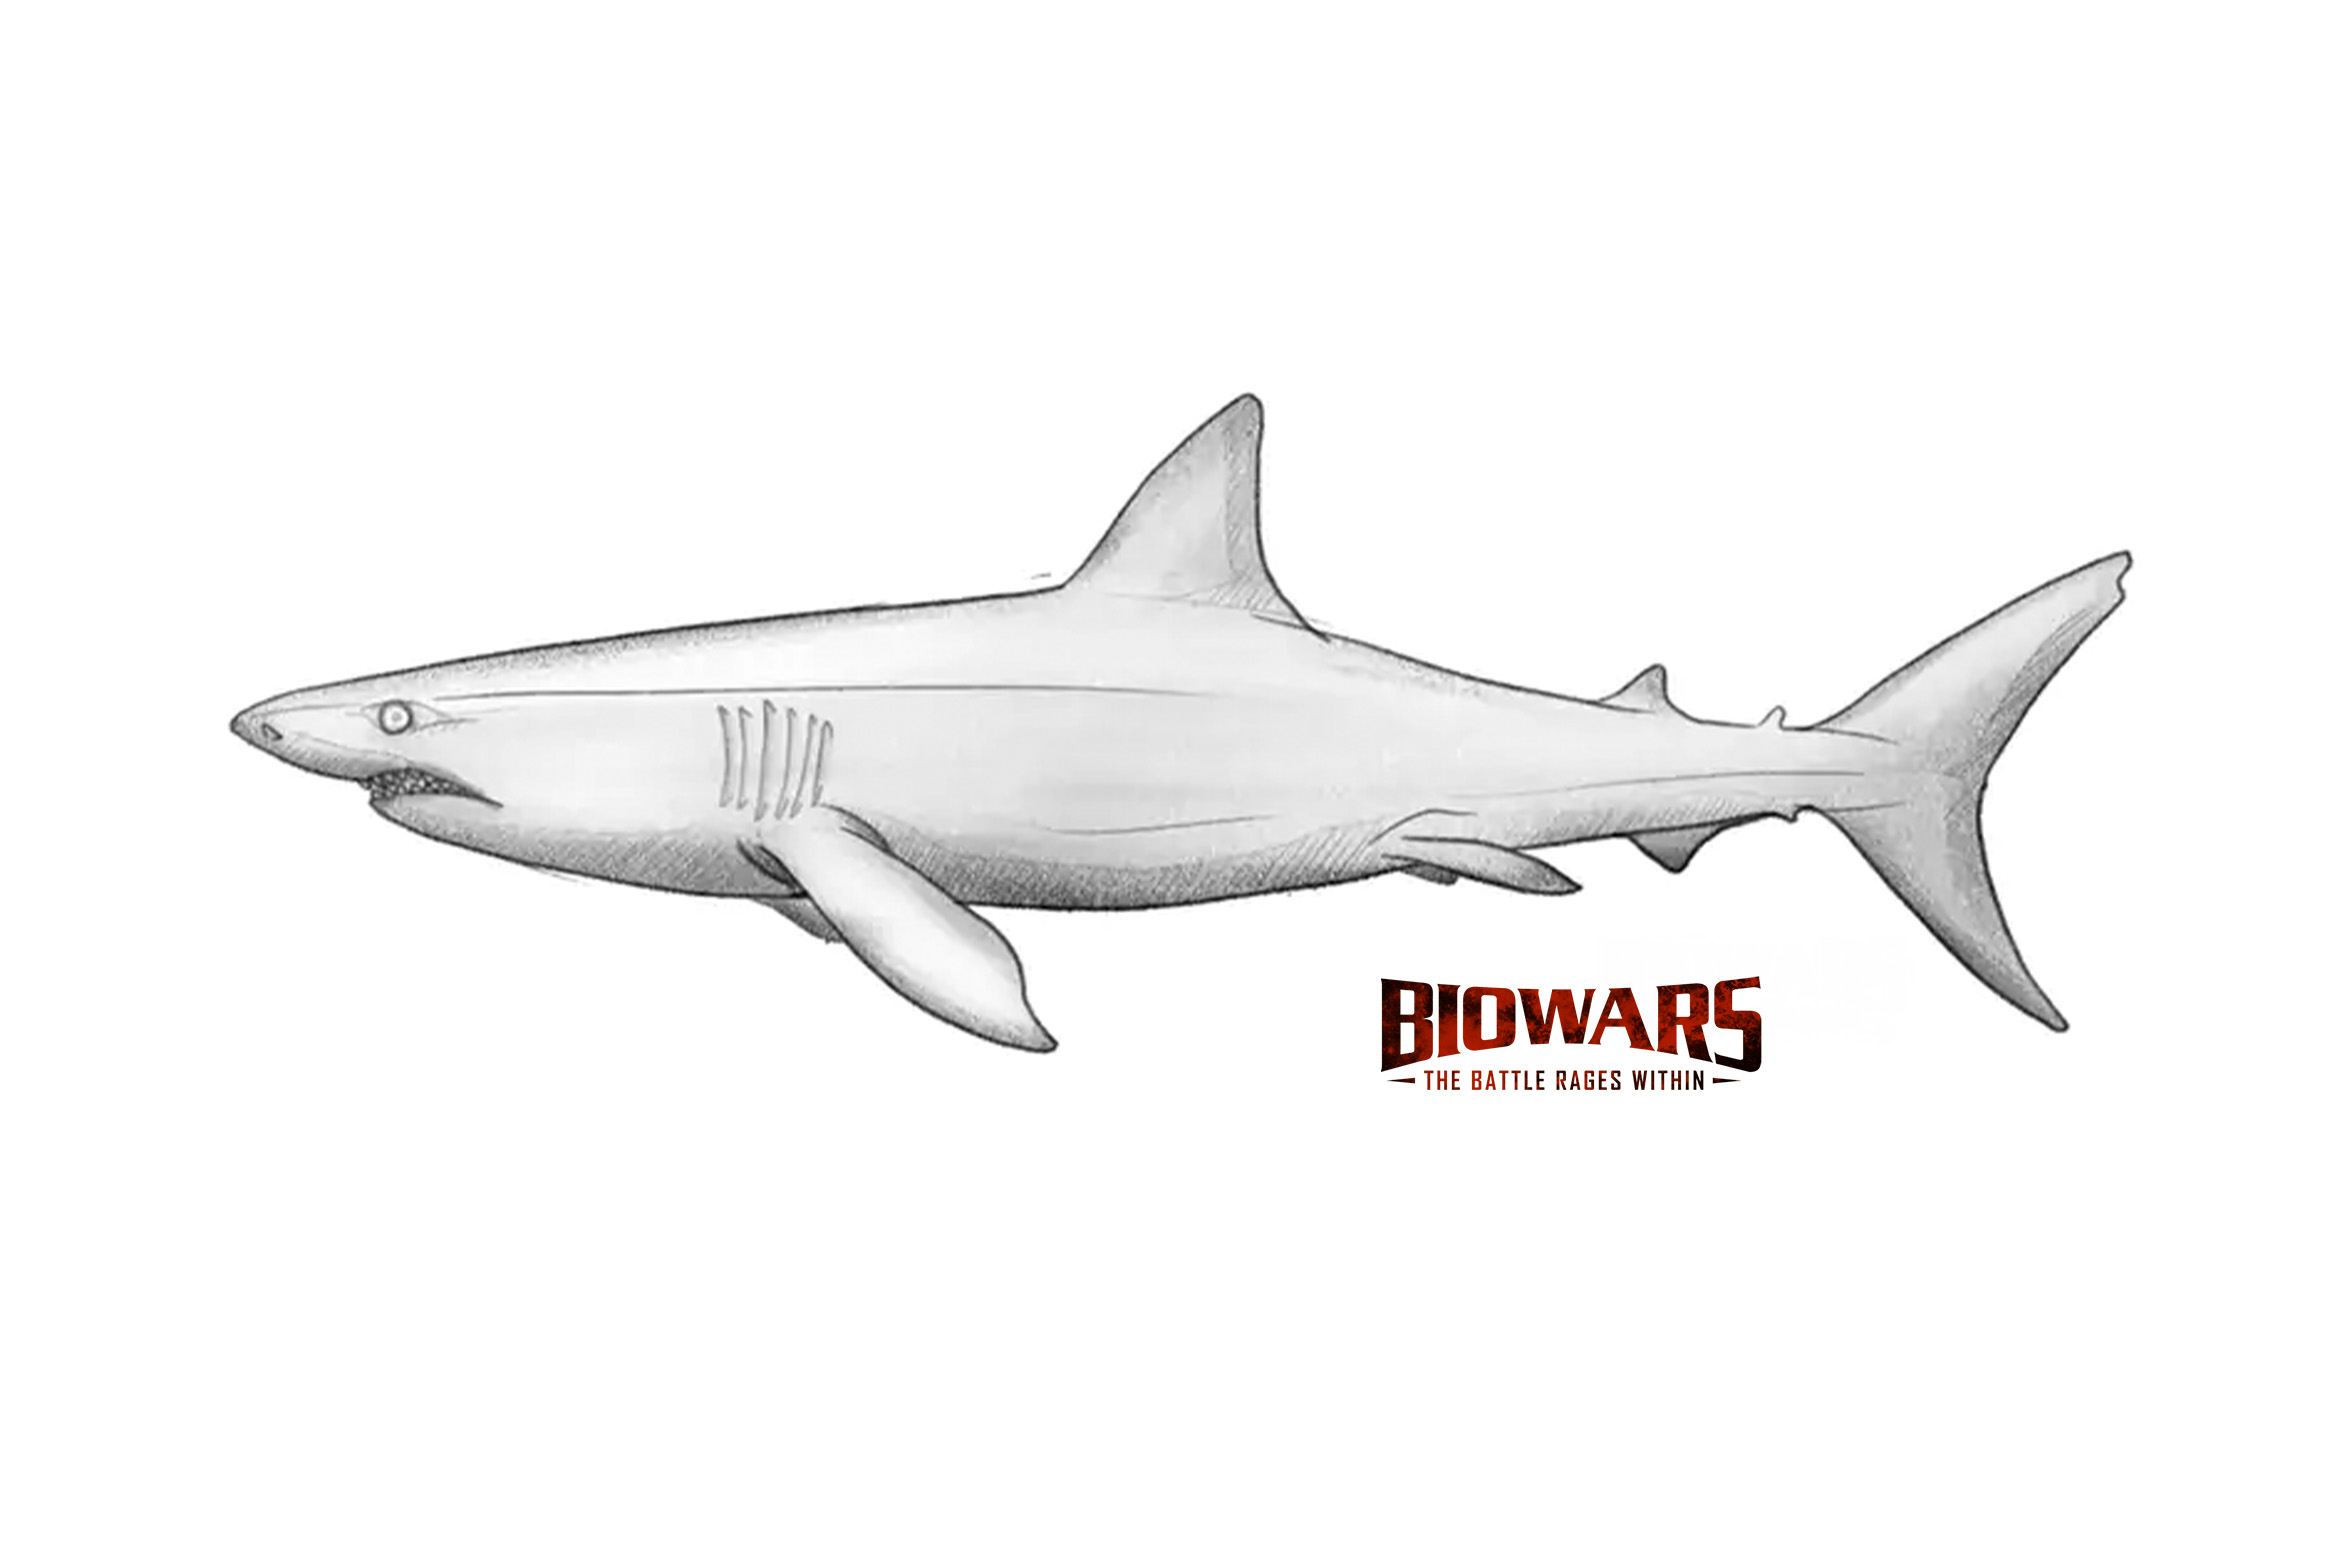
You can also use your eraser to highlight the parts of the shark that you imagine are bathed a bit with the sun; in our case, we highlighted the top part of the shark, right behind its eye and its pectoral fin:
Finished Your Shark Drawing? Try These Next!
Once you finish learning how to draw a shark, head over to one of our other drawing guides and keep sketching!
To become a good artist, it’s important to practice drawing on the regular, which is why we invite you to explore more of our beginner-friendly tutorials.
We have everything covered — from drawing animals and landscapes to sketching humans and body parts.
Some of the guides you’ll find on our site include:
- How to draw a dog
- How to draw a cat
- How to draw a horse
- How to draw a fox
- How to draw a cow
- How to draw an elephant
- How to draw a deer
- How to draw a dragon
- How to draw a rose
- How to draw a forest
- How to draw a face
Meet The Artist
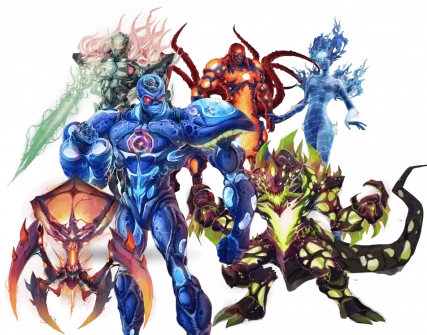
The artist behind the video and images on how to draw a shark is Goncalo Lopes, who designed the protagonists of the BIOWARS comic book.
Goncalo has vast experience in the arts, having worked on projects such as Transformers, GI-Joe, TMNT, Adventure Time, Godzilla and more. Right now, he’s happy to make time to record helpful art tutorials for our audience, so make sure to follow us for more how-to-draw guides!
A Recap On How To Easily Draw A Shark
The easiest way to learn how to draw a shark for beginners is to use basic shapes, such as circles, to define the size of the shark’s body.
Once you position its head, chest and back, you can then connect these parts into a whole and start adding details, such as the shark’s eye and fins.
But don’t worry — when you create the basic outline, placing key features becomes easy.
The last step to shark drawing is shading — do it slowly and softly, to avoid sharp transitions between different grey hues.
