Related Resources
Did you know that the modern image of a chubby, rosy-cheeked Santa Claus with a white beard, red suit and black boots was popularized by Coca-Cola in the 1930s?
The beloved warm figure was shaped for advertisement purposes, but the image stuck, and almost a century later, it continues to embody the holiday spirit.
In this guide, we’ll share with you five simple steps to Santa drawing. Whether you’re sketching him for the first time or you’re looking to improve your drawing skills — this tutorial is for you:
So, grab your pencils and embark on a festive sketching adventure!
The Tools You Need For An Easy Santa Drawing
Although you can use any type of pencil and paper for drawing Santa, you can also try out these tools:
- An H pencil: This pencil has a hard lead that allows you to create light, precise lines, which is exactly what you need when creating guidelines and outlining Santa Claus.
- An HB pencil: HB pencils produce lines that are neither too light nor too dark. That’s why they’re great for enhancing the lines and adding details to sketches.
- A kneaded eraser: You can twist and stretch kneaded erasers however you like. That means you can adjust their shape and size depending on what you wish to erase, making them ideal for removing even the smallest details.
- Lightly textured sketch paper: This paper has a smooth surface that’s easy to draw on — your pencil will glide over it and make drawing a Santa Claus more enjoyable for you!
How To Draw Santa In 5 Steps
When learning how to draw Santa, it’s easiest to sketch his body parts one by one.
1. Create The Guidelines For The Head
Recommended tool: H pencil
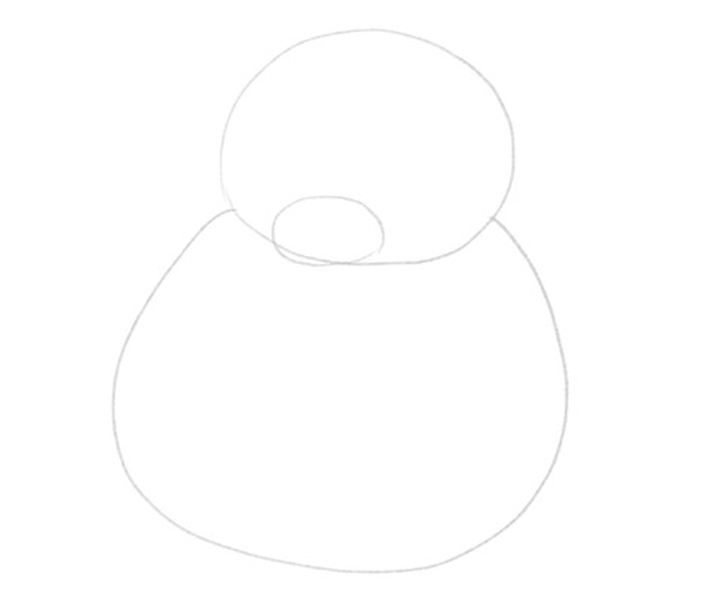
The first body part we’re going to create the guidelines for is the head.
To do this, we’ll start at the nose.
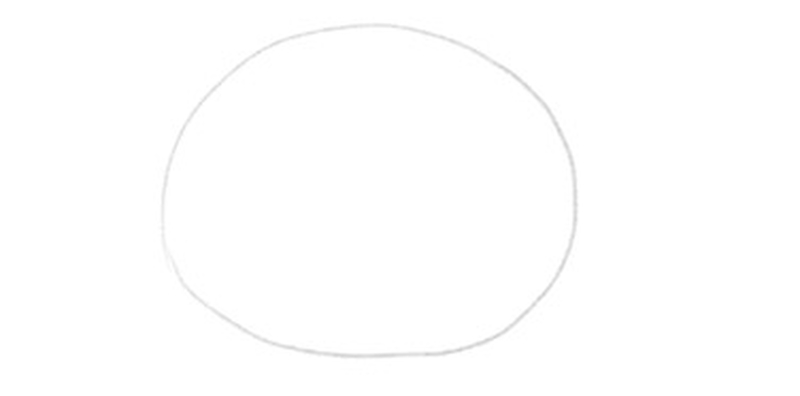
Santa Claus has a big, round nose, so we’ll use a round shape to outline it.
Don’t bother drawing a perfect circle; it’s perfectly fine even if your shape looks like this:
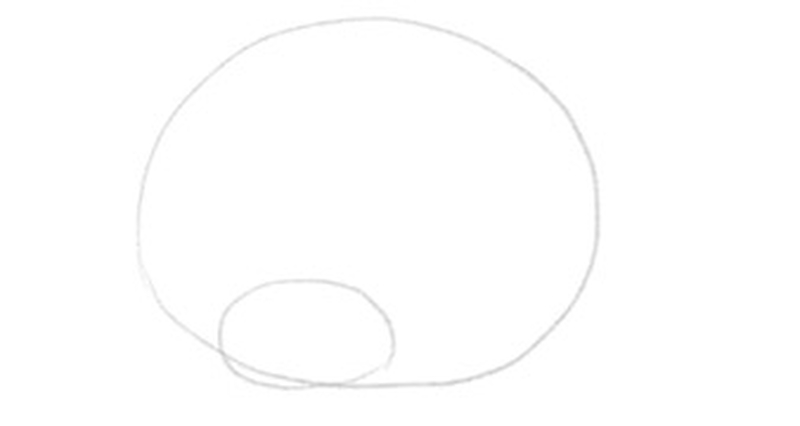
Next, let’s draw another round shape, for the upper part of Santa’s head.
When sketching the head, make sure that the bottom aligns with the bottom of the nose (it can also go slightly above it):
Santa wouldn’t be Santa if he didn’t have a big, white beard.
To outline his beard, we’ll draw another round-ish shape under the head, like this:
2. Outline The Lower Part Of Santa’s Body
Recommended tool: H pencil
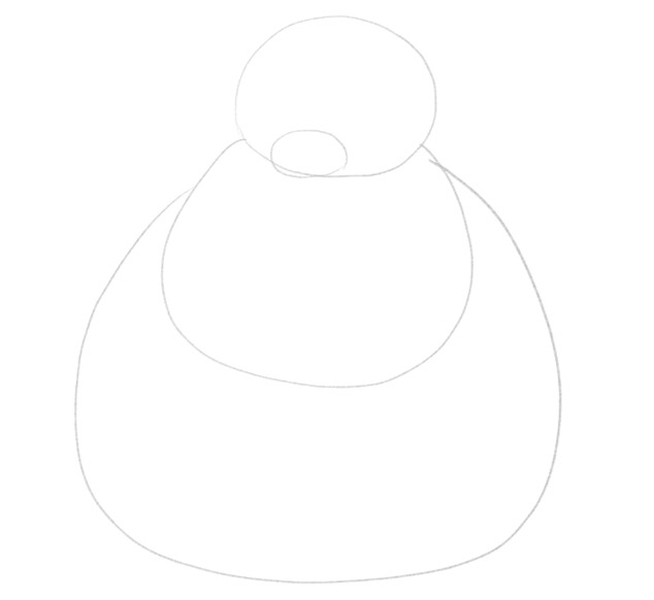
Santa Claus is almost exclusively depicted as a chubby old man, with a big belly.
So, when outlining his belly, sketch a big, round shape that’s slightly bigger than the head and the beard combined:
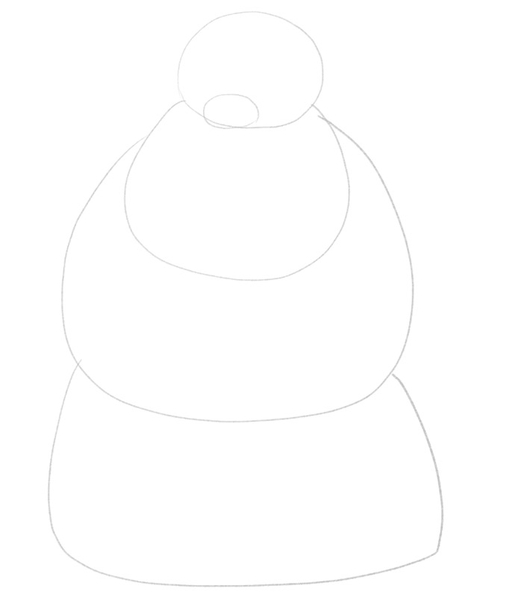
Next up is outlining the bottom of Santa’s coat — the part below his belt. Instead of drawing a round-ish shape, let’s make its corners slightly sharper, like this:
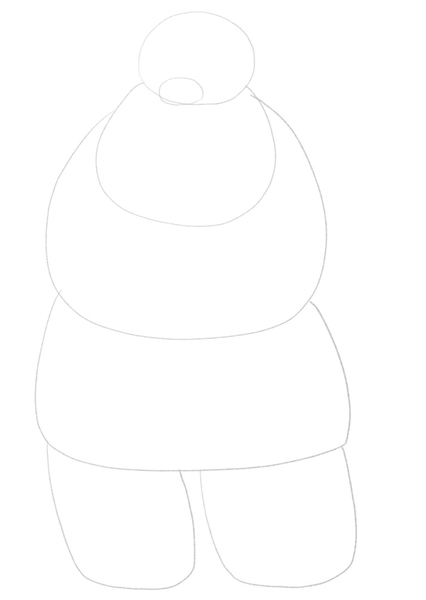
Next, let’s outline the legs.
To do so, draw two wide, rectangular shapes, but make their edges soft, like so:
3. Outline The Arms
Recommended tool: H pencil
Now, let’s draw Santa’s hands.
We’ll start with his right hand.
For starters, sketch a circle, like this:
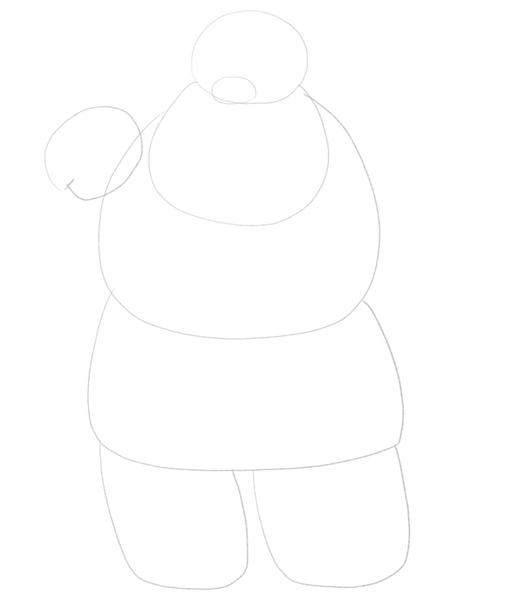
Santa’s hands are covered with gloves, which is why we’re drawing slightly larger circles.
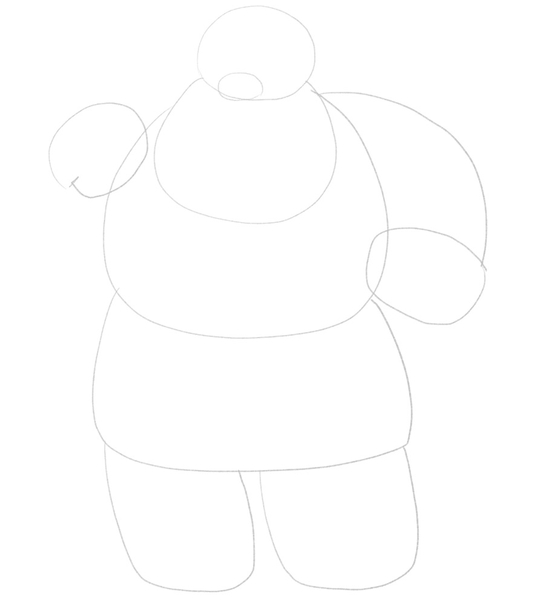
Next, draw another circle, i.e., a round-ish shape right next to Santa’s hip for his left glove-covered hand and connect it to Santa’s shoulder with a curved line, like so:
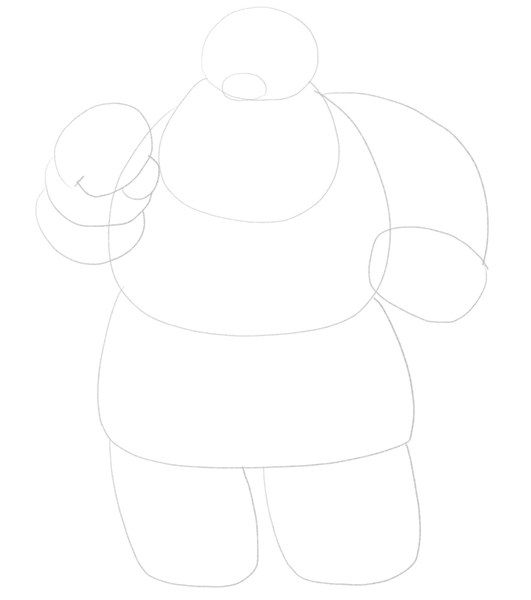
Let’s continue drawing Santa’s right arm.
At this point, we’re going to sketch a thumb, the fur-trimmed part of the coat and the part of the coat below it:
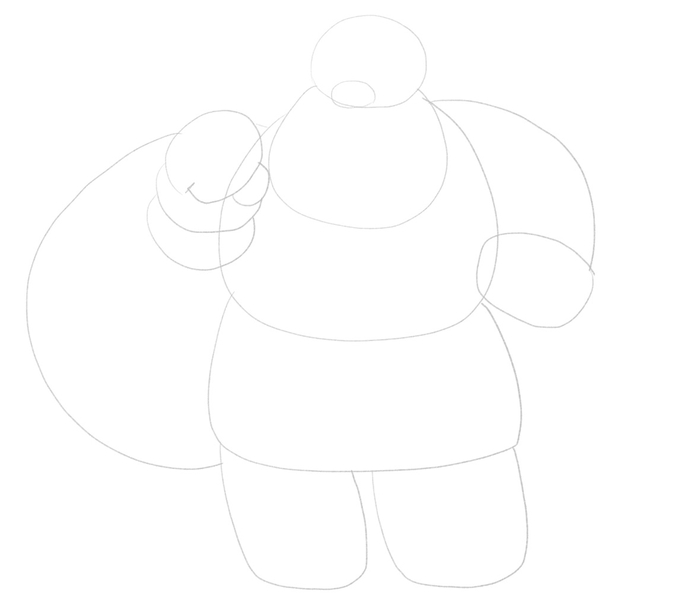
Since Santa brings gifts to kids around the entire world, he needs a big sack to fit all the presents.
So, let’s give the guy a giant bag, shall we?
4. Outline The Rest Of Santa’s Body
Recommended tool: H pencil
Let’s draw the rest of Father Christmas’ body and his outfit.
He’s traditionally depicted wearing boots, and that’s exactly what we’re going to outline next.
Attach two rectangle-like shapes to Santa’s upper legs, like this:
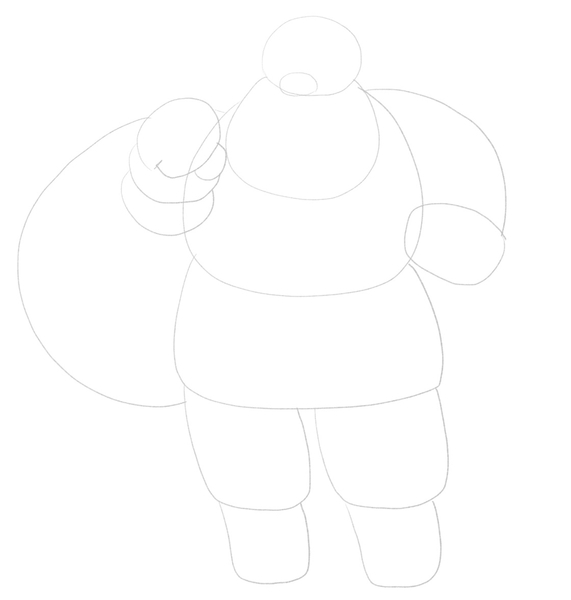
Next, let’s draw the front part of the boots, like this:
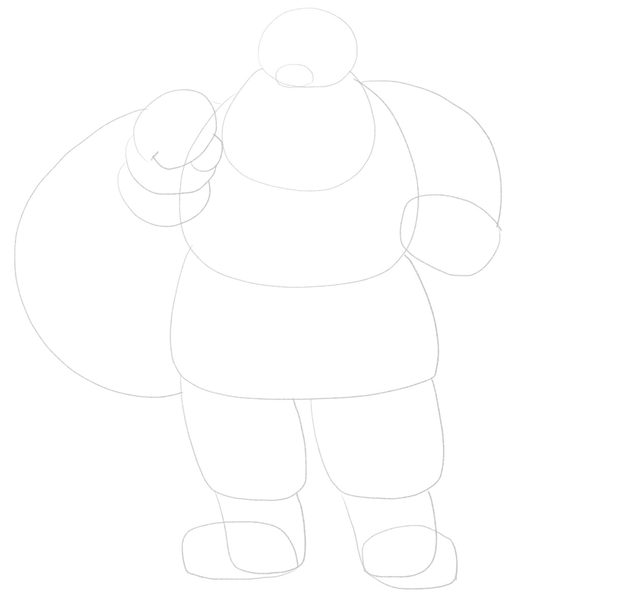
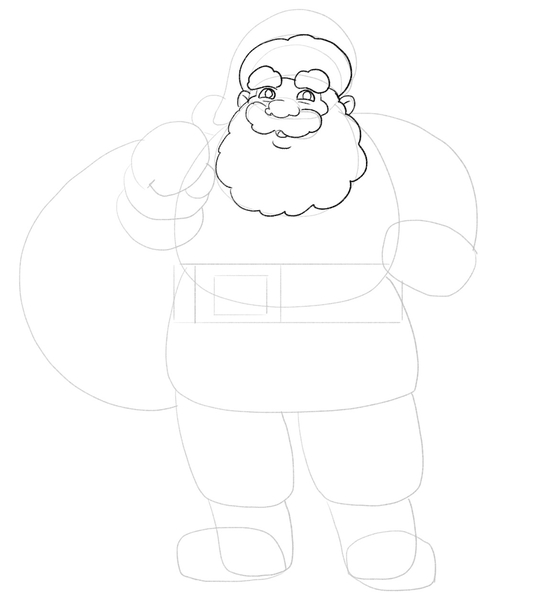
Now, it’s time to draw the mustache.
Sketch a cloud-like shape under Santa’s nose, like this:
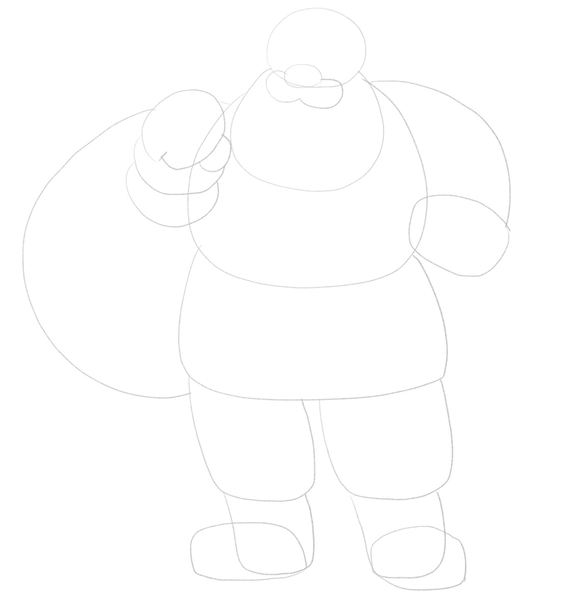
Now, let’s start drawing the fluffy white part of Santa’s hat.
To do so, sketch a half-moon shape and have it look like this:
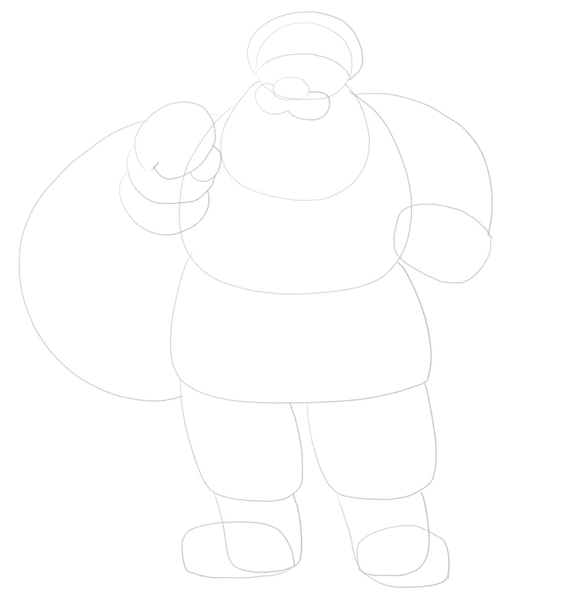
Oh, and since we’re here, let’s draw the ears.
This is super easy — simply sketch two tiny round shapes between the beard and the hat:
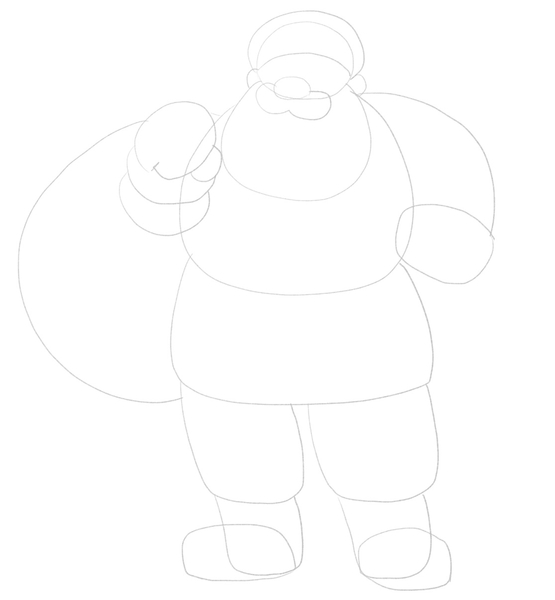
Okay, now back to drawing Santa’s hat.
We need to sketch the part that’s in the back, with the white pom-pom at the tip:
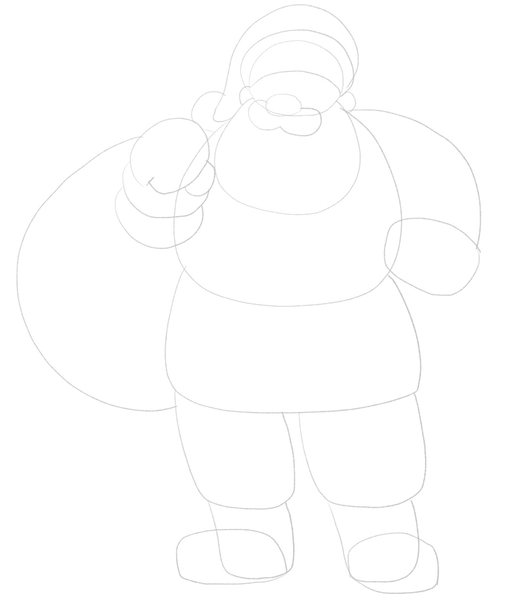
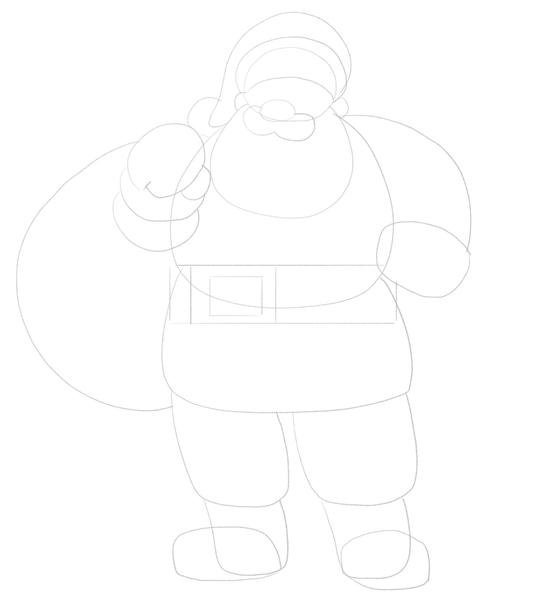
Next up, let’s draw the belt right in the middle of Santa’s body.
Sketch a rectangle that stretches from one end of Santa’s body to the other.
Then, add a large buckle to it. Draw a small rectangle between the horizontal sides of the belt and then add two vertical lines around it:
5. Enhance The Lines
Recommended tools: HB pencil, kneaded eraser
Now that the basic sketch is ready, let’s enhance the lines and add the finishing touches to the sketch.
First, grab an HB pencil or apply more pressure to your pencil of choice to create darker grey lines.
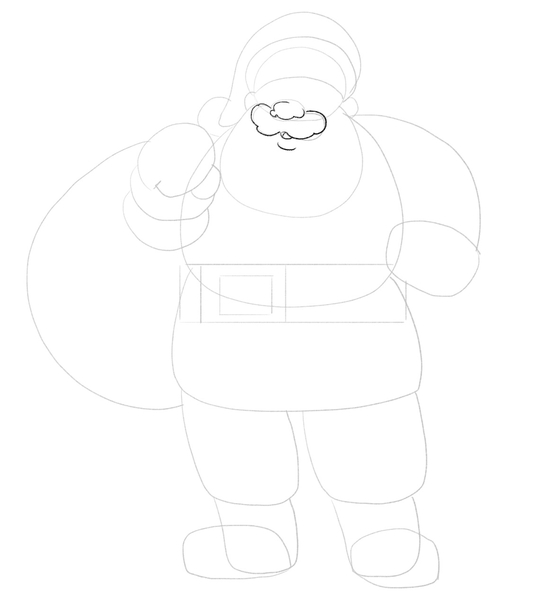
Then, let’s start at the nose and the mustache.
You don’t have to blindly follow the guidelines.
Instead, feel free to make the lines a bit wavy; then, add two small, curved lines beneath the mustache — for the mouth and the chin, like this:
Next, draw the eyes and add the eyebrows. You can sketch them as tiny clouds.
Then, connect the eyebrows to the mustache, to create tiny cheeks.
As for the beard, make it fluffy and wavy, like this:
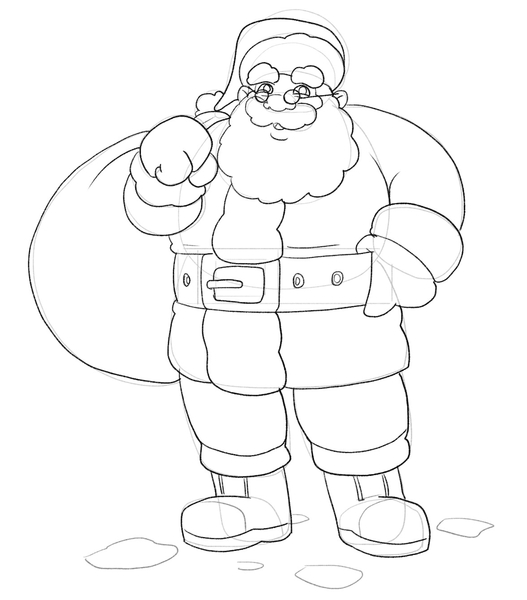
Continue to go over the lines to make them darker.
As you go, add more details to your Santa drawing, such as eyeglasses, notches on the belt and the furry, fuzzy part in the middle of the coat.
Draw the left hand so that it’s hooked to the belt and add a few square-like shapes under Santa’s feet (we don’t want him to look like he’s floating).
Oh, and add some details to the boots, like so:
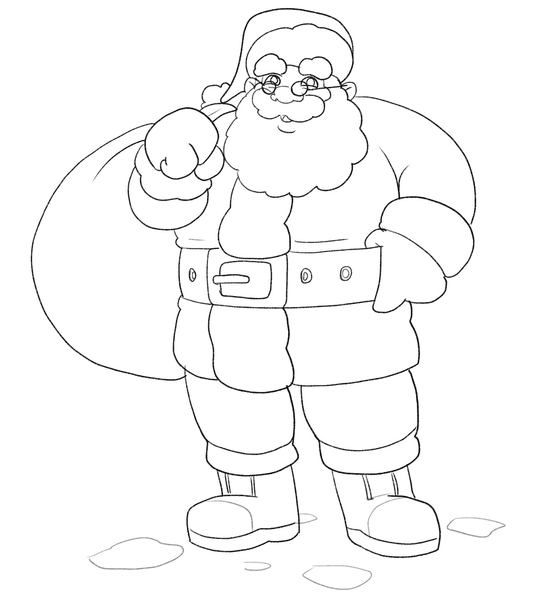
To finalize your Santa drawing, grab your eraser and remove the guidelines.
Be careful not to mess up the lines you just enhanced.
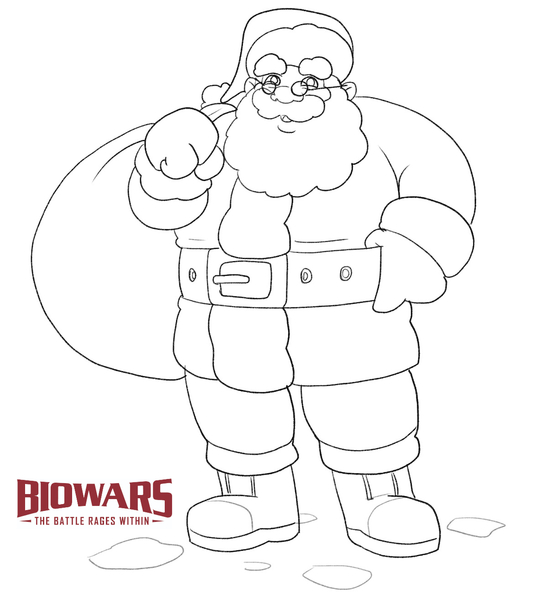
And that’s it — your Santa is ready to spread joy to children across the globe:
Finished Your Santa Claus Drawing? Try These Next!
Now that you’re on a roll, we invite you to continue your artistic adventure and keep on perfecting your drawing skills!
We have a bunch of step-by-step guides ready for you, including.
- How to draw a Christmas tree
- How to draw a snowflake
- How to draw a forest
- How to draw a tree
- How to draw a deer
And many more!
Meet The Artist
The artist behind this guide on simple Santa drawing is Goncalo Lopes — the man who worked on Godzilla, Transformers, TMNT, GI-Joe, Adventure Time and many other exciting projects.
When we say that you’re in good hands — we truly mean it!
A Recap On Easy Santa Drawing
When learning how to draw a Santa, you need to focus on simple shapes first and use them to create the guidelines for your Santa drawing.
Round shapes, rectangles, and thin, curved lines are your best friends when outlining.
Once you create the rough sketch, it’s all about enhancing the lines and adding finishing touches to the drawing as you go.
Continue practicing and keep that festive spirit alive with every stroke of your pencil. Happy sketching and a very Merry Christmas to you all!
