Related Resources
Whether you’re attempting to re-create your favorite comic book character, bringing a new superhero or villain to life, or practicing in a sketchbook, drawing a nose can be more difficult than it seems!
After creating tutorials in which we shared steps to illustrating the eyes, mouth and face, we’ve made a five-step guide for beginners to show you how to draw a nose the easy way from the front and the side:
Professional Artist Shows How To Draw A Nose Step-by-Step
Lead BioWars’ artist and professional illustrator, Gonçalo Lopes, created this step-by-step video tutorial to show you how to draw a nose easily from scratch.
To make the process easier to follow for beginners, he also illustrates each step. (You’ll see the images below where we break down the video tutorial so you can explore it at your own pace!)
Gonçalo is in charge of creating the distinct look of the BioWars characters. The BioWarriors are fearless protectors of the immune system. They fight against microbes and mutants who wish to mess up the immune system and destroy their human host. The battle between the two forces occurs daily in every one of us.
To find out how your own BioWarriors work and what they do to protect your inner universe — the Bioverse — check out our comic book!

How To Draw a Realistic Nose From the Front
The first thing we’re going to do is teach you how to draw a nose from the front.
When you’re learning how to draw a nose, starting from the front can help you understand what shapes are included.
Step 1. Draw The Tip
To begin drawing a nose from the front, let’s start from the tip.
As you can see in the image below, Gonçalo draws the ball of a nose as an almost geometrical shape:
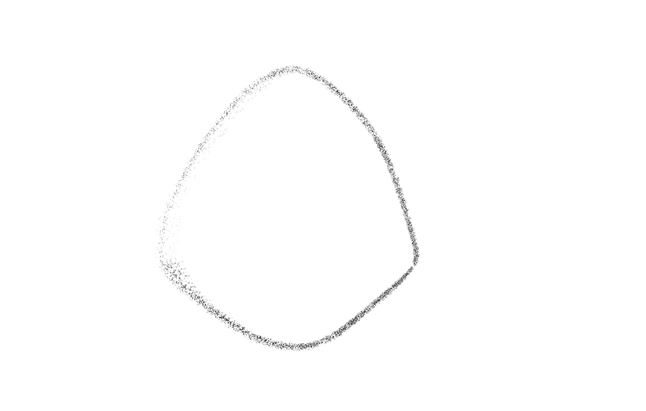
This shape looks almost like an egg, except that it has two rather sharp angles on the sides.
Of course, the shape of a nose’s tip varies from one person to the next. Some people have wider, others pointier and narrower tips, so feel free to draw the shape you like.
However, no matter the shape you draw, make sure the bottom is wider than the top!
Step 2. Illustrate The Dorsum
Next comes drawing the dorsum of a nose.
This is just a fancy word for the nasal ridge, i.e. the longest part of your nose that connects the tip to the root.
Now, most people have some kind of dorsal hump on their noses, so their ridges aren’t straight. But even without a hump, the area above the tip of the nose shouldn’t be a straight line. That’s because the nasal bone is a bit bumpy, hence most noses look like this:
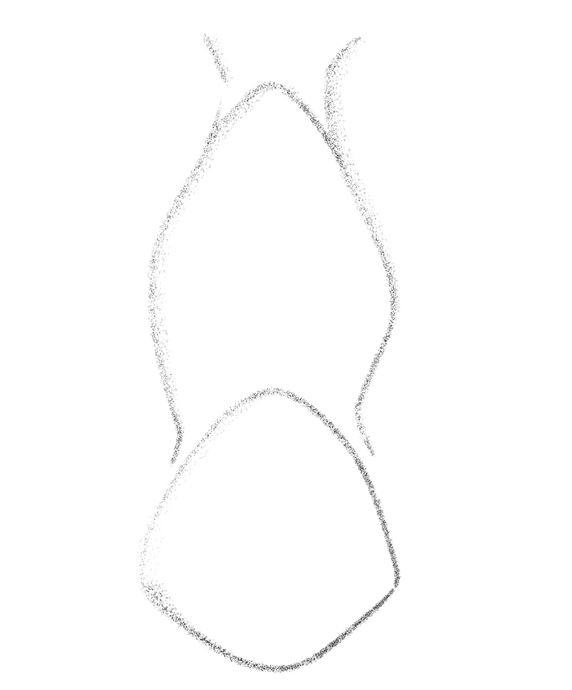
Add two short lines on either side of the nasal dorsum to connect it to the nasal bridge. That’s the area between and a little below your eyebrows!
Step 3. Add The Wings Of The Nose
Did you know that your nose has wings?
Like the kiwi bird, it can’t use them to fly, but it does have them!
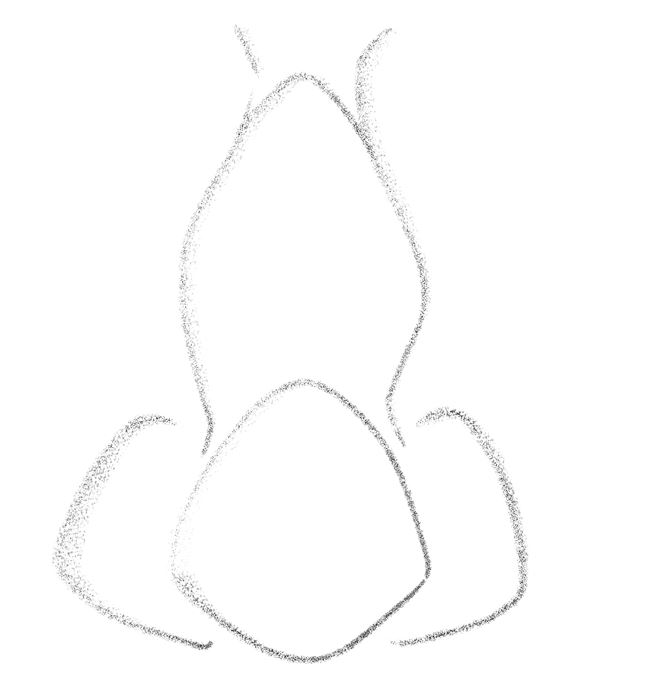
The nasal wings are the rounded bits on either side of your nose tip.
People often incorrectly refer to the nasal wings as nostrils. In reality, the nostrils are just the openings below the alae.
When drawing the wings, you can make them resemble quarter-moons, like this:
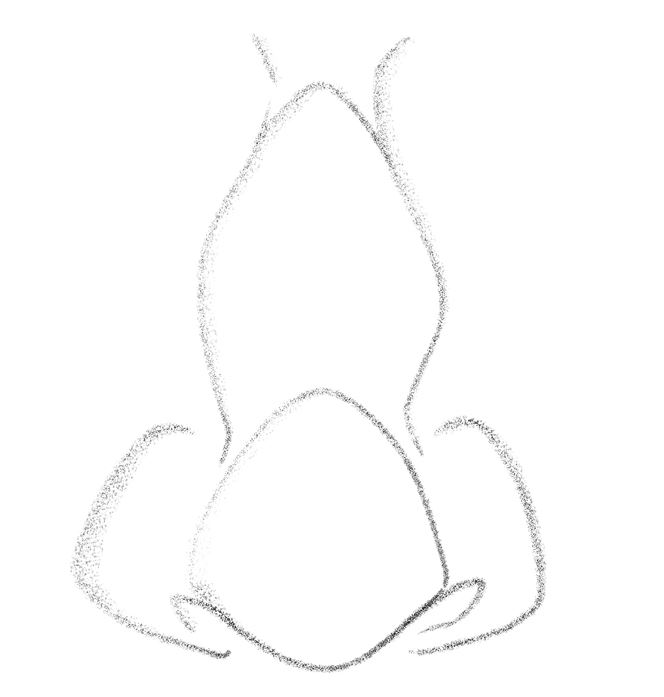
Step 4. Sketch The Nostrils
Once the nasal wings are in place, it’s time to add the nostrils.
By the way, did you know that you breathe in around 11,000 liters of air every day? That’s about 2,900 gallons!
Sometimes, alongside air, you may also breathe in some unwanted guests, like viruses and pollen. Luckily, your nostrils are lined with tens of thousands of tiny hairs that safeguard the entrance into your body and prevent germs from freely waltzing inside. Sure, some still pass, but then it’s the BioWarriors turn to face the intruders and make them regret entering!
Ok, back to drawing the nostrils.
The nostrils should look like small, circle-like holes in the alae, like so:
Step 5. Shade The Nose
See how easy it is to draw a nose? It took you just four steps to finalize the outline!
Now, let’s make your nose drawing more realistic, shall we?
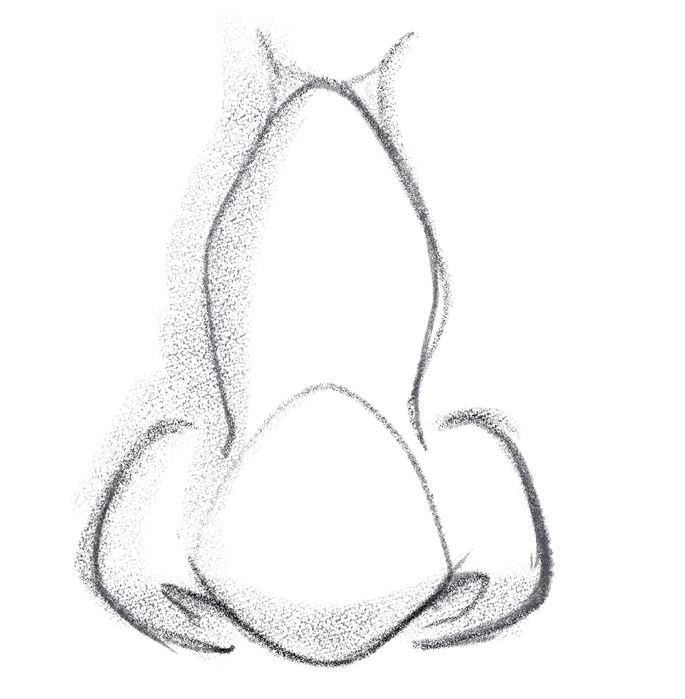
First, go over the outline to make the lines darker and more prominent.
Then, add dimension to the drawing with shading!
Before you shade the nose, decide where the source of light is.
Imagine that the light is shining on the left side of the nose from above.
There’s no need to go over the top with shading, especially when you’re still learning the basics of drawing the nose.
Simply add some thick shade along the nose ridge.
Then, add shade to the left nose wing and make the inside of the nostrils dark. Don’t forget to also shade the tip of the nose slightly darker at its bottom:
Congrats — you just finished drawing a nose from the front!
Feel free to practice and repeat the process until you feel comfortable drawing all of the elements that make up a nose!
How To Draw a Realistic Nose From the Side
When you perfect how to draw a nose from the front, it’s time to learn how to draw it from the side!
In this tutorial, Gonçalo shows you how to illustrate the nose from the right-side view.
As in other tutorials, we’re going to break the nose shape into smaller shapes and sections, so you can easily copy Gonçalo’s steps.
Step 1. Draw The Tip
No matter the angle you opt for, the first thing to draw when illustrating a nose is its tip.
Now, the tip’s shape is slightly different from the side than it is from the front.
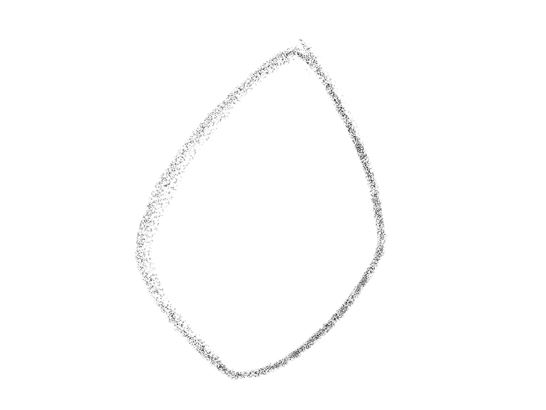
From the side, the tip of the nose is narrower and its right angle is slightly sharper than from the front.
Depending on the nose shape you wish to illustrate, draw the tip as sharp or as rounded as you like. Gonçalo sketches it like this:
Step 2. Illustrate The Dorsum
Next up, draw the dorsum, a.k.a. the nose ridge.
Start from the top and draw a line from the nose bridge to the tip:
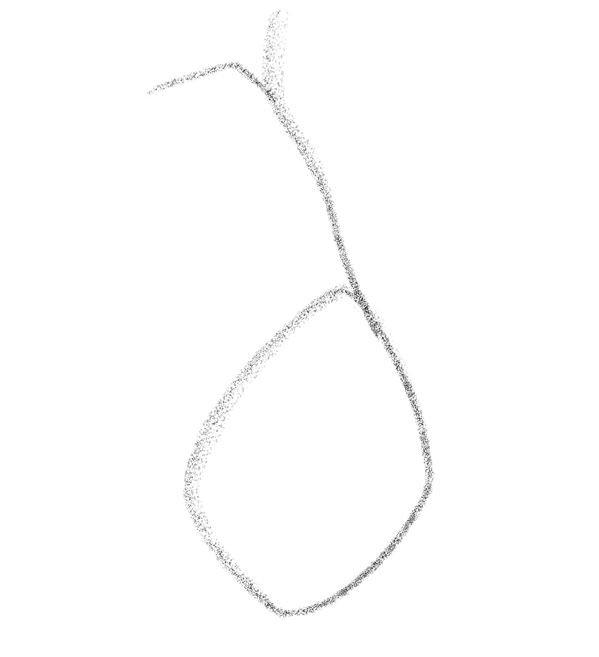
Make the ridge as long as you want the nose to be.
Now, the shape of the ridge depends on the nose shape you want to sketch.
For example, if you’d like to draw a button nose, the dorsum would have to be straight and the tip of the nose would need to be rounder than the illustration shows.
Gonçalo opted for a slightly hooked (or aquiline) nose, hence the slightly curved ridge.
Step 3. Add The Wings Of The Nose
Next up are the nose wings.
Form the side, only the right ala, i.e. wing, fully shows.
The left ala slightly peaks behind the tip, like this:
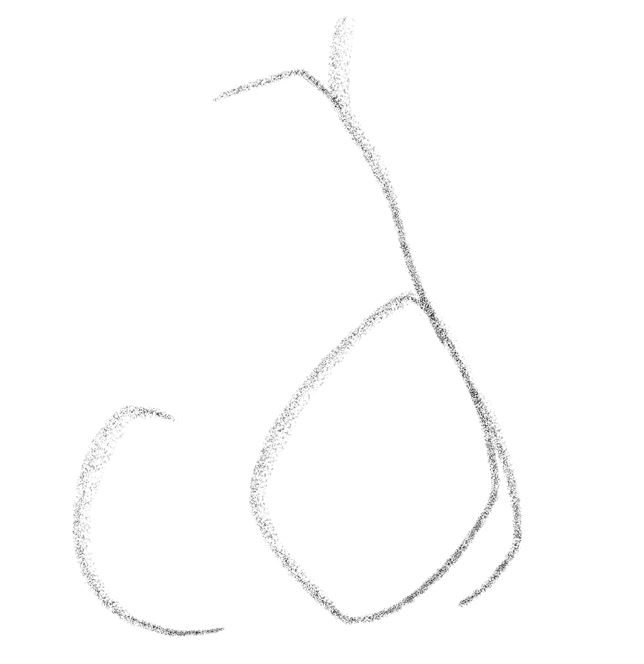
Again, the shape of the wings looks like quarter moons or half-circles.
You don’t have to connect the right ala to the rest of the nose because, at this point, you’re drawing just the wing’s outline. You’ll emphasize its size later on when shading the sketch!
Step 4. Sketch The Nostrils
Now, draw the nostrils.
Since you’re drawing the nose from the right angle, the right nostril is going to be much larger than when you were sketching it from the front.
The nostrils should be rounded or oval, and connected to the tip:
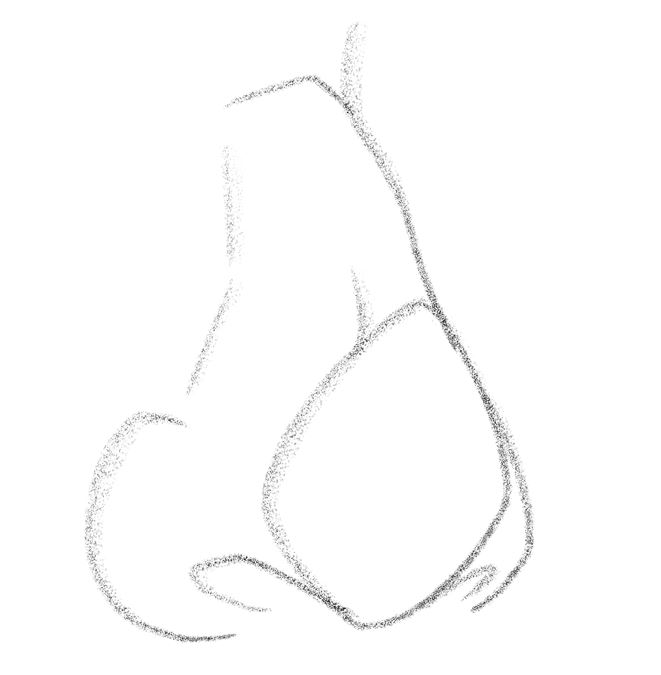
Pay attention to the perspective and make the other nostril much smaller.
Then, draw a line between the wing and the top of the ridge. Make sure it’s not straight and slightly curve it outwards, like Gonçalo does.
Next, draw a short, curved line from the tip upwards.
Both of these lines help you add structure to your nose drawing!
Step 5. Shade The Nose
And just like that, you made it to the final step of learning how to draw a nose easily!
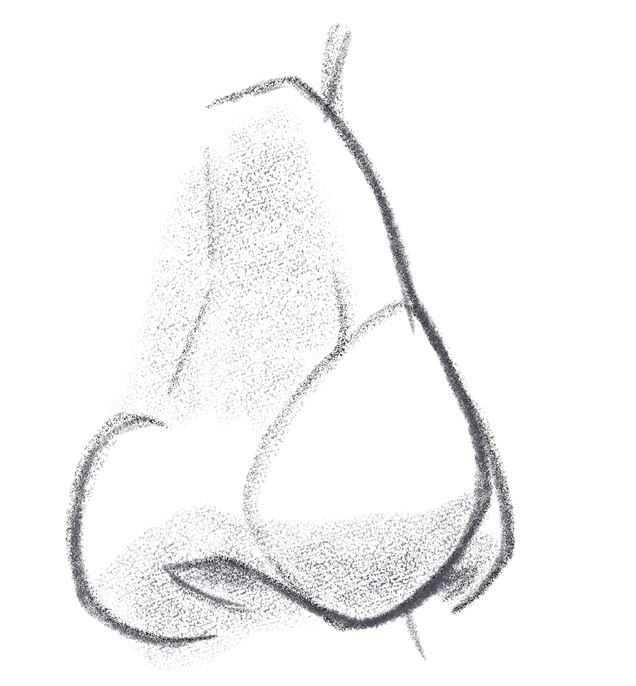
The last step is to shade the outline.
First, use a pen with a softer lead to go over the outline.
Be sure to make the wings, nostrils, tip and ridge darker than the other elements.
After that, shade the side of the ridge, the nostrils, and the tip.
The insides of the nostrils should be the darkest like the sketch shows:
Tools To Use When Learning How To Draw A Realistic Nose
The right tools can help you draw a nose like a pro. Here’s what you’ll need:
- An H pencil to outline
- A 4B pencil for shading
- A kneaded eraser to erase the shapes you’re not happy with
- Sketch paper with micro-perforations because it allows you to easily apply corrections to your drawing
If you prefer digital to hand drawing, make sure to check out our guide on the best digital drawing tools on the market!
Recap On How To Draw A Nose Step-By-Step
Who knew you could draw a realistic nose in just five steps?!
After breaking the nose shape into smaller elements, we hope you find the process of sketching a nose a lot easier.
The important thing is to start by illustrating the tip, then add the dorsum, the wings, and the nostrils.
And lastly, shading the sketch helps you make it look more realistic!
