Related Resources
Grab your pen and paper, it’s time to learn how to draw a horse!
Did you know that horses have an almost 360-degree field of view?
These intelligent animals are nature’s gift and can develop strong bonds with humans.
Due to their beauty and overall awesomeness, many movies and TV shows are dedicated to them. Remember Spirit and BoJack Horseman?
Horses appear in comics, too. Marvel’s Phantom Rider rides a horse named Banshee!
The horses’ majestic appearance sure is a sight to behold, but when it comes to drawing them, things can get a bit complicated.
That’s why we’re here and we’ll show you how to draw a horse step by step:
A Professional Artist Shows You How To Draw A Horse [Video]
BioWars’ lead artist Gonçalo Lopes created a video tutorial that will help you learn how to draw a horse from scratch:
In the video, Gonçalo starts simple by defining the area where he’ll draw the horse and sketching the basic shapes of the horse’s body.
He draws the upper body first, adds the head and the tail, and then proceeds to illustrate the horse’s legs.
Let’s break the video into several steps so you can explore them at your own pace.
How To Draw A Horse In 10 Steps
1. Establish Your Perspective And Draw The Base For Your Sketch
The first thing you should do is establish the angle from which you want to draw a horse.
For starters, we recommend you draw it from a side to get a good sense of proportion and learn how to easily sketch its body parts.
You see, horses have around 700 muscles in their body (for comparison, we have more than 600 muscles!), so drawing them may seem challenging when you’re a beginner.
However, the process of illustrating a horse becomes easier when you start by drawing the basic shapes first and then connecting them into complex forms.
The very first thing we’re going to do is draw a large square.
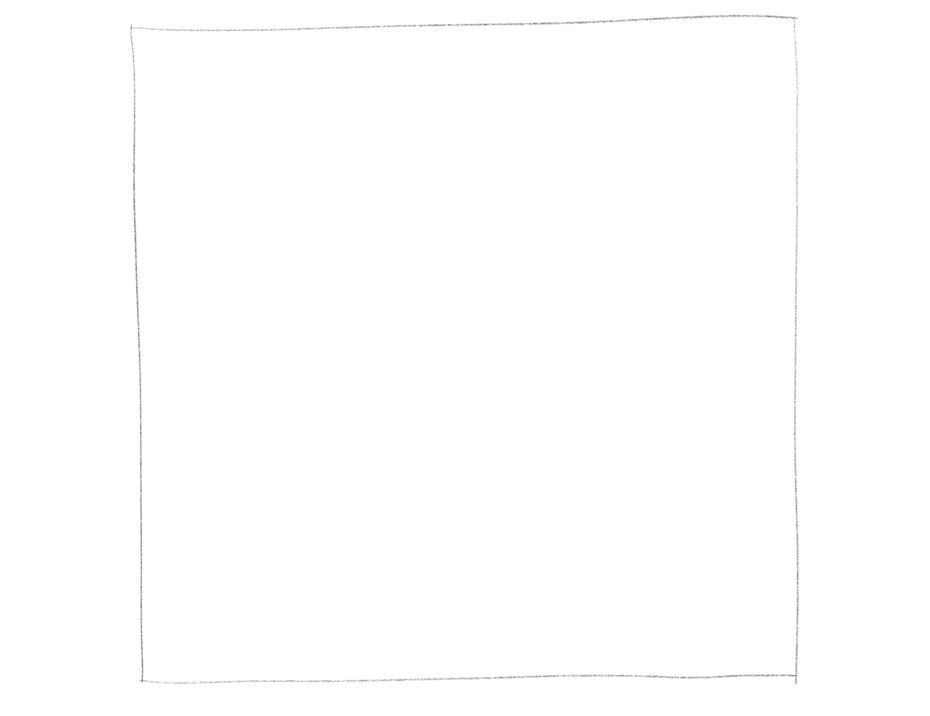
The reason we’re doing this is that the square is going to help us determine the size of the horse.
The distance between the left and the right side of the square represents the horse’s length, while the space between the square’s top and bottom tells you how tall the horse is going to be.
We’ll draw the head outside of the square later on, but at this point, you should decide how big you’d like the chest, back and legs to be.
2. Outline The Horse’s Chest, Belly & Its Backside
Now that the square is in place, let’s start illustrating parts of the horse’s body.
Apply light pressure to your pen because you’ll want to erase unnecessary parts of the drawing once you’re done sketching.
First up, we’re going to draw two circles in the upper corners of the square, like this:
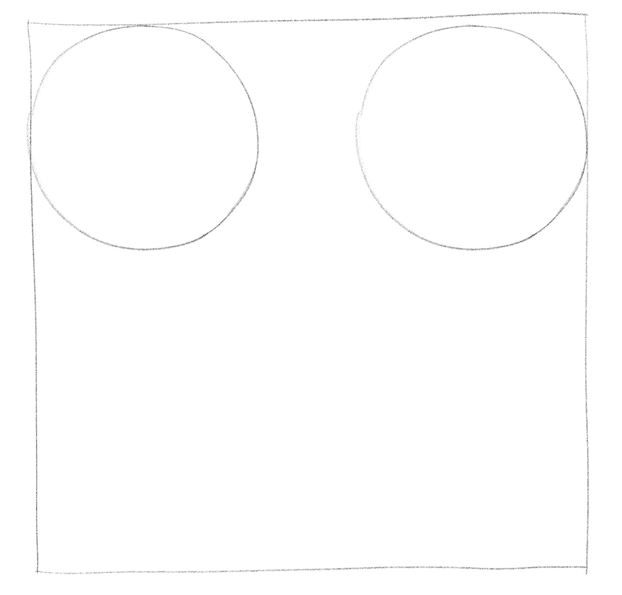
The circle on the left is where the horse’s chest will be, while the circle on the right represents the horse’s backside.
Next up, you should connect the circles with thin lines, like so:
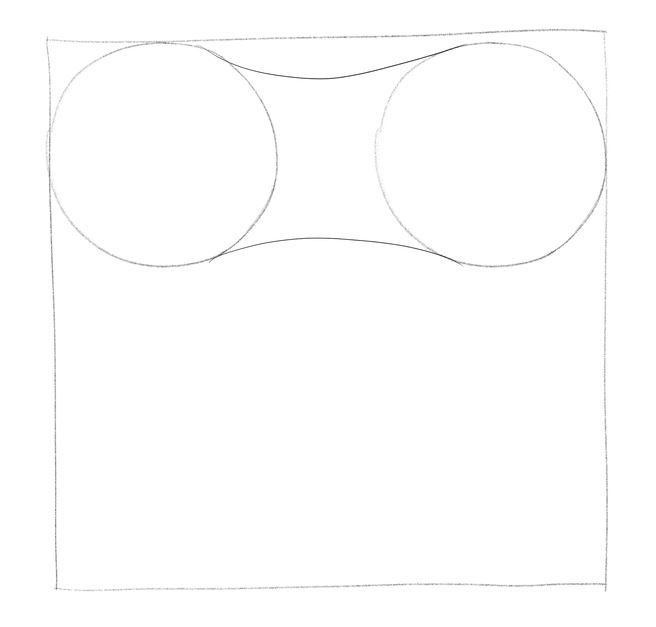
Although it may be hard to picture it at this point, the upper part of your horse’s body is slowly coming together!
3. Draw The Horse’s Neck And The Head
To make the sketch start to look like a horse, let’s add the neck and the head.
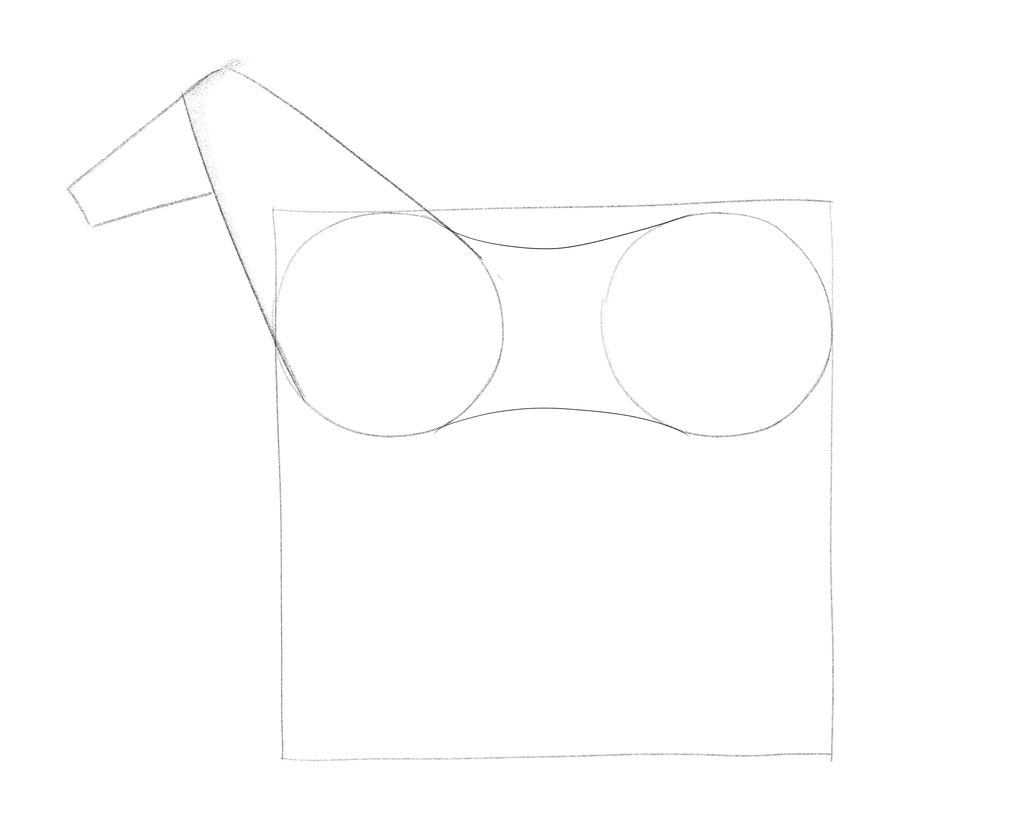
At this point, you just want to draw the outlines.
As you can see from the picture, Gonçalo drew the bottom of the horse’s neck as wide as the circle in the left corner. Then, he gradually narrowed it until he reached the point where he then drew the head.
Use simple lines and make the outline of the head and the neck look like geometrical shapes.
If you’re a beginner, it’s more important to get the proportions well and decide on the appropriate size of the head and the neck than to make them look realistic this early on.
4. Add Front & Back Legs
Next up, it’s time to draw the legs.
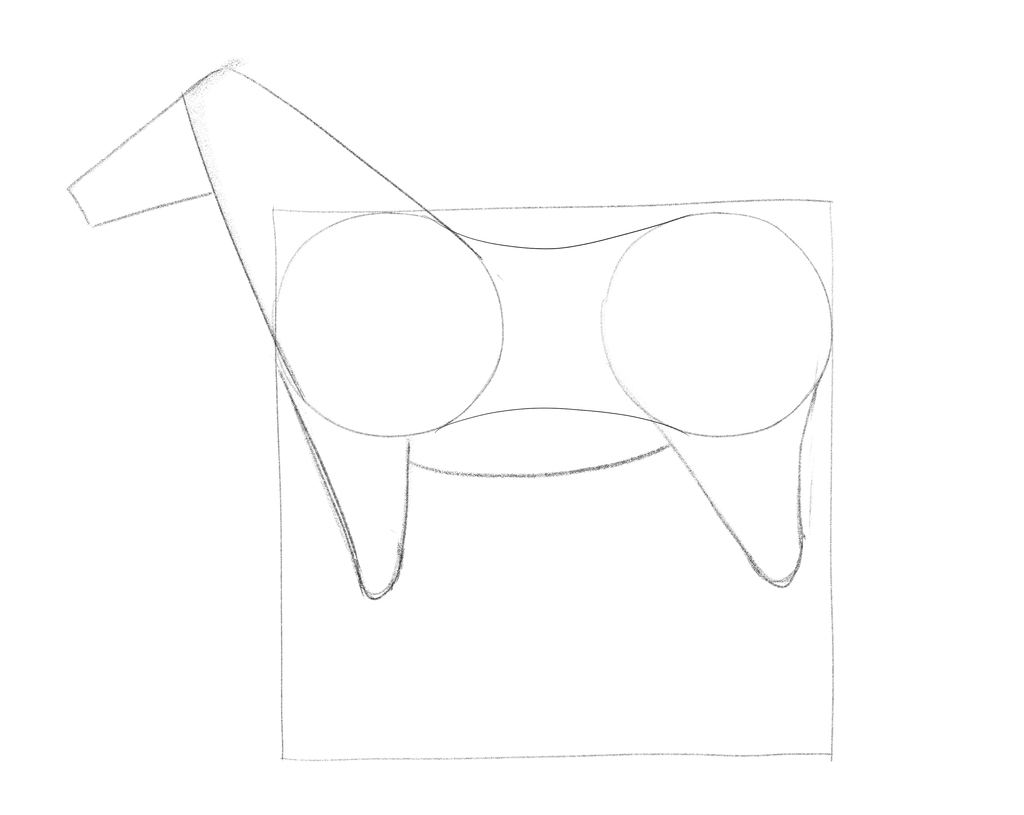
For starters, you should draw the front leg to the knee and the rear leg to the hock area.
The front leg should look almost like an extension of the horse’s neckline. The back side of the leg should start around the middle of the circle on the left.
As for the rear leg, you can make the thigh as wide as the circle on the right and then slowly narrow the leg toward the hock.
Unlike the head and the neck, the legs shouldn’t look as sharp and geometrical.
Notice how Gonçalo used semicircular lines when sketching the knee and hock areas.
5. Sketch The Belly
Once you draw the upper parts of both legs, add the line that connects the horse’s legs — that’s going to be its belly!
Before you draw it, pay attention to the line at the top that connects the circles. That’s where the horse’s back is, so make sure the distance between the back and the belly is proportional.
6. Finish Drawing The Horse’s Legs
To complete the outline of the horse’s body, let’s finish sketching its legs.
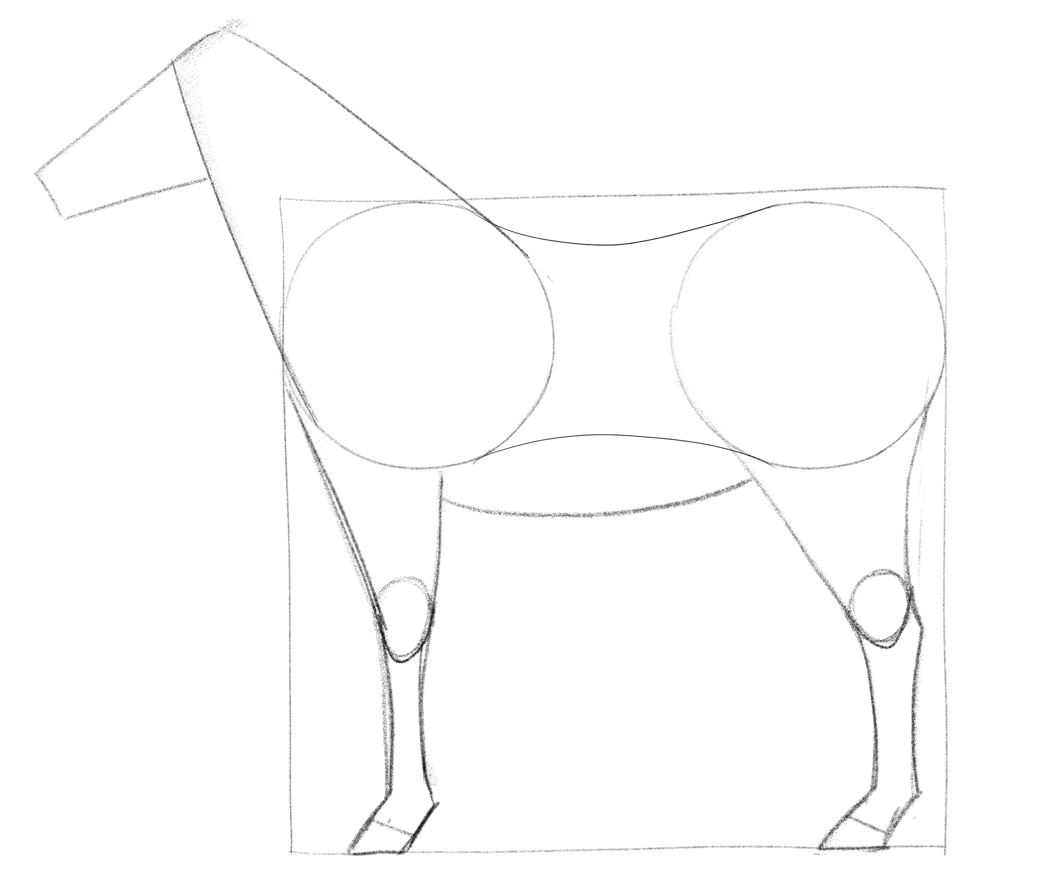
Now, the bottom line of the square is where the horse’s hooves should be. But even if you go over it a bit, don’t worry as long as your horse’s body looks proportionate!
The lower part of the horse’s legs should slightly overlap with its thighs.
Now you can see that the tips of the thighs is where the horse’s joints are!
To illustrate the tendons, Gonçalo used straight lines that extend into the hooves.
Next, it’s time to sketch the other two legs.
You should connect them to the horse’s chest and belly because that’s what they look like from the side.
The right front leg should be slightly behind the left front leg, while the rear right leg should be in front of the rear left leg, like this:
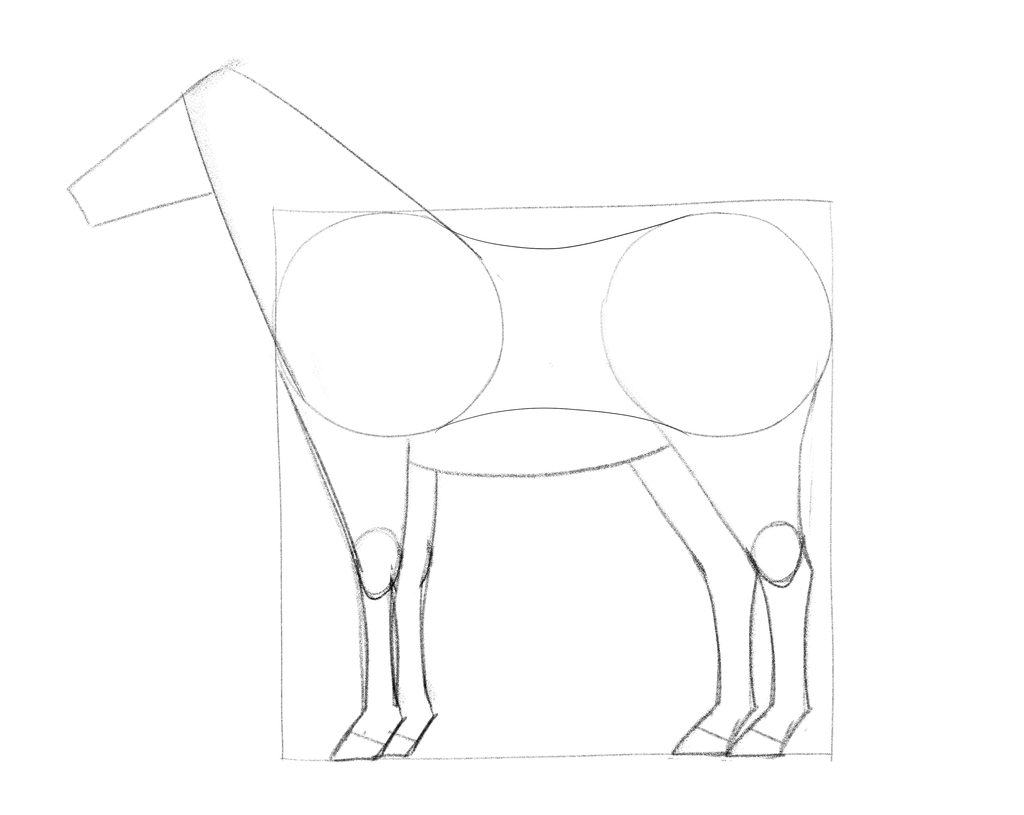
7. Add Details To The Horse’s Head
After you’re done drawing the legs, you can illustrate the horse’s ears.
Since we’re drawing a horse from the side, only one of its ears is visible, like this:
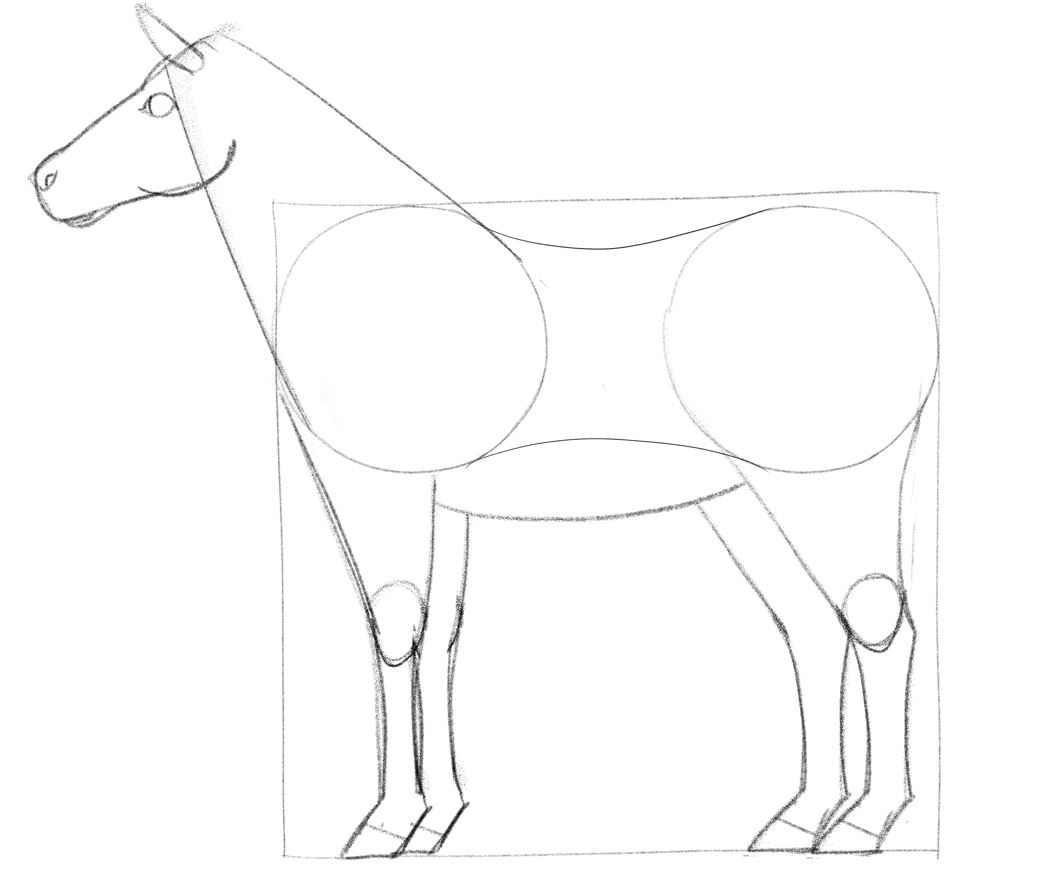
Gonçalo then proceeded to draw the mouth. He also added one eye and one nostril because, like the ears, you can see only one of them.
Notice how he kept the lines simple and clean.
You can also make the horse’s jaw slightly softer and more pronounced because, in nature, there are no straight lines as in the outline.
8. Draw The Horse’s Tail And Mane
Oftentimes, the horse’s mane is what makes it look so awesome!
So, how about you add it to your sketch?
You can draw a bit of the mane right beside the horse’s ear.
The rest of it should fall below his head and along his neck, while a portion of the mane should cover the back of its head, like so:
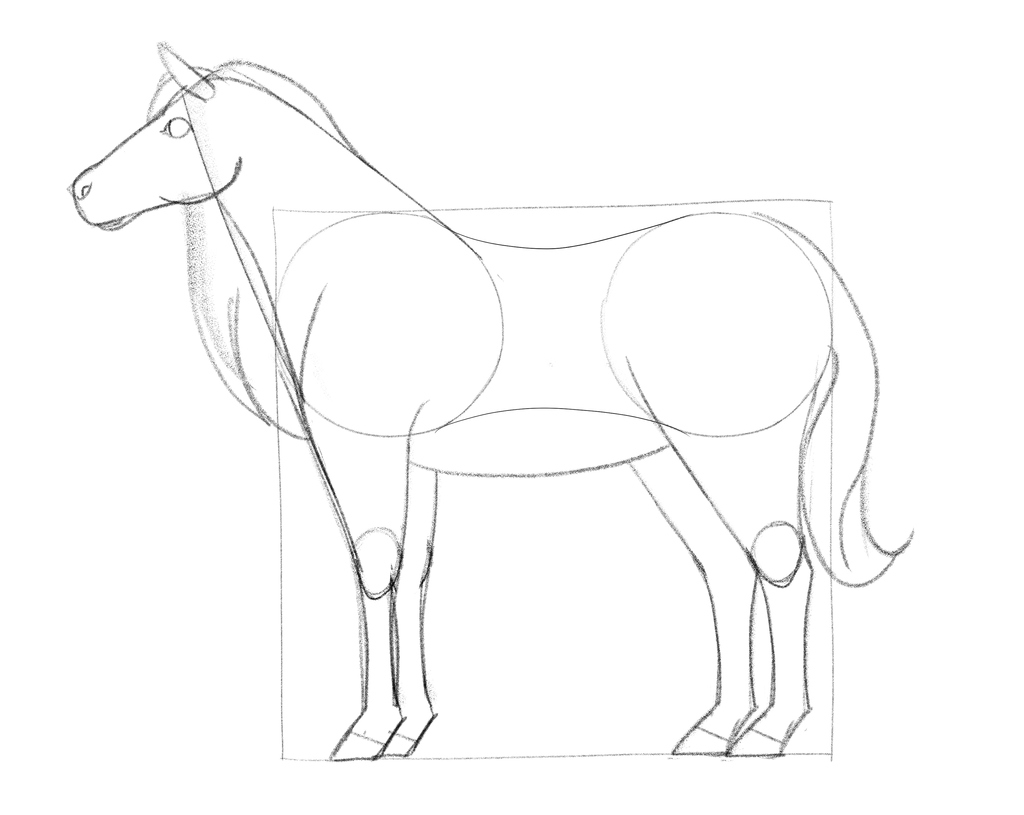
As for the tail, you can make it reach the hock joint.
We suggest you use curvy lines to make the tail’s hair look slightly wavy like Gonçalo did.
9. Erase Unnecessary Elements
At this point, your drawing is almost done, so you don’t need the square base any longer.
Grab your eraser and make sure to erase the square, the inner part of the circles, and all superfluous lines.
Then, we suggest you apply more pressure to the pencil to make the remaining lines more pronounced.
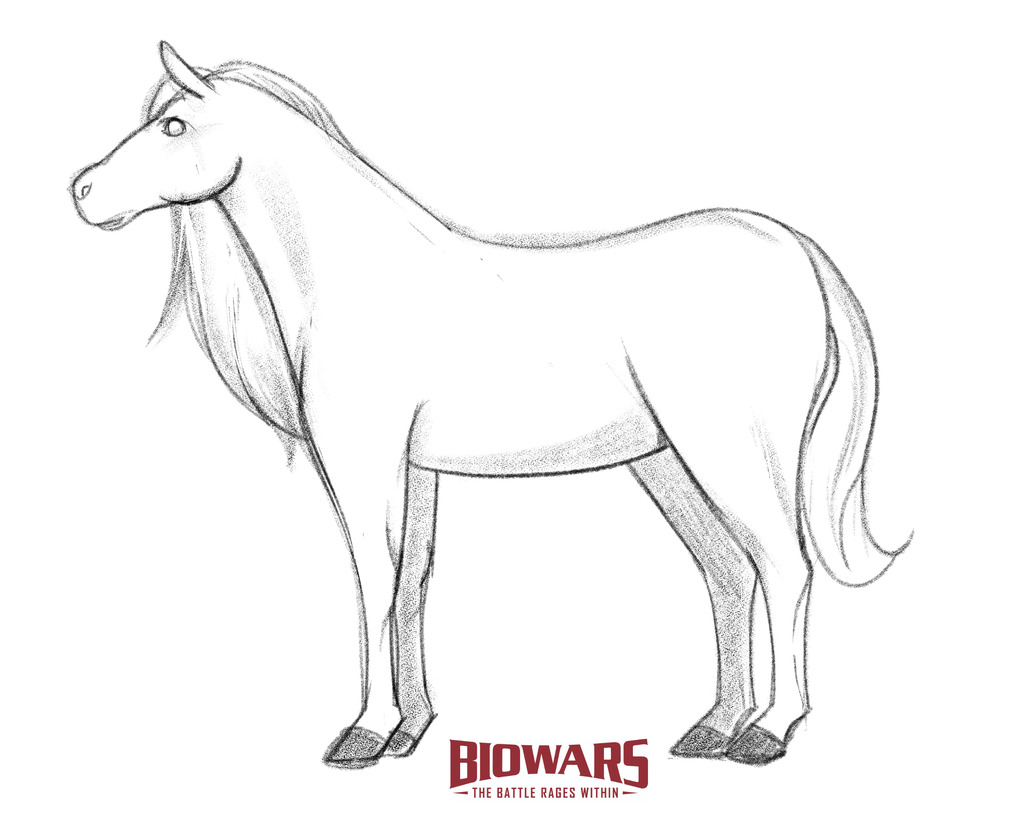
10. Add Dimension With Shading
Now, to add dimension to the horse drawing, let’s shade it, shall we?
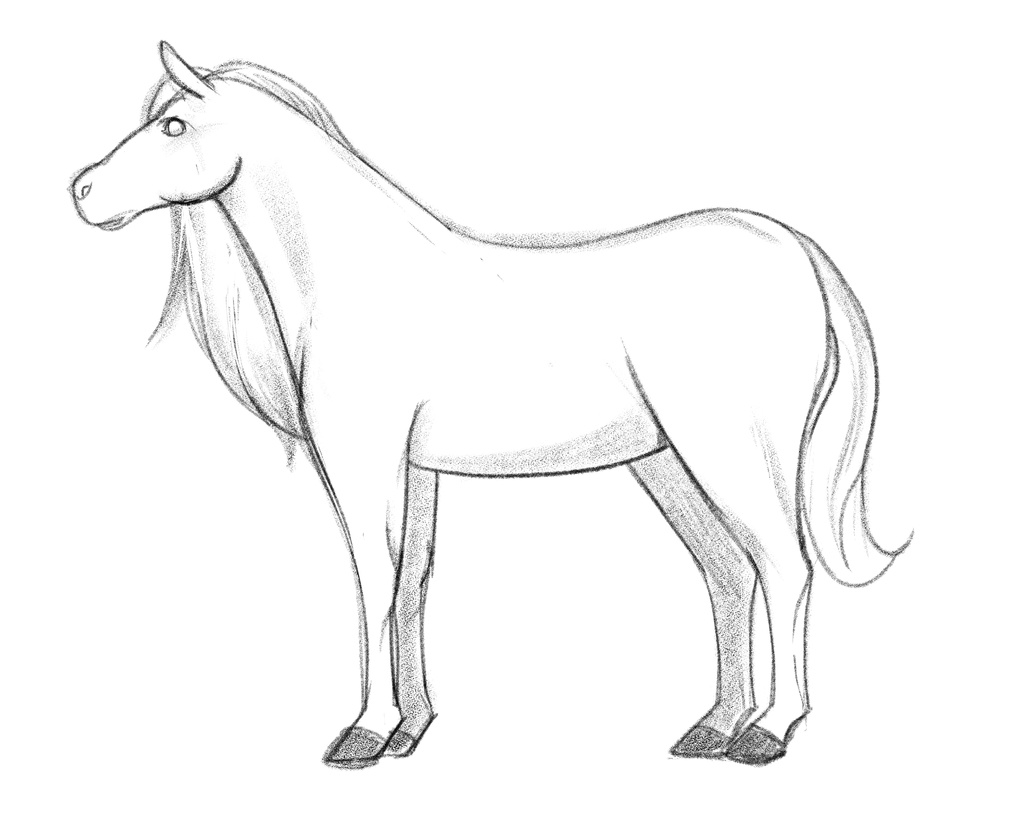
You can make the hooves the darkest, and then shade the belly, the ends of the mane, and the legs that are further from you.
Moreover, add delicate lines to shade the horse’s neck and back.
Don’t forget about the leg muscles either! Adding just one or two lines will help you make them pronounced and more dimension to your drawing.
Let’s Recap How To Draw A Horse
Whether you’re drawing a face, a hand, a mouth, eyes, or a horse, the important thing to remember is this — go slow until you learn how to get the proportions right.
When sketching a horse, we recommend you sketch a square first because it will help you decide on the horse’s size.
Then, add one detail at a time, and stick to straight, geometric shapes until you complete the basic outline.
Once the outline is ready, you can soften the lines, and enrich your illustration with the mane and the tail. Then, shade the horse’s body to make the final result as realistic as possible.

