Related Resources
Did you know that we have 27 bones in each hand and 34 muscles have to work together to move our fingers and thumbs?
Much like the rest of your body, hands are complex. Not only do they rely on an intricate system of bones and muscles, but they come in different sizes and can drastically vary from one person to the next.
This is why drawing hands can be a real challenge.
In our previous tutorials, we showed you how to draw a face and how to draw a person. In this one, we’re going to teach you how to draw hands in five steps. Even if you’re an absolute beginner, you’ll still be able to follow along.
Pick your favorite digital drawing tool or grab your drawing set of choice, and let’s begin!
How To Draw Hands For Beginners: The Start
BioWars artist Gonçalo Lopes created an easy-to-follow video tutorial that will help you master the basics of drawing hands.
In the video, Gonçalo starts with simple shapes, defining the wrist, the palm, and then the rest of the hand, adding the parts one by one until they start to resemble a hand.
We’re now going to break the video into several steps and share them below for you to explore at your own pace.

Step #1: Draw The Palm Of An Open Hand
To start drawing a hand, you need to first deconstruct it into several shapes.
The first basic shape you’re going to draw is the palm of an open hand turned upwards.
Start by drawing a simple shape of your lower palm. This is the area where your thumb forms a valley with your index finger. It will resemble a slanted pentagon, like the image below.
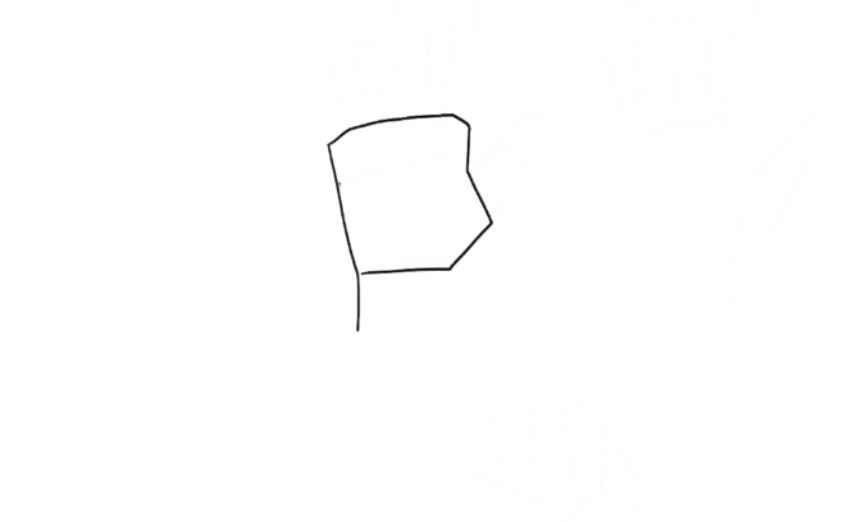
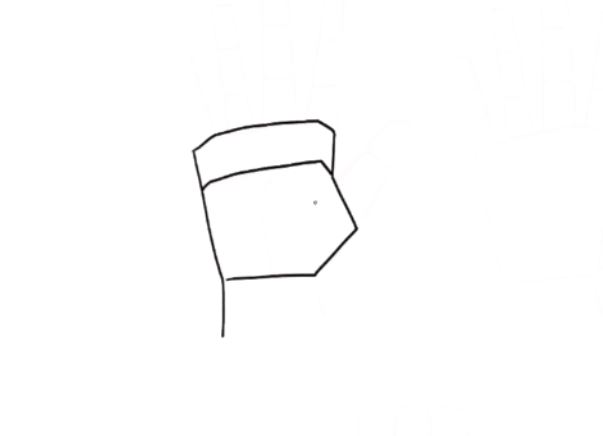
Next, draw a transverse line to mark the place where the metacarpals end and the proximal phalanges begin. The former area is where the so-called “mountains of Mercury, Sun, Saturn, and Jupiter” are, while the latter refers to the area of “the mountains of primary and secondary Mars and plain of Mars.”
Then, define the Thenar, or what people like to call “the Mount Venus,” by running a slightly angled vertical line down the middle of your pentagon. It will look like this:
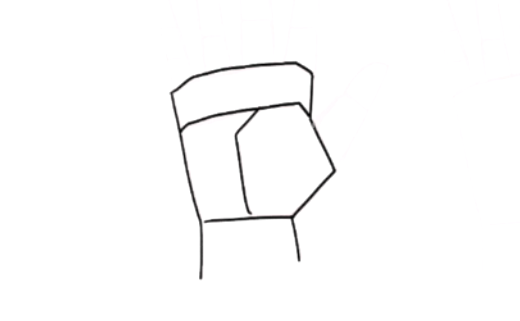
And with that, you’re done drawing the open palm.
Step #2: Draw A Thumb
When it comes to finger shapes, we’re going to keep them as simple as we did the palm. Remember, you’re still learning, so don’t sweat it if your drawing doesn’t look realistic at first!
Our fingers consist of three bones, save for the thumb, which has only two!
The first finger we’re going to show you how to draw is the thumb.
Gonçalo starts off by drawing the thumb part between the metacarpophalangeal and interphalangeal joint cases. Don’t let these big words scare you. The former refers to the joint that connects the thumb to the palm and the latter to the joint where the thumb bends.
This is how Gonçalo drew the joint cases and connected the space between them:
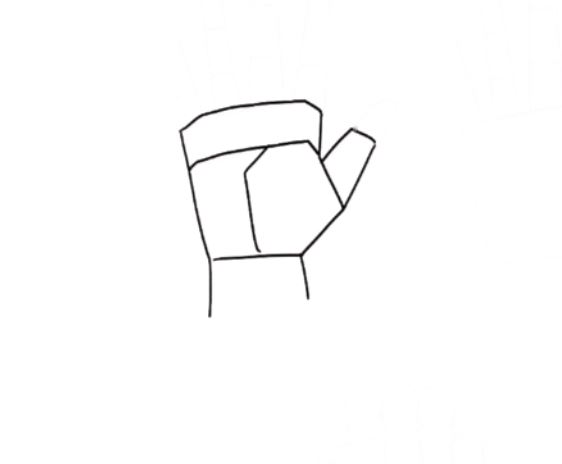
As you can tell, this part of the finger slightly resembles a trapeze.
Now, let’s draw the rest of the thumb.
The upper part of the thumb looks pretty much like the lower area, except that it’s thinner. This is the part where the fingernail and fingertip are.
When you connect the interphalangeal joint case with a fingertip, the thumb looks like this:
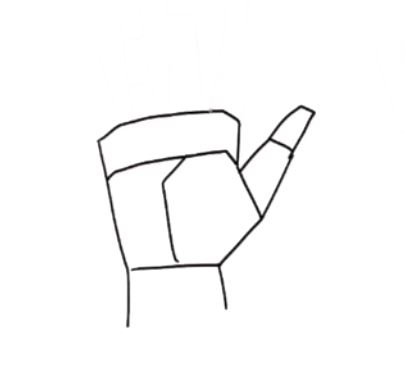
And that’s all! As you can see, the drawing is pretty geometrical and that’s completely fine because, at this point, we’re learning the basics of how to draw hands easily.
Step #3: Draw The Rest Of The Fingers
Now that you have the thumb in place, let’s add the remaining four fingers.
As Gonçalo recommends, try to keep the shapes as simple as possible. If you take a look at the screenshot from the video or watch the tutorial, you’ll notice that he didn’t bother perfecting the shape of each finger either.
Right now, it’s important to find space for each of the four fingers and connect them with the palm.
First, draw a simple pointer finger shape, like so:
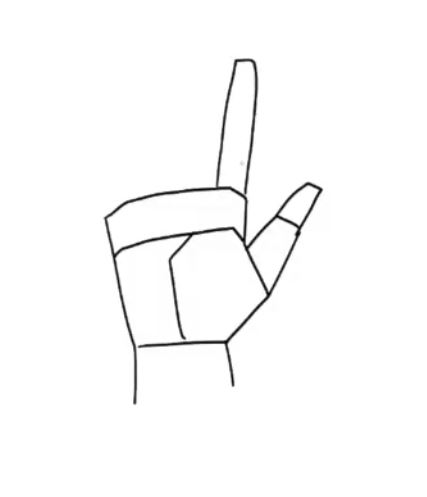
Once you draw the finger outline, illustrate two joint creases to mark the place where the intermediate and distal phalanges are, just like this:
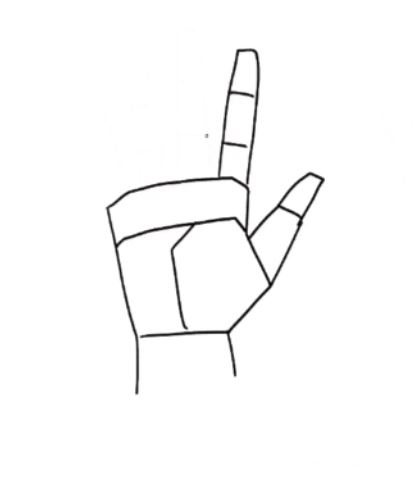
Now, you can apply the same technique to the other fingers.
Draw finger outlines first, then mark the place where joint creases are.
Pay attention to the length of each finger as the middle finger is typically the longest. The pointer finger is usually slightly shorter than the middle finger and the ring finger is, in most cases, shorter than the pointer finger. Of course, that’s not always the case, but that’s how Gonçalo illustrates them. Finally, the pinky is the shortest.
Gonçalo’s end result looks like this:
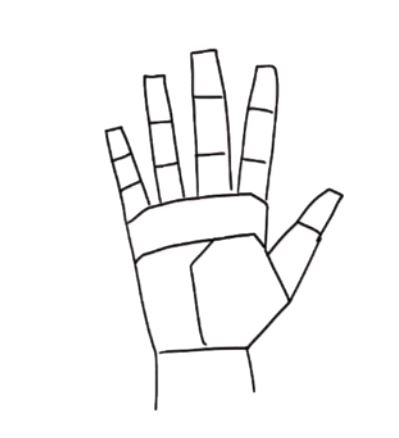
When you learn to draw the basic hand shape with an open upward-facing palm, drawing the hand in other poses becomes easier.
You can first practice drawing a hand with the palm turned downward.
In that case, drawing the palm is even easier than the first example we did.
There is no transverse line and no Thenar either. Instead, the open palm slightly resembles a larger trapeze.
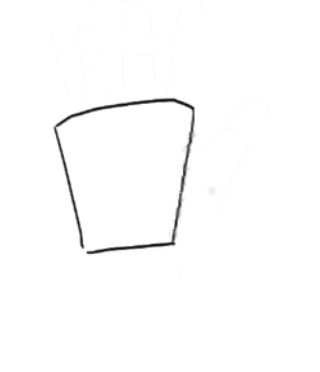
After you draw the palm, you can start adding the fingers. Draw the thumb first and add the phalanges and joint creases one by one, like you did before.
Since the palm is turned downward, you’ll want to mark three creases on it, just like this:
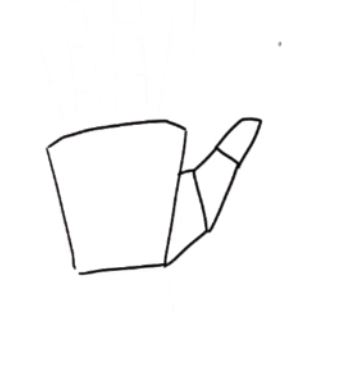
Once you’ve drawn the thumb, add in the rest of the fingers the same way as before — draw finger outlines first and then mark the places where the intermedial and distal phalanges meet. This is how the end result should look:
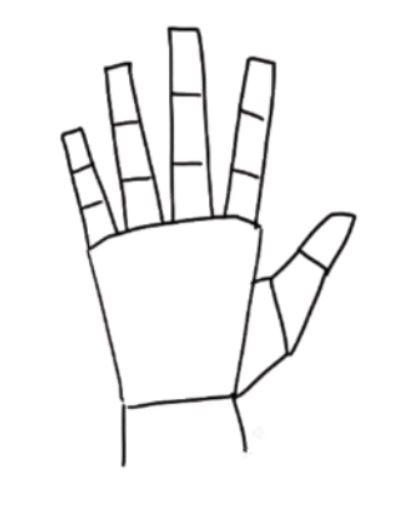
Step #4: Practice Different Hand Poses
When you perfect drawing the simple hand shape, you can start illustrating other hand poses.
For example, you can simply bend the finger shapes you previously drew to illustrate a fist!
To draw a hand in a fist, start from the proximal phalange of the thumb first and connect it to the Thenar and the Hypothenar Eminence, i.e., “the mount of Venus” and “the mount of moon,” like Gonçalo shows:
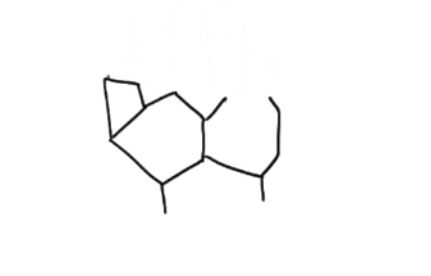
Since all of the fingers are bent in a fist, you just need to draw the intermediate phalange to illustrate them, like this:
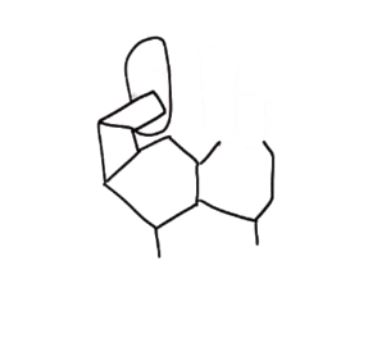
To complete the fist drawing, continue adding one intermediate phalange next to the other.
To make the drawing more realistic, you can draw nails as semicircular shapes. You can also add a lunula to each nail — that’s the white-ish, crescent-shaped part of your nail.
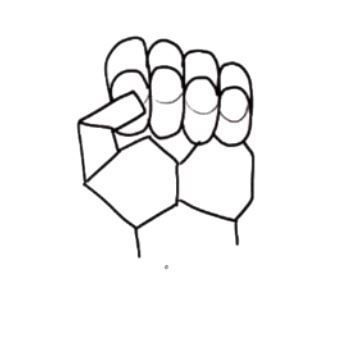
Step #5: Add Details
When you’re happy with the way the basic handshapes look, you can add some eye-catching details to your illustrations.
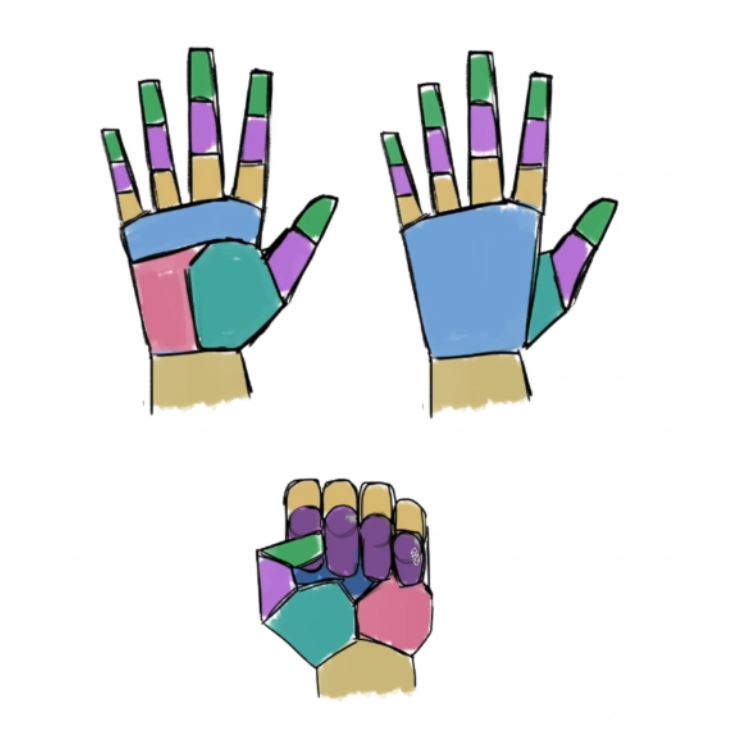
Depending on what kind of character you wish to create, you can play with colors or even adorn the hands with some jewels.
Our artist colored every part of his hand illustrations differently, just to show you that you shouldn’t limit your creativity!
Experiment with details until you achieve exactly the look you pictured for your characters.
Key Takeaways On How To Draw Hands Easily
While learning how to draw hands may seem challenging or downright impossible at first, we hope our step-by-step tutorial helped you realize that illustrating hands isn’t so hard after all!
You can stick to simple palm and finger shapes at first until you perfect them. Once you learn how to draw basic hand shapes, you can then start experimenting with other shapes, such as a hand in a fist.
Take it slow and practice regularly until you’re happy with the results! Last but not least, don’t forget to bring your character to life with color!


