Related Resources
In this beginner-friendly guide, BioWars’ lead illustrator Gonçalo shows you how to draw ears with all their creases and folds in seven easy steps.
He even made a video of his digital ear drawing process that you can follow with this guide:
And if you prefer to look at images and draw, read on to discover illustrations you can copy in each step.
The Tools You Need For Your Own Ear Drawing
If you’re drawing ears with a pencil, we recommend using:
- An H pencil: This is a great choice for sketching because it leaves a light trace on paper, which makes it easier to build but also erase when you’re unhappy with how a line turned out.
- An HB pencil: HB pencils have a “medium-hard” lead, and they’re your best choice when adding details and soft shadows to your drawing.
- A B pencil: When it’s time to shade your sketch, we recommend using a B pencil because it has the softest lead, meaning it leaves the darkest trace.
- A blending stump: A pencil-like tool you can use for blending the lines when you start shading your ear drawing. It has two pointed ends and is made up of tightly rolled paper.
- A kneaded eraser: You can easily manipulate kneaded erasers, and stretch and compress them as needed, so they make erasing a lot easier. You can also use a kneaded eraser to highlight certain parts of your ear drawing.
- Lightly textured sketch paper: Your pencil will glide smoothly over the surface of this paper. Erasing mistakes is easier, too!
Now, you don’t need all of these tools. This is just what artists use, but if you’re a beginner, an H pencil will suffice!

7 Steps To Drawing Ears
1. Draw The Root Of The Helix
Recommended pencil: an H pencil
The easiest way to start drawing an ear is to sketch the helix first — that’s the outer rim of your ear.
But we’re not going to draw the whole helix at once because its shape may be tricky to nail when you’re a beginner.
Instead, let’s just draw the root of the helix for now. That’s the part that touches your face and goes up to the helix’s highest point, like this:

The bit that’s closest to the face should be slightly thicker than the rest of the helix.
As you draw the lines toward the tip of the ear, make sure they are narrower, because the rest of the ear should be tapered.
2. Add The Rest Of The Helix
Recommended pencil: an H pencil
Now, to finish illustrating the helix, extend the lines from the top toward the earlobe in the shape of a large comma:
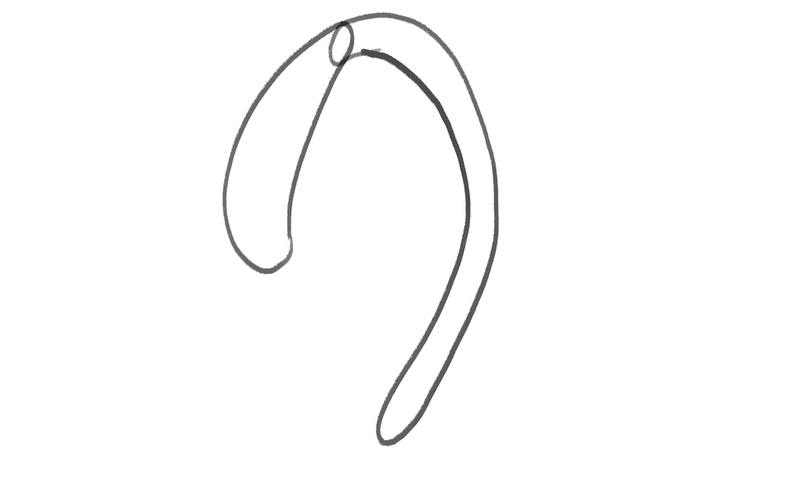
Don’t worry about the intersection of the two parts of the helix, you’ll erase it later on.
At this point, don’t apply too much pressure on your H pencil, so you can later easily erase unnecessary elements.
3. Draw The Earlobe
Recommended pencil: an H pencil
When drawing an earlobe, simply add a kidney-bean-like shape to the bottom of the helix.
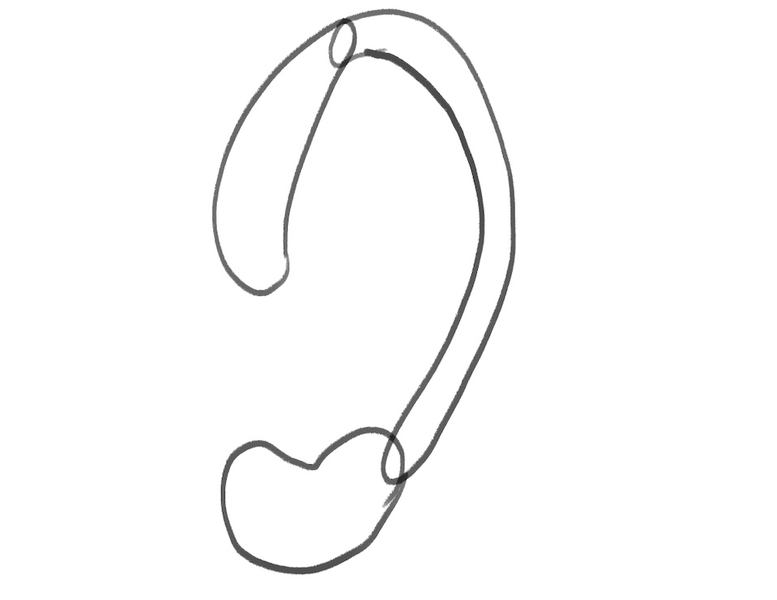
To find the ideal positioning for your earlobe, align the that connects to the face with the root of the helix.
To do this, you can either pull a light vertical line from the helix all the way below and even pass the place where your earlobe will end. Or, place a ruler vertically along the length of the ear, aligning it with the helix and dotting where your earlobe should end.
By the way, did you know that your earlobes never stop growing? Just like your nose, they keep getting larger the older you get!
4. Add The Tragus
Recommended pencil: an H pencil
The tragus is the part of your ear that sticks out in front of your ear canal.
By the way, speaking of ear canals, did you know that you can actually hear the music better with your left ear than with your right? Research shows that your right ear is more attune to speech, while your left has a knack for music.
Back to drawing the ear.
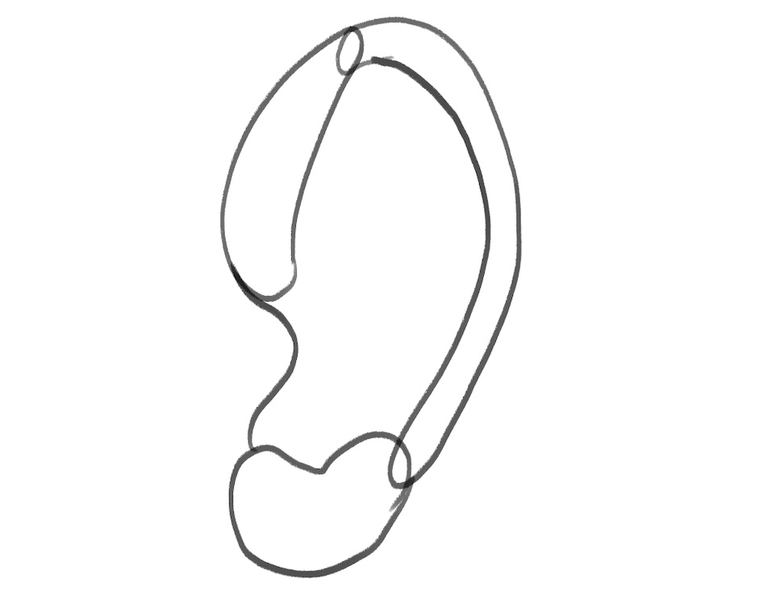
To illustrate the tragus, draw a short, wavy line to connect the helix’s root and the earlobe:
5. Sketch The Inside Of The Ear
Recommended pencil: an H pencil
Now we move inside, specifically to the antihelix and the antitragus.
Antitragus is a fancy name for the small bump across the tragus, and antihelix is a ridge that runs close to the edge of the helix.
You can draw the antitragus first simply by curving a line from where the tragus ends up to the root of the helix.
As for the antihelix, sketch it like a thick, Y-like shape:
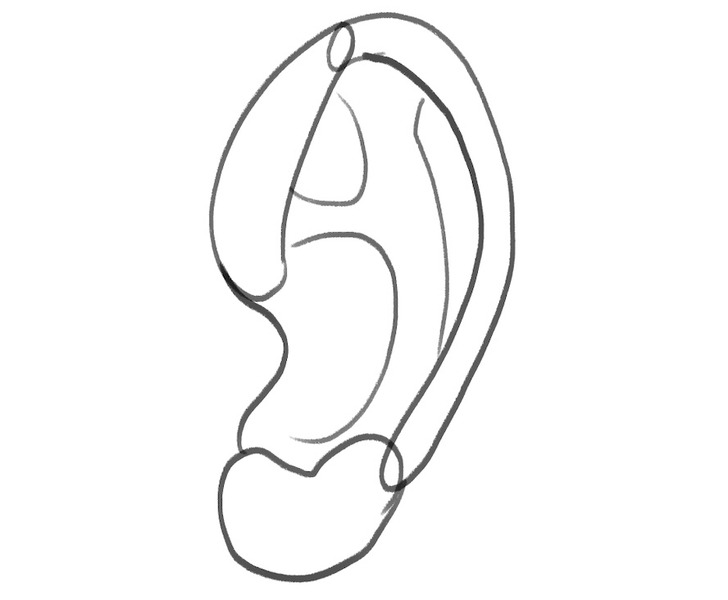
And that’s a wrap on drawing the ear outline!
6. Erase Unnecessary Details
Recommended tool: a kneaded eraser
Now is the time to prepare your drawing for shading.
We’re going to start erasing the superfluous lines.
This step is important because it will make your drawing look more realistic.
That’s why you should erase the tiny line separating the inside of the ear and the root of the helix and the line between the root and the rest of the helix.
Then, get rid of the line between the earlobe and the antihelix because they should almost touch.
Take a look at the image below to see which lines Gonçalo erased:
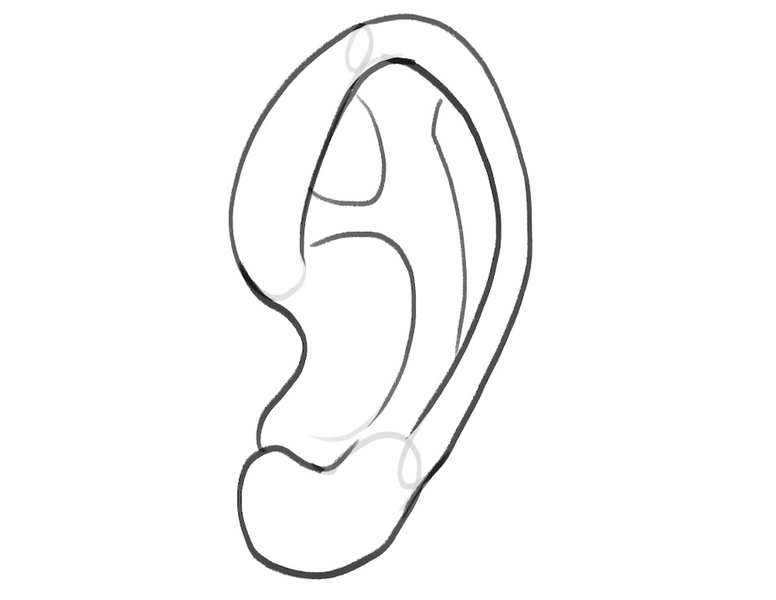
As you can see, he erased all the bits where one line goes over the other.
7. Make The Outline Darker
Recommended pencil: an HB pencil
Once the superfluous details are gone, you can start preparing your ear sketch for shading.
At this point, you can take an HB pencil and use it to make the ear outline darker and more pronounced, like so:
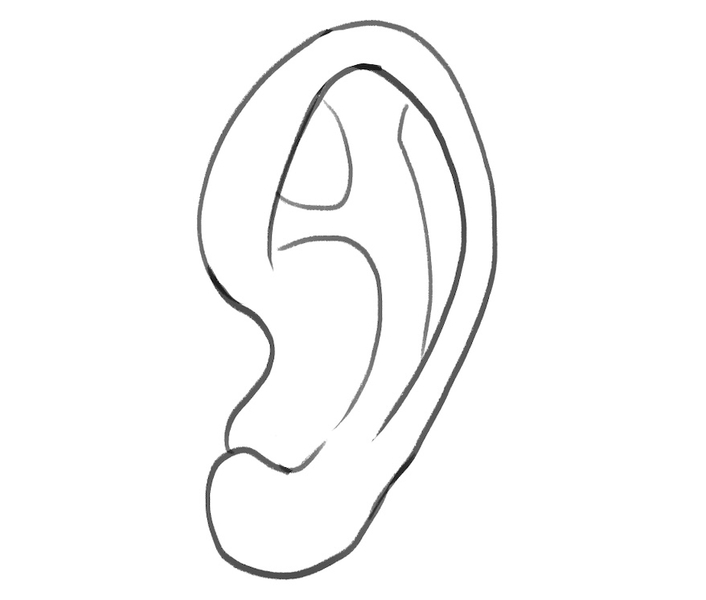
How To Shade Your Ear Drawing
Now that your ear outline is ready, all that’s left to do at this point is to shade your ear illustration.
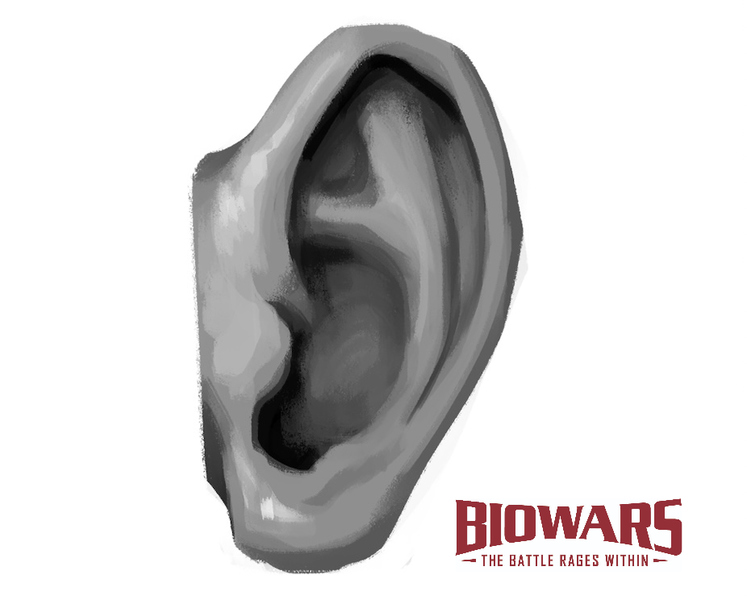
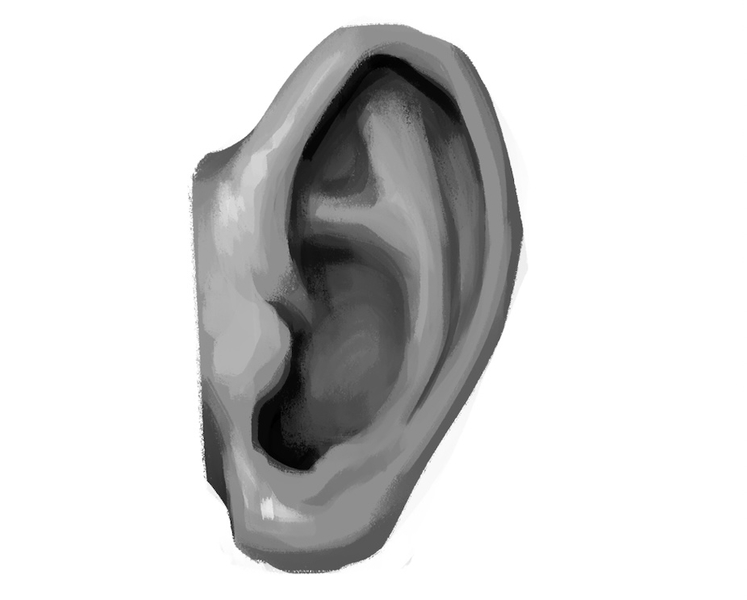
Here is what Gonçalo’s finished drawing looks like after he digitally shaded the outline:
You can achieve equally impressive results with a pencil.
1. Position The Light Source
As always, when shading, the first thing to do is determine the position of the light source.
Gonçalo positioned the light source in front of the ear on the left side, and that’s why the inside of the ear, behind the tragus, and the area below the root of the helix are the darkest.
2. Shade The Inside Of The Ear
Recommended pencil: a 4B pencil
When shading your drawing, we recommend you shade the darkest areas first.
Grab your 4B pencil and shade the area near the ear canal.
This part of your ear sees no light because of the tragus that blocks it, so make sure to apply a lot of pressure on your pencil so as to create almost black strokes.
Use the same pencil to shade around the “Y” shape. The cartilage slightly pops out and shading should make it look that way.
The top of the antihelix is partially covered by the helix, hence it should be darker than the rest of the antihelix.
The further away from the helix you get, the lighter the cartilage should be.
The right side of the antihelix is facing away from the light source, which is why it needs to be darker than the opposite side of the cartilage.
By applying different levels of pressure to your pencil, you can create various levels of shadow intensity, which allows you to add specific levels of depth to your ear drawing.
3. Shade The Outer Rim Of The Ear
Recommended pencil: an HB pencil, a blending stump
The earlobe and the surface of the root of the helix should be the lightest areas of your drawing since they’re exposed to the light source more than other ear bits.
To ensure there are no abrupt transitions from darker to lighter areas, use the HB pencil to add some middle tones to your sketch.
Middle tones will help your drawing appear in 3D and look more realistic!
If some lines still look too sharp, you can soften them by using a blending stump. Alternatively, you can even grab a tissue, pull it tightly over your pointer finger, and go over the sharp lines and the areas that need blending or smudging.
Finished Drawing An Ear? Draw These Next!
Now that you know how to draw an ear, here are more tutorials you’ll like:
Meet The Artist
This guide was created by Goncalo Lopes — a professional comic book artist with years of experience in the industry.
He designed the new look of the BIOWARS characters and is in charge of making beginner-friendly guides that will help you learn how to draw!
Aside from working on BIOWARS, Goncalo has also collaborated on numerous other projects, including Adventure Time, Godzilla, Transformers, GI-Joe and TMNT.
A Recap On How To Draw Ears
Here’s a quick recap of what it takes to draw a realistic ear.
For tools, we recommend:
- An H pencil
- An HB pencil
- A 4B pencil
- A blending stump
- A kneaded eraser
When drawing an ear, start with simple shapes, outlining the helix and tragus first to frame the ear. Then, move inside the frame and add the antihelix and antitragus.
Finally, erase the overlaps, darken the key lines that give the ear its shape, and shade in to give the ear dimension.
