Related Resources
Did you know that there are more than 33,000 fish species described around the world?
Fish come in all colors and sizes, but many beginners struggle to draw their recognizable shape.
We created this guide to show you the tricks to simple fish drawing and help you sketch a lifelike fish in six easy steps!
If illustrations work better for you, keep reading to discover images for every step of the fish body drawing. Feel free to explore them at your own pace!
Sketching Tools For Easy Fish Drawing
Tools you might want to use for your easy, pencil fish drawing include:
- An H pencil: These pencils have a hard lead that leaves a light trace on the paper. That makes H pencils ideal for sketching because you can easily enhance the appearance of lines or erase mistakes in the later stages of fish drawing.
- An HB pencil: We recommend using a medium-hard lead for adding details and softly shading your sketch.
- A 4B pencil: A 4B lead is particularly soft and dark. You can use it to add dark shadows to your drawing and enhance the lines.
- A kneaded eraser: Kneaded erasers are highly malleable and you can tweak them into whatever shape you want, depending on what you need to erase. That’s why we recommend you add them to your arsenal of art supplies.
- Lightly textured sketch paper: This paper’s soft surface is perfect for beginners because your pencil can easily glide over it. Plus, it’s also easier to erase unneeded lines.
Of course, you don’t *have* to use these tools. Feel free to try them out, but use whatever tools you’re comfortable with!
Even the BIOWARS lead comic book artist doesn’t use all of these tools in the video. It’s perfectly fine to stick with just one pencil and whatever paper and eraser you have. All that matters is that you’re comfortable and willing to learn how to draw a fish!

How To Draw A Fish In 6 Steps
To show you how to easily draw a fish, we’ll sketch the base of its body using geometrical shapes.
Step 1. Draw The Base
Recommended tools: H pencil
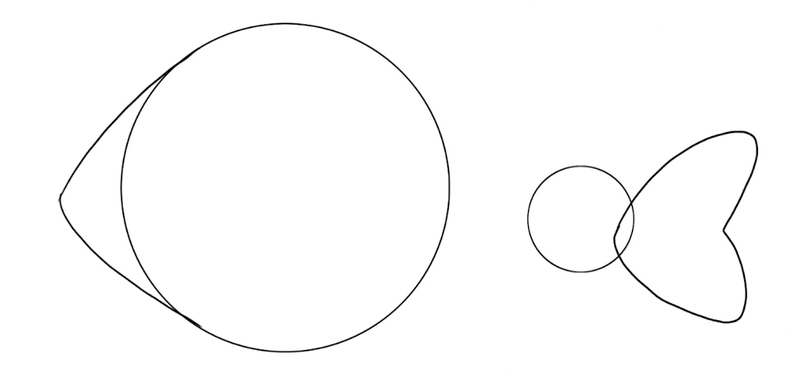
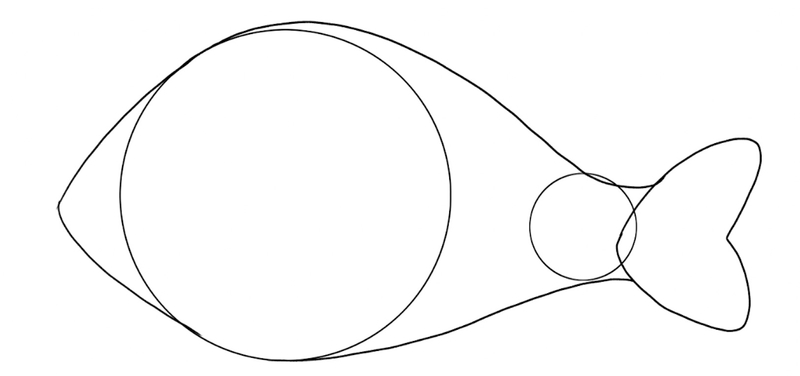
If you’re a beginner, we recommend starting your fish body drawing by sketching a large circle on the paper.
The size, i.e. the width of the fish, depends on how big you draw the circle. This part of the fish’s body is right behind its head, and that’s where its body is the widest.
Don’t place the circle too close to the edges of the paper, because you need to leave room for details later on.

Then, let’s add a small circle to the right. We’ll attach the tail to it in a few steps.
Avoid placing it too far away from the first circle because you don’t want your fish to look disproportional.

Next, let’s add the head and the caudal fin, i.e. the tail.
For the tail, sketch a heart shape and glue it to the small circle you drew in the previous step.
To add the head, sketch a triangle-like shape at the front. Follow the shape of the circle and then extend the lines forward, to form a peak, like so:
All that’s left to do at this stage is to connect the elements to create the recognizable shape of the fish’s body:
Step 2. Draw The Fins
Recommended tool: H pencil
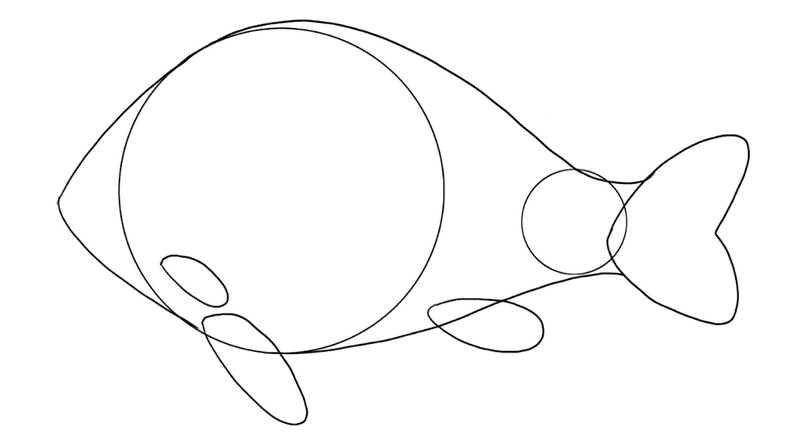
Now’s the time to add the fins — pectoral and pelvic.
The pectoral fin is at the front.
The fish species we’re drawing has two oval-shaped pectoral fins — the larger one is attached to the lower end of the circle at the front and the other is placed slightly above.
As for the pelvic fin, let’s draw a medium-sized oval shape and place it right between the two circles, like this:
Step 3. Draw The Head
Recommended tools: H pencil
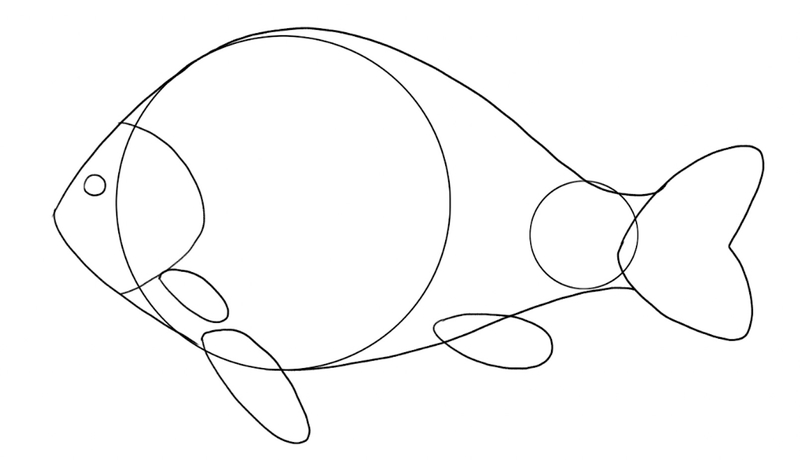
Now’s the time to add an eye to your fish sketch.
Place it slightly above the nostril, i.e. the triangle’s peak.
Then, let’s draw a half-circle for the head.
Draw a line that touches the upper pectoral fin, then curve it upward, like so:
Step 4. Draw The Spiny Dorsal Fin
Recommended tool: H pencil
The fish we’re drawing has a spiny dorsal fin.
To draw it, imagine for a second that there’s a vertical line passing through the large circle.
Start drawing the spikes at the point where this imaginary line touches the fish’s back.
The first spike should be the largest and the remaining three should gradually become smaller, with the last in line barely peaking from the back:
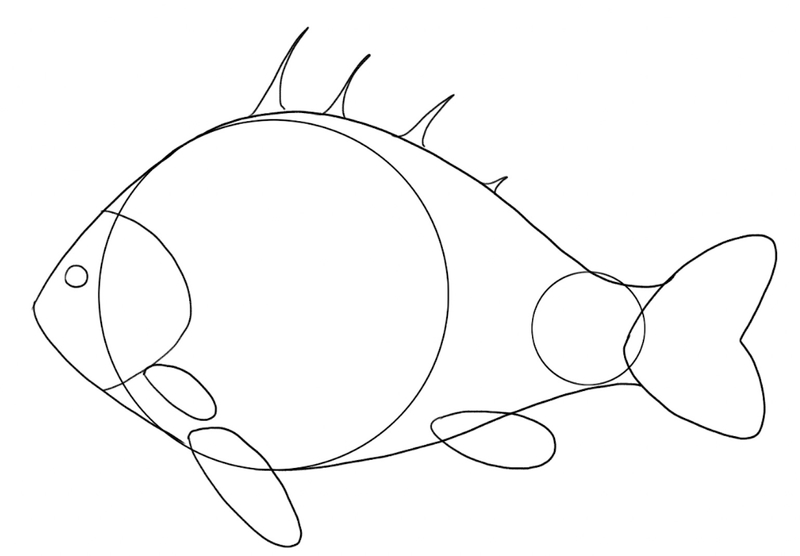
To finish drawing the spiny dorsal fin, connect the spikes with curved lines so that your fish drawing looks like this:
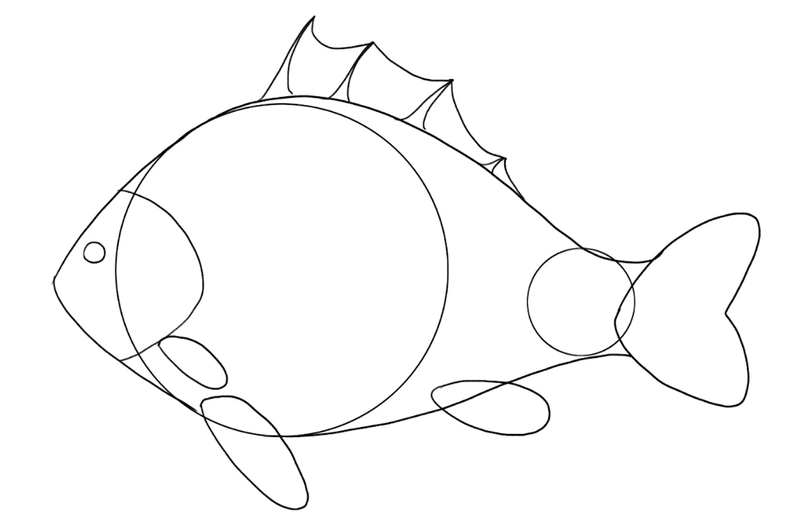
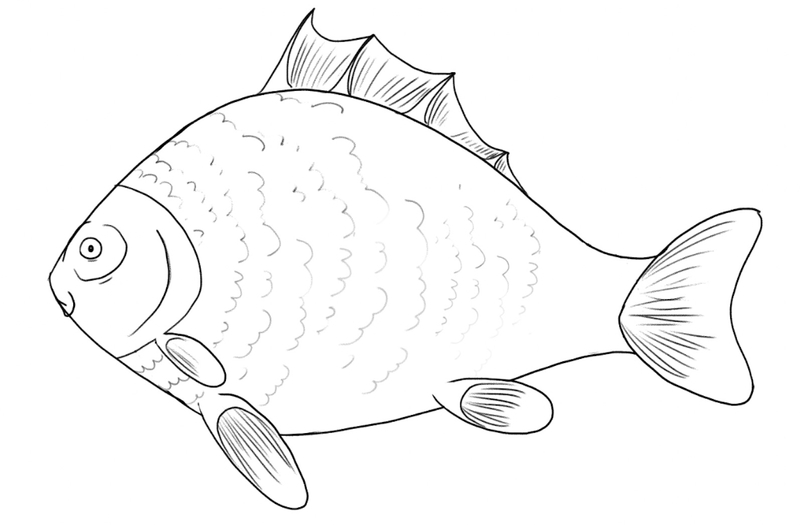
Step 5. Add The Details
Recommended tool: H pencil, kneaded eraser
Since all the basic elements are in place, let’s add the details to bring the fish to life.
For starters, grab your eraser and remove the lines that separate the fins from the rest of the body. Delete the guidelines as well:
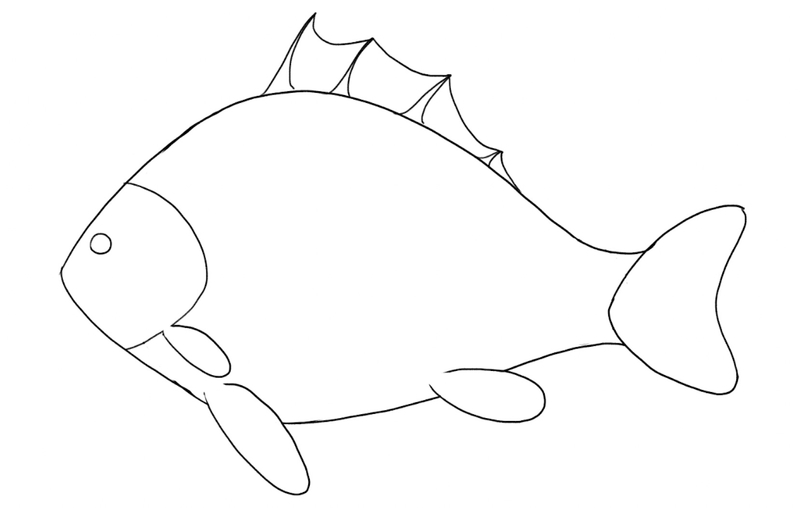
Then, add the tiny, outward-curved lines inside the pectoral and pelvic fins.
Next, let’s add some details to the head.
Draw the mouth by sketching a super small horizontal line below the triangle’s peak at the front. Then, add another J-shaped line right below the mouth.
Let’s add a pupil and two curved lines around the eye; make sure that the lines don’t touch.
Sketch one more line at the back of the head, like this:
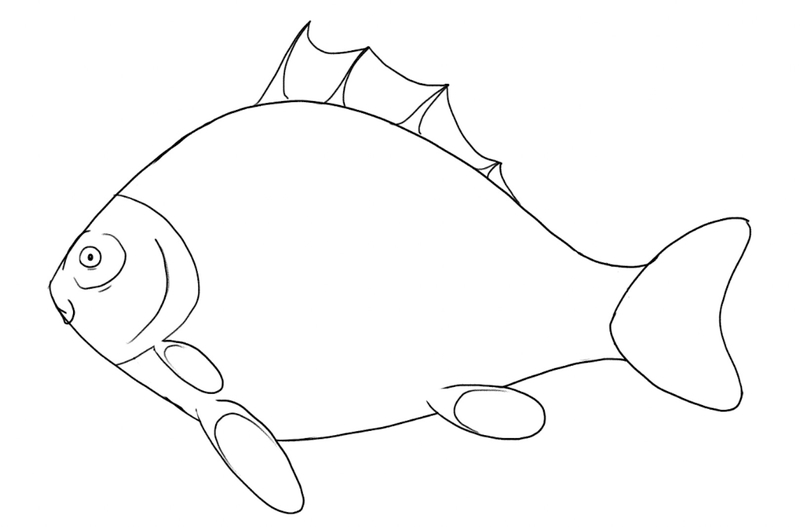
To add texture to the dorsal and caudal fins, draw short lines that follow the fins’ shape, like so:
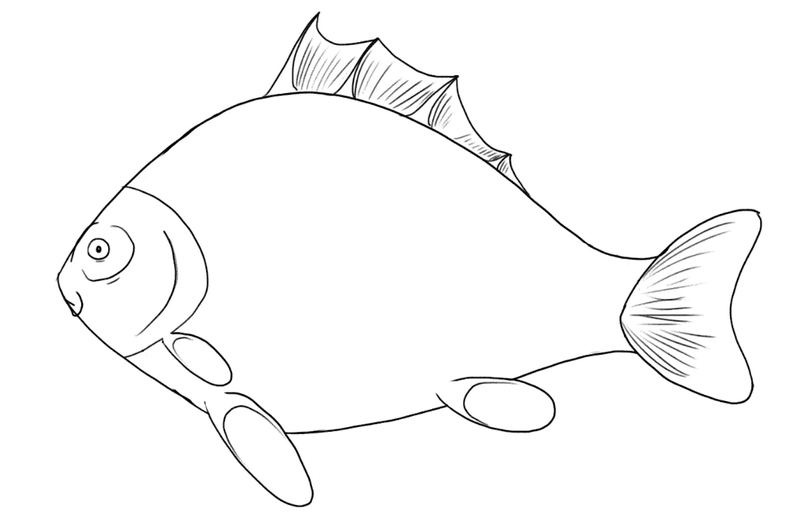
Add the same lines inside the other fins and then start sketching the scales.
The gills are quite simple to draw; all you have to do is sketch vertical wavy lines across the fish’s body. Just make sure that the lines follow the body’s shape, like this:
Step 6. Shade Your Fish Drawing
Recommended tools: HB and 4B pencils, kneaded eraser
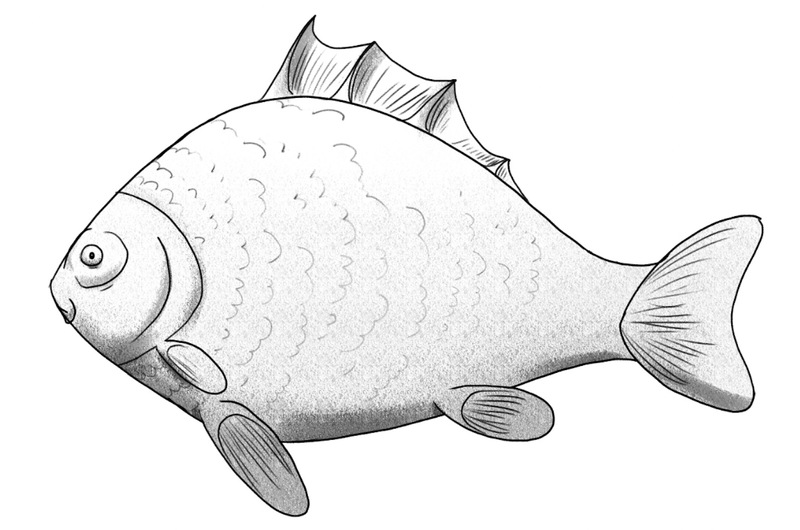
To finalize your fish drawing, let’s shade it!
Start with your HB pencil (or apply different levels of pressure to your pencil of choice to create various shades of grey).
Go over the entire fish’s body to softly shade it.
Then, shade the belly in a darker hue with a 4B pencil.
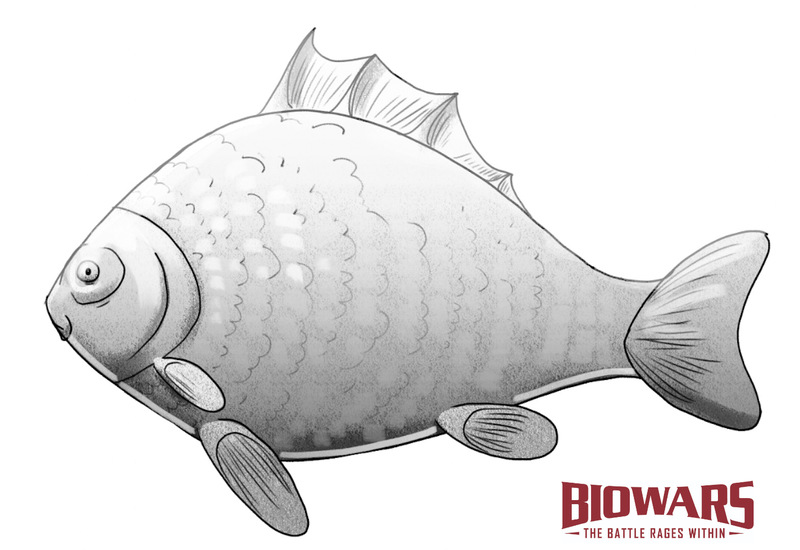
We imagine that the source of light is on the left, so we added a darker shadow on the pectoral and pelvic fins, and some on the head and the spiny dorsal fin:
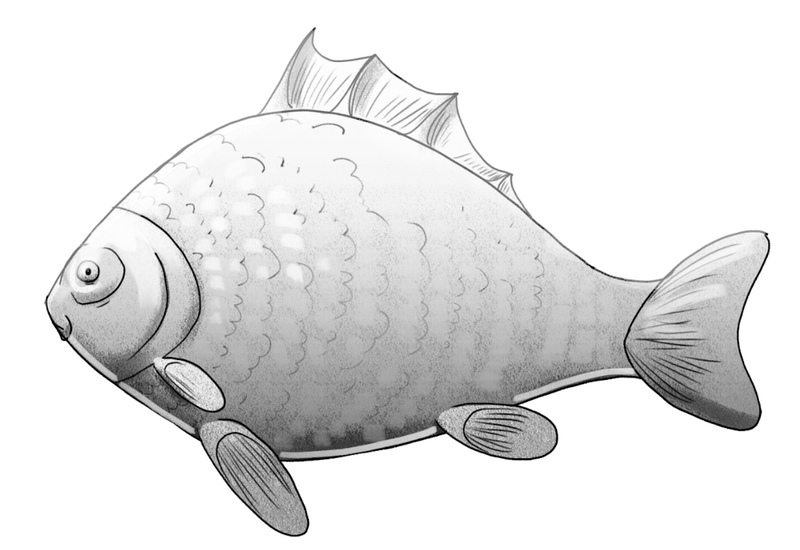
After you shade your drawing, you can use your eraser to make the scales behind the head lighter than the rest, like so:
Finished Your Fish Drawing? Try These Next!
Did you enjoy learning how to draw fish? Keep your creative juices flowing and turn to the next page in your sketchbook!
We have a bunch of other tutorials ready for you, so you can continue to practice and perfect your drawing skills!
Discover how to draw some of the most popular animals, including:
- How to draw a penguin
- How to draw a bat
- How to draw a panda
- How to draw a wolf
- How to draw a horse
- How to draw a cat
- How to draw a dog
We have a lot more how-to’s in store, and you’ll find them all on our blog and YouTube channel!
Meet The Artist
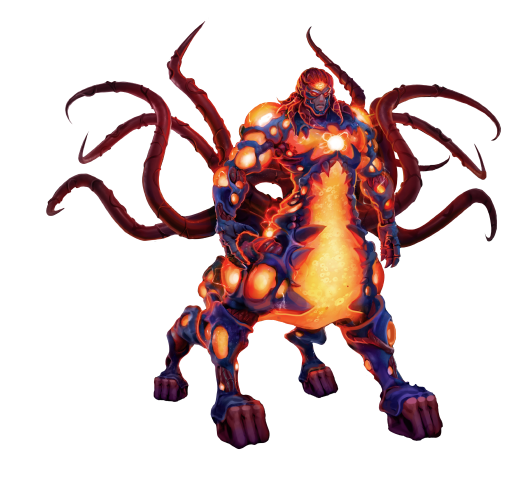
This step-by-step tutorial was created by Goncalo Lopes — a professional artist who’s participated in many large-scale projects, including Transformers, GI-Joe, TMNT, Adventure Time, Godzilla and many others.
Goncalo is also the lead BIOWARS artist and he created the look and feel of all the BIOWARRIORS and the menacing viruses and bacteria!

A Recap On How To Draw A Fish
To draw a fish, you need:
- A pencil
- A piece of textured paper
- An eraser
- Some patience
- And a good guide
The last step is particularly important when you’re a beginner!
The important thing is that you don’t rush into outlining the fish.
Instead, work on your fish drawing in steps and:
- Use circles to form the base of the fish’s body
- Add the fins
- Draw the head
- Add more fins if you wish (like the spiny dorsal fin!)
- Add details to the drawing
- Shade the fish

