Related Resources
Did you know that the Tyrannosaurus Rex was the most dangerous dinosaur?
The intelligent carnivore had the strongest biting force of all, which allowed him to crush other animals’ bones as if they were made of paper.
Dinosaurs went extinct about 65 million years ago, but these rawrsome animals continue to fascinate and inspire artists to this day.
If you’re thinking of adding a fearsome dinosaur to your comic book or a sketch, this article will serve as the trusty guide you need for easy dinosaur drawing.
We’ll provide clear instructions and expert advice to help you capture the essence of the most famous dinosaur of all — the legendary T. rex!
So, grab your sketchbook and let’s travel back millions of years to a time when dinosaurs ruled the Earth.
Sketching Tools For Dinosaur Drawing
The tools we recommend you use for dinosaur drawing include:
- An H pencil: Using an H pencil and its hard lead, you can create light and precise lines, which are ideal for the outlining stage.
- An HB pencil: HB pencils are somewhere in between H and B pencils in terms of hardness and darkness. The lines you can produce with an HB pencil are not too light or too dark, and we recommend using them for detailing and soft shading.
- A 4B pencil: 4B pencils have the softest and darkest graphite core of the three and you can use them to add deep tones to your T.rex artwork.
- A blending stump: Blending stumps are tools that you can use to smooth out harsh lines and ease transitions between different shades of grey when shading.
- A kneaded eraser: Unlike traditional erasers, kneaded erasers are highly malleable and can be molded into different shapes and sizes. Since you can easily manipulate them, they allow you to precisely erase small details or add highlights to your sketch.
- Lightly sketched paper: The smooth surface of this paper ensures your pencil easily glides over it, making the drawing experience more enjoyable.
You can grab all of these tools, or simply use your favorite pencils to start drawing a dinosaur!
How To Draw A Dinosaur In 5 Steps
The easiest way to draw a dinosaur (or any other animal) is to do it step-by-step.
That way, you’ll avoid messing up the proportions and the dinosaur’s form.
So, let’s start from the basics.
1. Draw The Base Of The Dinosaur’s Body
Recommended tool: H pencil
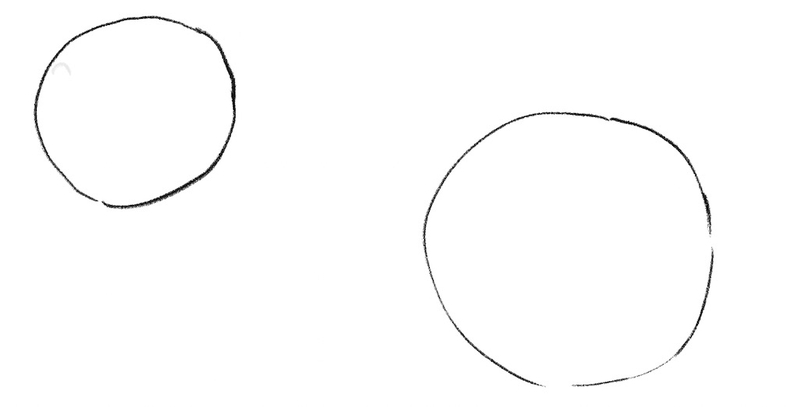
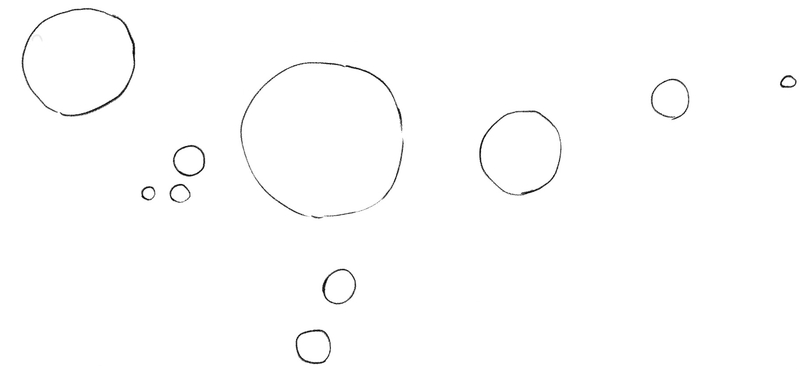
The first thing we’ll draw are two circles.
They will be the base of the drawing, with the smaller circle on the left representing the dinosaur’s head and the larger circle on the right representing its belly.
Make sure to leave enough space on the right side of the paper because we’ll add the tail later:
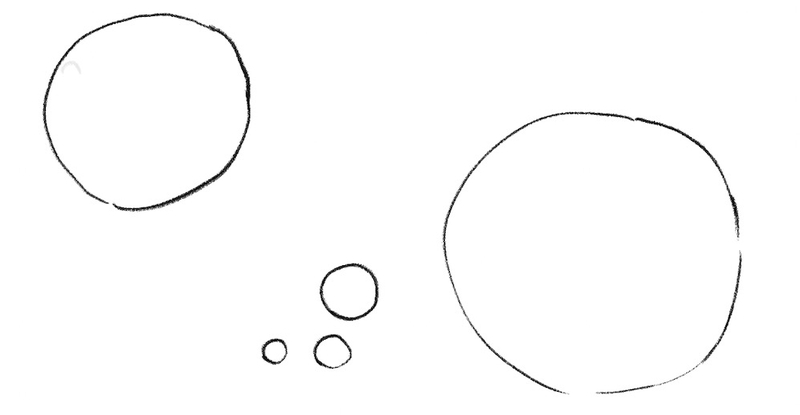
Next, we’ll draw the base for the hand (yep, T.rex’s iconic short hand).
From this angle, we can see only the left hand.
To sketch the base for it, draw three small circles and place them closer to the larger circle on the right, like so:
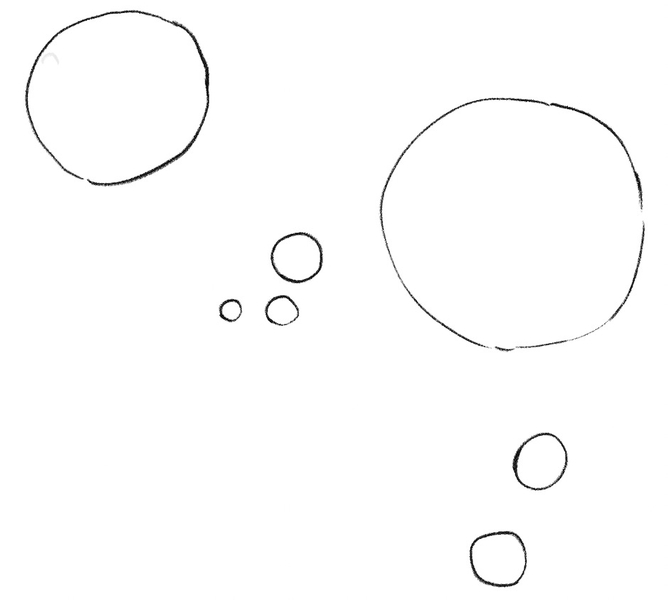
Now, it’s time to give this T.rex something to stand on.
For the legs, we’ll continue to sketch circles. We’ll need just two, diagonally placed like this:
Despite its gigantic size, the T.rex was super fast thanks to its tail.
To draw its strong tail, we’ll stick to geometry a bit more and use circles once again.
We need only three circles, but make sure that they gradually become smaller the further away from the dinosaur’s body they are:
2. Add Details To The Head And Define The Dinosaur’s Shape
Recommended tool: H pencil
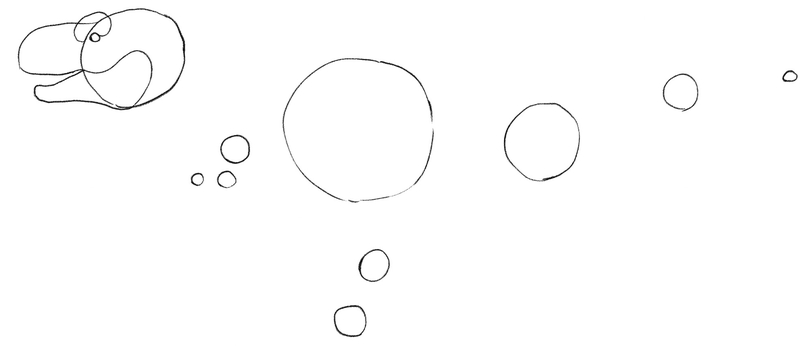
Right now, we want to add some details to the dino’s head.
We’ll use curved lines to draw the mouth and a tiny circle for the eye, like so:
3. Connect The Shapes
Recommended tool: H pencil
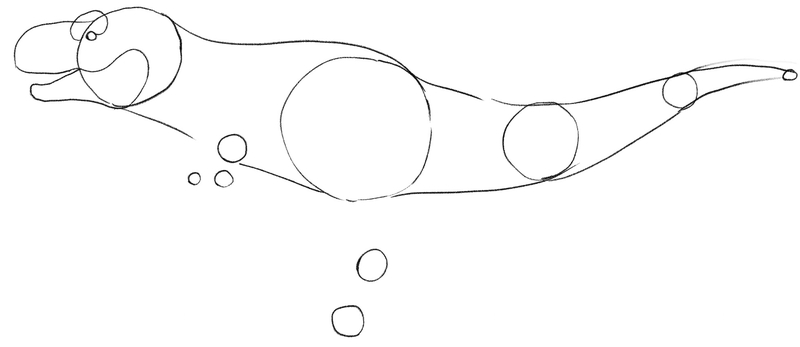
With all the circles in place, you have, by now, defined the size of the dinosaur’s body.
Now, it’s time to connect the head to the rest of the body using thin lines, just like this:
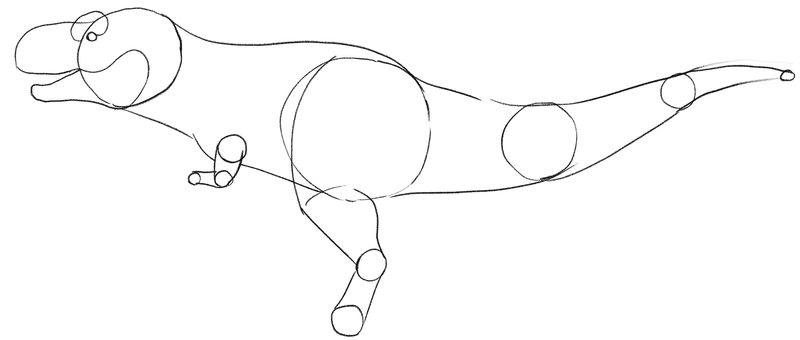
Next, let’s do the same for the T.rex’s arm and leg:
Once the hand and the leg are in place, let’s add fingers and toes to the sketch.
Dinosaurs are known for their curled-up hands and the T.rex, in particular, has a small one.
So, when drawing fingers and toes, keep them short and make sure to add claws:
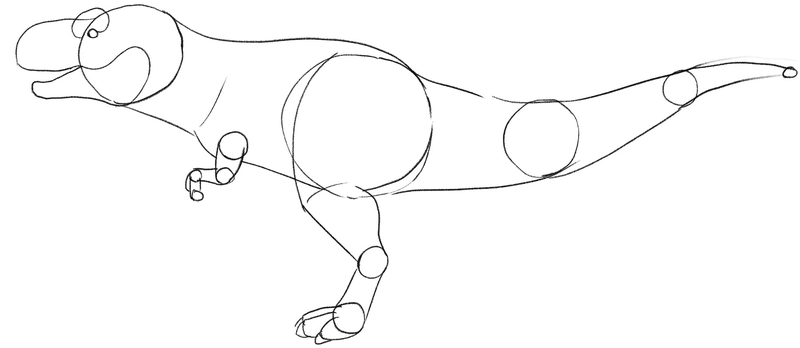
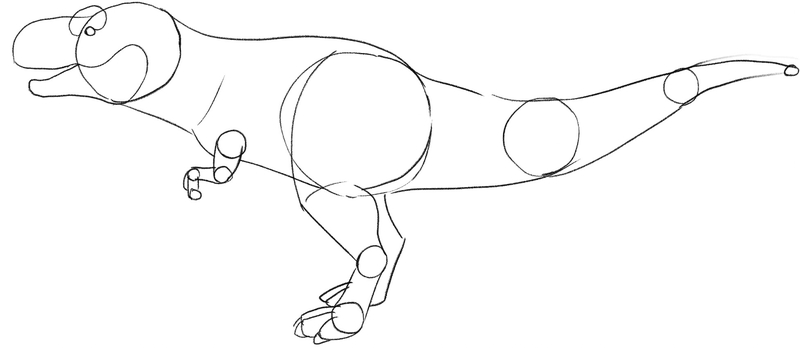
Now it’s time to draw the dinosaur’s other leg.
Sure, we can’t see much of it, but we can’t leave the poor guy standing on one leg only.
All you have to do is follow the shape of the leg we drew earlier:
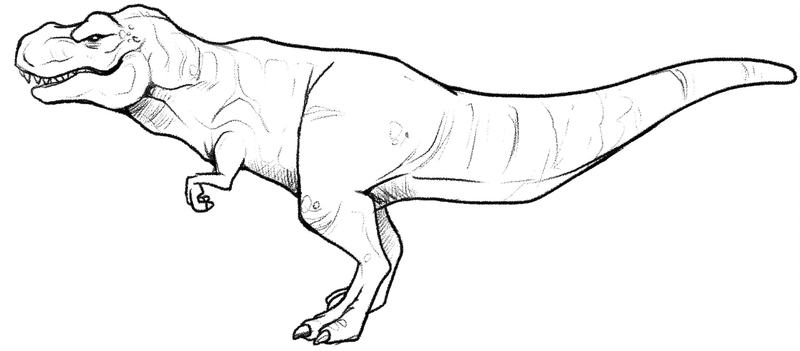
4. Enhance The Lines And Add The Details
Recommended tools: HB pencil, kneaded eraser
Once the outline is complete, it’s time to enhance the lines and start adding details to the sketch.
Let’s start from the head.
You don’t have to make it as smooth as the outline is; instead, add a few bumps here and there, like in front of the eye, above it and at the top of the head.
When it comes to eye shape, dinosaurs had a wide variety, but we’re drawing narrow, elliptical eyes on this guy:
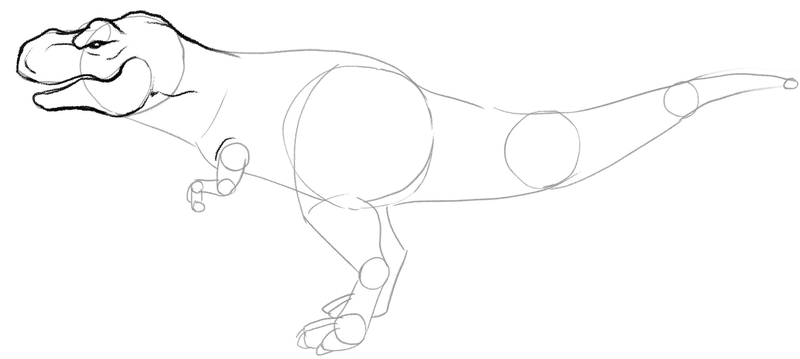
Continue to go over the lines and make them pop out more. Be careful to avoid the guidelines on the inside since we’ll remove them soon.
Now’s also the time to give our T.rex teeth.
To draw them, sketch small triangular shapes:
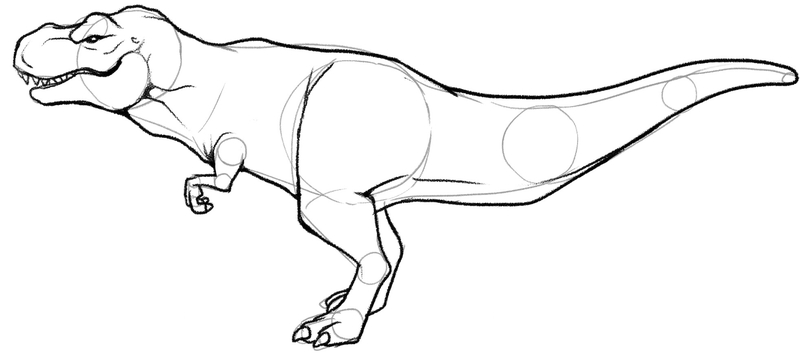
Before we start adding more details, let’s erase the guidelines that no longer serve us.
Remove the circles carefully since you don’t want to mess up the outline.
Then, use the HB pencil (or apply more pressure to your preferred artistic weapon of choice) and add vertical lines along the dino’s body.
Next, it’s time to prepare the sketch for shading.
Before we start adding soft grey hues, let’s scatter short, thin, closely-nit lines along the dinosaur’s neck, belly and its right leg (these are the parts that are in the shade):
5. Shade Your Dinosaur Drawing
Recommended tools: HB and 4B pencils, blending stump, kneaded eraser
The final stage of learning how to draw a dinosaur is to shade it.
We’re not aiming to create a realistic sketch; instead, we want to draw a dinosaur you can use for your comic book, so we won’t overcomplicate it with shading.
For starters, let’s add more lighter grey shades along the dino’s chest, belly and tail.
Then, you can use the 4B pencil to add darker grey tones under the T.rex’s body, to give him a ground to stand on:
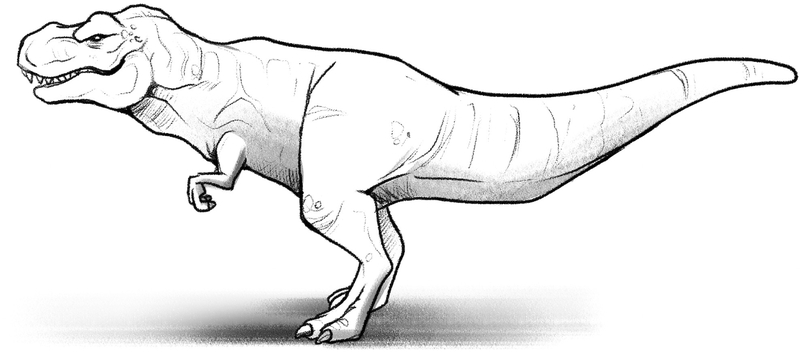
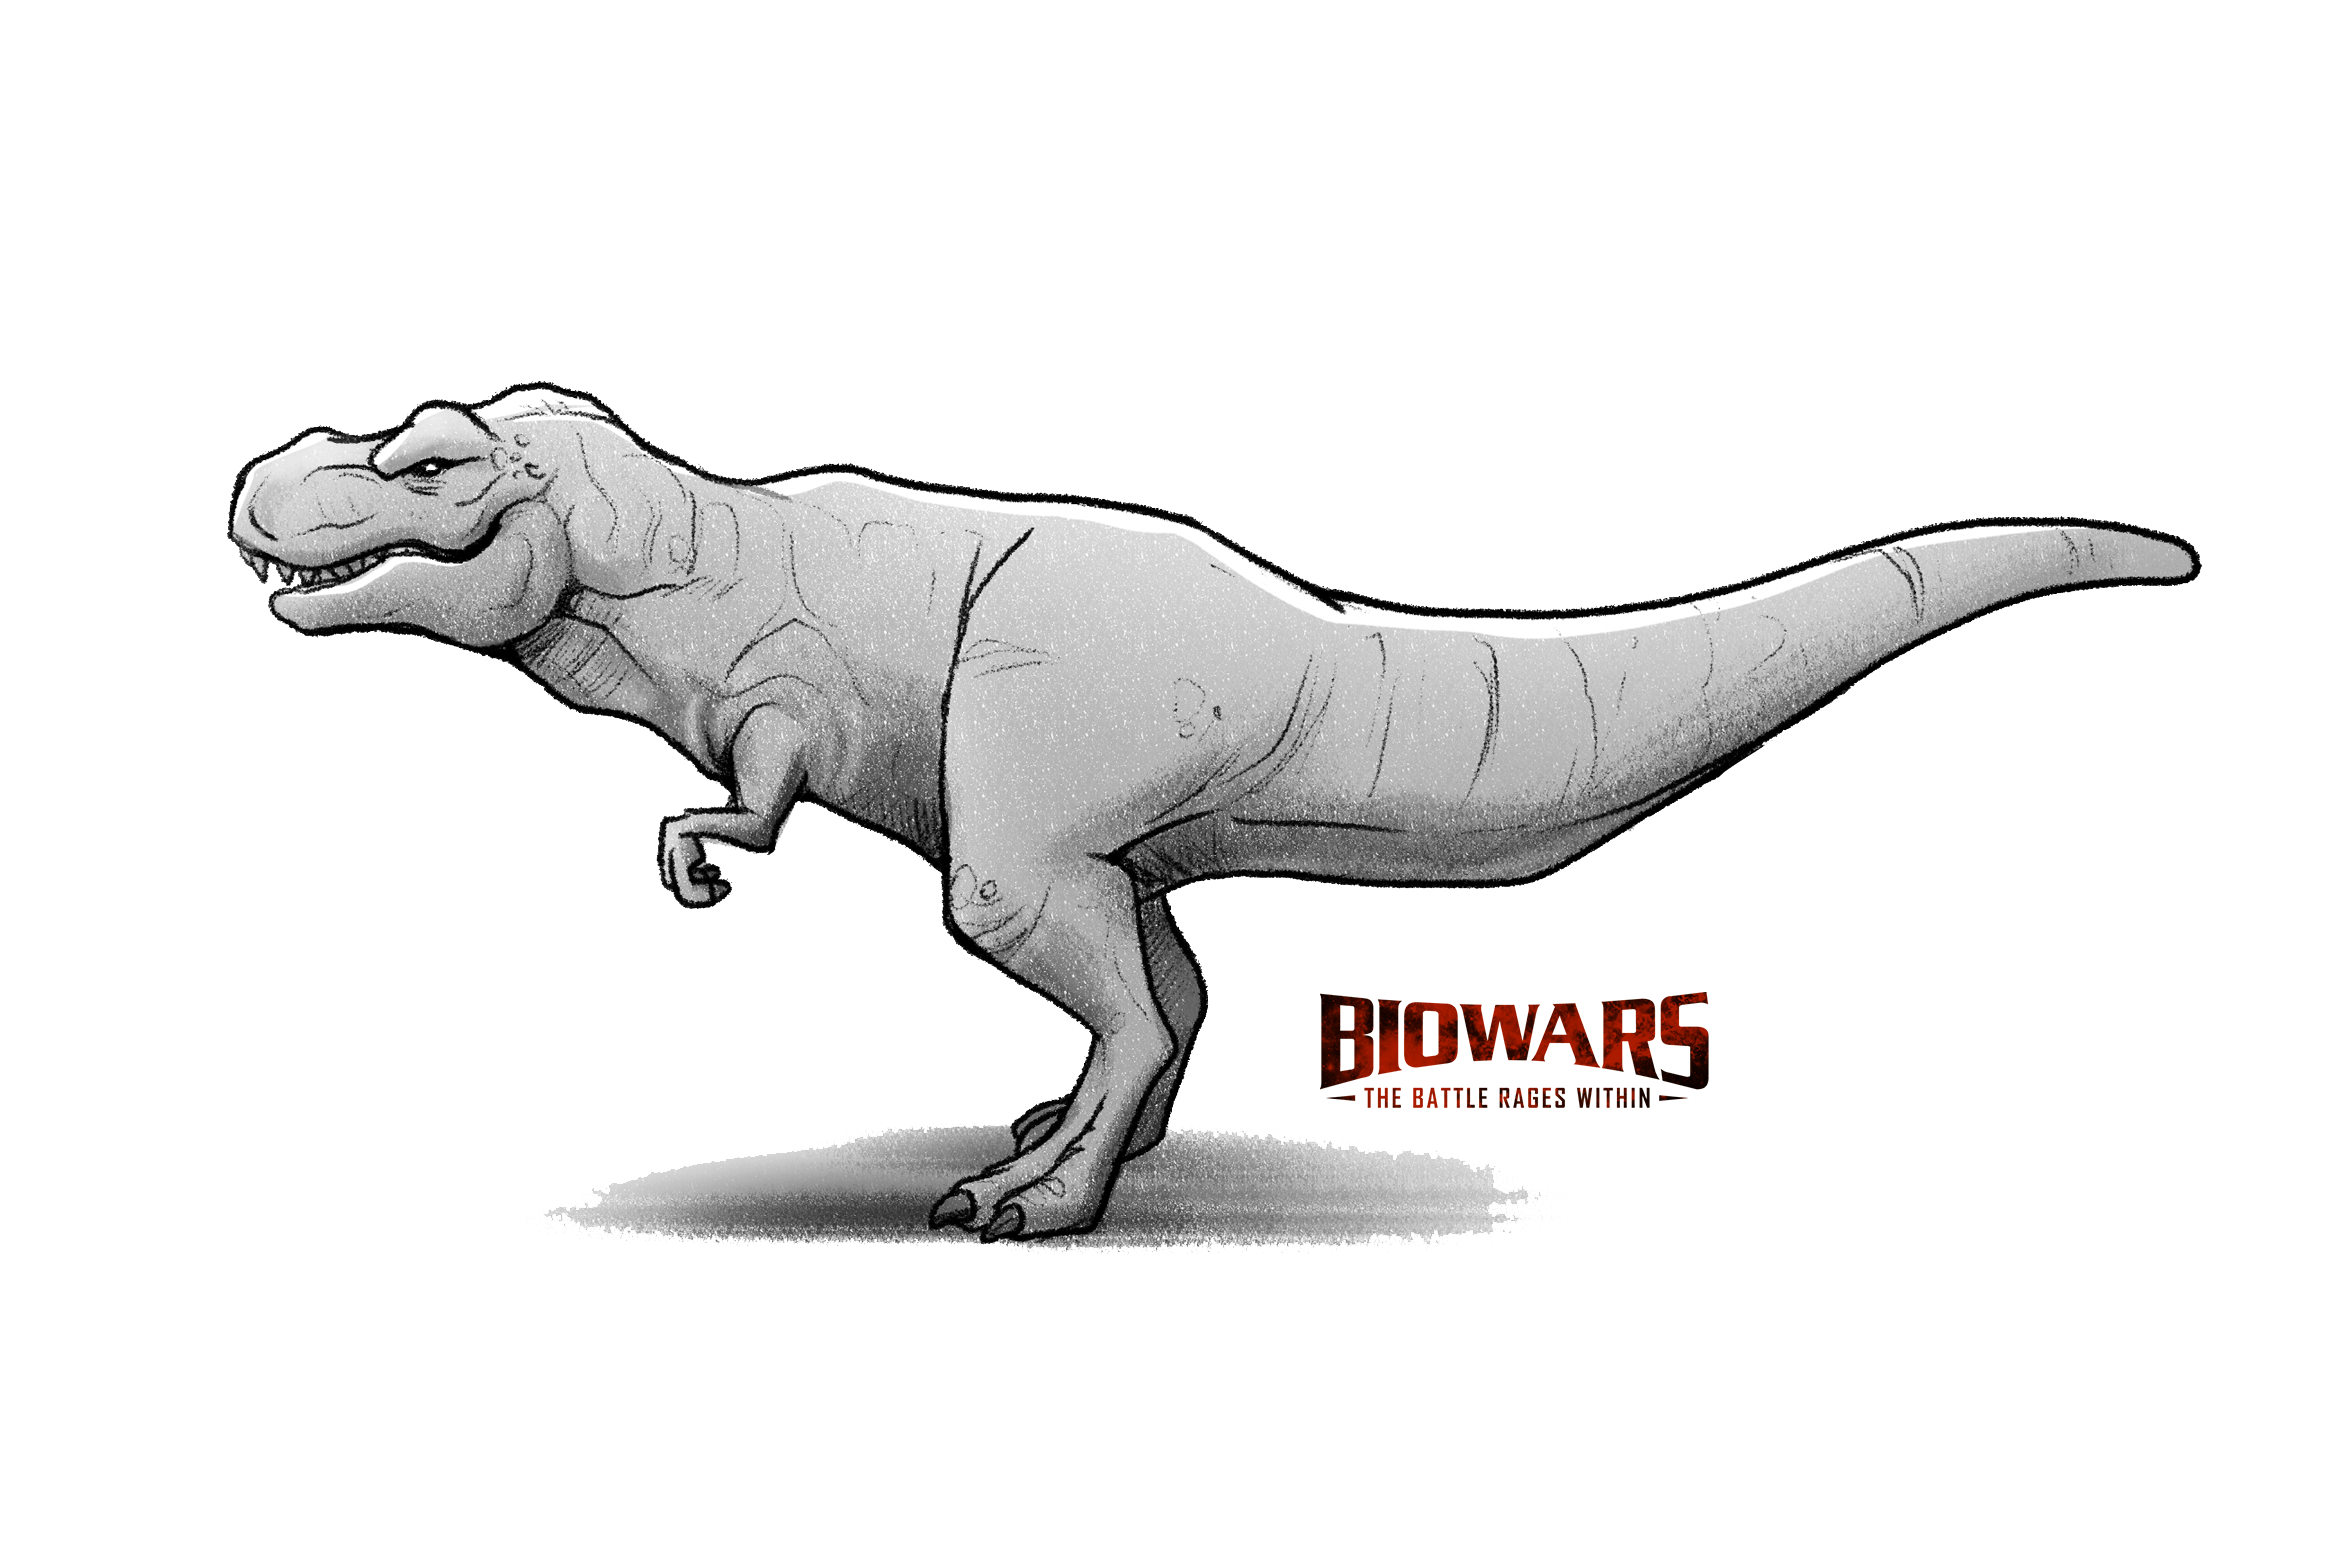
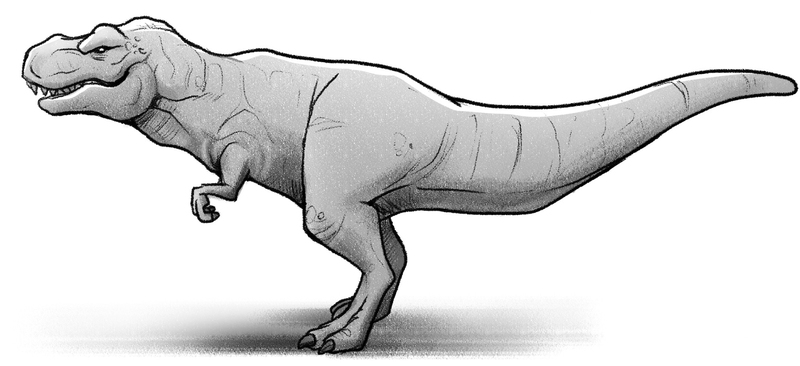
To finish shading your drawing, you can simply color the entire dinosaur in a single shade of grey. Make sure though that the bottom of the dino’s body is darker than the rest of it.
You can use a blending stump to blend all the greys together so there are no abrupt transitions from darker to lighter parts.
Oh, and you can also use a kneaded eraser to add lighter tones along the dino’s back, like this:


Finished Your T.Rex Drawing? Try These Next!
If you’ve mastered the skill of dinosaur drawing, why stop now?
We encourage you to keep practicing how to draw animals and explore these guides:
- How to draw a horse
- How to draw a cat
- How to draw a dog
- How to draw a penguin
- How to draw a deer
- How to draw a fish
- How to draw a bat
- How to draw a wolf
Feel free to explore all of our beginner-friendly art guides and learn how to draw landscapes, people, anime and much more!
We also invite you to head over to our YouTube channel and watch our step-by-step video guides.
Meet The Artist
This tutorial was created by Goncalo Lopes — the lead BIOWARS artist who has worked on many films, TV series, comic books and games.
Some of the projects he participated in may sound familiar, such as Godzilla, Transformers, GI-Joe, TMNT and Adventure Time.
So, trust us when we say this — you’re in good hands!
Goncalo knows what he’s doing and he’s here to help you learn how to draw with ease!
A Recap On How To Draw A Dinosaur
The easiest and fastest way to learn how to draw a dinosaur is to use circles in the early stages of drawing to define the size of dino’s body.
Then, you just have to connect the circles into a cohesive whole and slowly start adding details to the head and the rest of the T.rex’s body to give him more depth.
Finally, as for shading, you don’t have to go too wild when adding grey hues to the drawing. Just a few tones will suffice to bring your sketch to life.

