Related Resources
Did you know that deserts cover one-fifth of the Earth’s surface?
These hot terrains get very little rain, but there are still some plants that can grow in such a dry environment, such as cacti. As for animals, camels, scorpions and snakes are among the species that don’t mind the desert’s scorching heat.
Whether you want to learn how to draw a desert for your comic book or just for fun, this guide is for you!
Our resident BIOWARS comic book artist will show you the steps to simple desert drawing, so even if you’re a beginner, you’ll be able to easily follow this four-step tutorial:
The Tools You Need For Desert Drawing
Here are the tools you can use for your desert drawing:
- An H pencil: These pencils have a hard lead which leaves behind light lines — this is just what you want when outlining! Plus, you can easily erase mistakes!
- An HB pencil: This type of pencil has a medium-hard lead, so it leaves a moderately dark trace. An HB pencil is a great choice when adding light shading to your sketch.
- A B pencil: The softest lead of the three, this pencil is the best pick for shading your drawing.
- A blending stump: We recommend getting a blending stump to make blending easier. This tool allows you to create soft transitions from lighter to darker areas and vice versa.
- A kneaded eraser: Kneaded erasers are elastic, so you can change their shape and size depending on what you want to erase. You can also use them to highlight parts of your drawing.
- Lightly sketched paper: The smooth surface of this paper ensures that your pencil glides easily over it. It’s also easier to erase lines when the paper isn’t heavily textured.
You can grab all of the tools above, or simply pick up your favorite pencil and eraser and start drawing a desert!
How To Draw A Desert In 4 Steps
When learning how to draw a desert, it’s best to sketch it in parts.
That way, it’ll be easier to get the proportions right and modify the parts that need changing later on.
Step 1. Outline The Top Of The Desert
Recommended tool: H pencil
The first step to desert drawing is to sketch the line that separates the sky and the sand.
Grab your H pencil (or your pencil of choice) and a piece of paper, and sketch a straight horizontal line connecting the left side of the paper to the right.
Place it close to the top edge of the paper, because you need a lot of room below to draw the rest of the desert. Make sure to leave some room above this line as well because we’ll add some dunes here later:

Step 2. Sketch The Dunes
Recommended tool: H pencil
When you determine where the top of the desert will be, let’s split the section between the horizontal line and the bottom of the paper with a wavy line.
You can draw a soft wave — no need to go wild here.
Again, make sure that there’s room between the bottom of the paper and the line you add:

Next, let’s add some curved lines in the space between the straight and the wavy line.
We’re doing this to depict the dips and peaks of the sandy terrain.
You can draw a smaller curved line on the left side of your drawing.
Then, sketch two curved lines (one longer and the other shorter) and have them touch the long horizontal line, like this:

Now, let’s form some dune peaks.
First, draw two short lines starting from the wavy horizontal line and point them upward.
Then, add a straight-ish line in the right corner of the desert to separate the straight horizontal line and the small curved one:

Next, it’s time to form some dune peaks.
For starters, let’s draw a pyramid-like shape on the left-hand side of the paper.
Sketch a slightly curved line and have it touch that large curved line you drew earlier.
Have the line end just above the long, straight horizontal line. That’s where the dune’s peak will be.
Then, you can attach a U-shaped line to the peak to form a pyramid, like this:

Next, draw the exact same pyramid shape and attach it to the one you just added, like so:

Keep adding the pyramid shapes of various sizes above that long, straight horizontal line you drew first; make sure to attach the shapes to one another, like this:
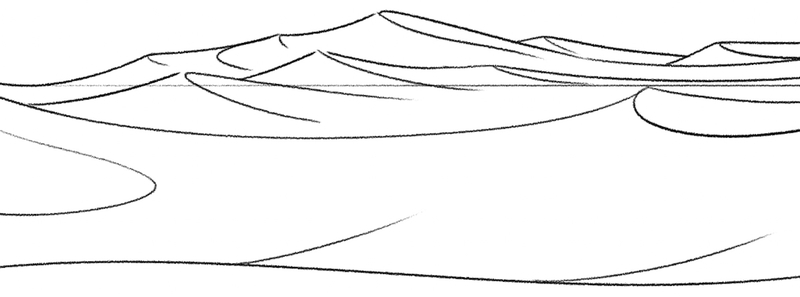
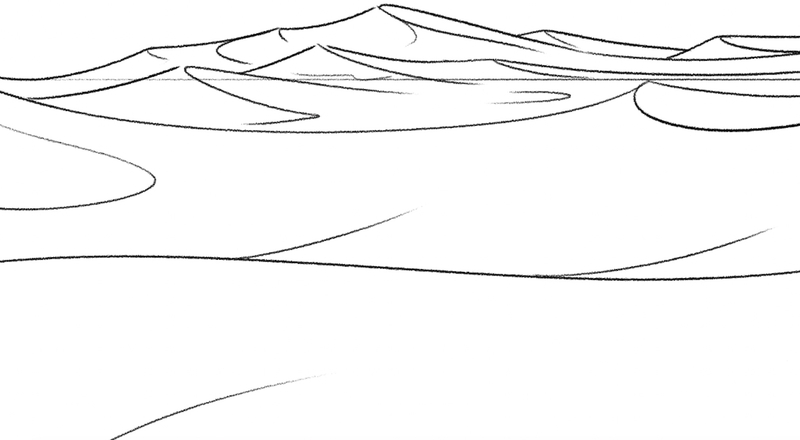
To finish drawing the desert outline, you can add curved lines here and there across the dunes, to add more dimension to them.
Then, sketch a short, angled line near the bottom of the paper:
Step 3. Draw The Cacti
Recommended tool: H pencil
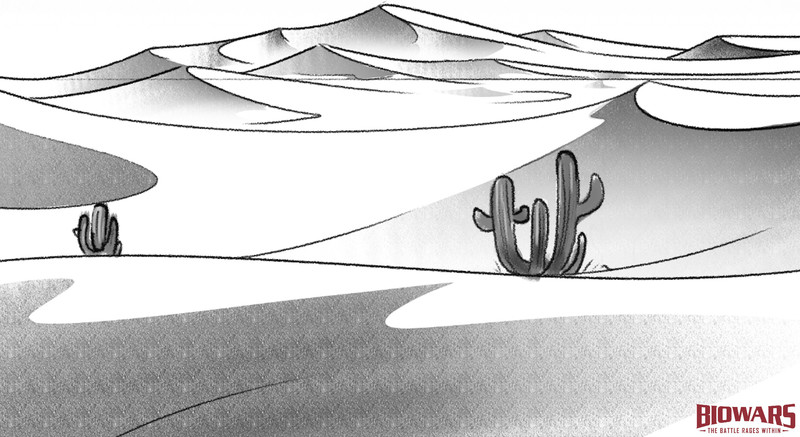
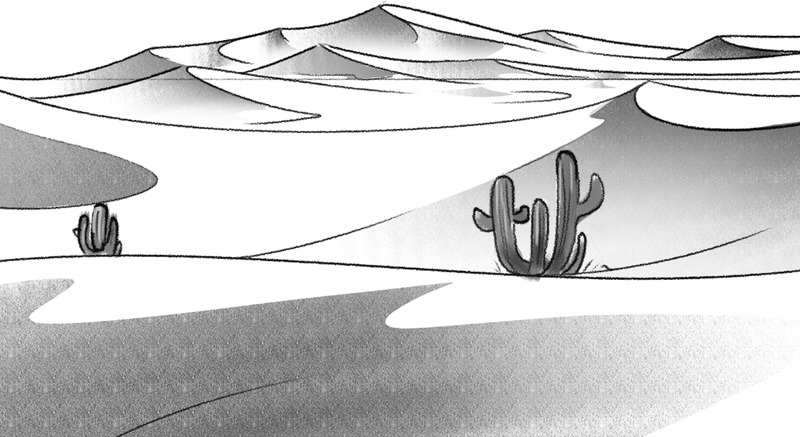
You can leave your desert drawing like this and that would be perfectly fine.
But we’d like to enrich the sketch with some details, like a simple cactus or two.
You can draw them as big and rich as you want.
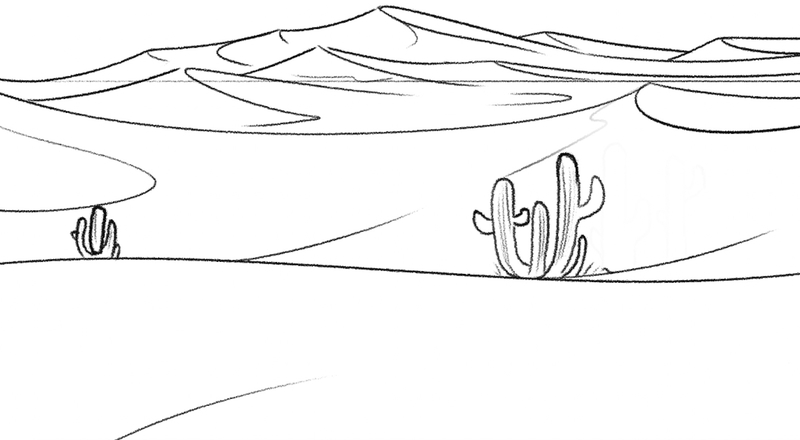
If you’re drawing them in the distance, you don’t even have to bother adding the stems; instead, you can simply sketch 2D “W” shapes, as we did on the left side of the desert.
We added a larger cactus with more stems on the right side of the drawing.
This cactus looks like a combination of several 2D lowercase “t’s,” like this:
Step 4. Shade Your Desert Drawing
Recommended tools: HB and B pencils, blending stump, kneaded eraser
Now that we added the details we wanted, it’s time to shade the desert!
We’ll combine two pencils — HB and B — because we want to combine several shades of grey to shade the dunes. (You can also use just one pencil and apply different levels of pressure to it when shading)
Before you start shading, it’s important to decide on the position of the Sun.
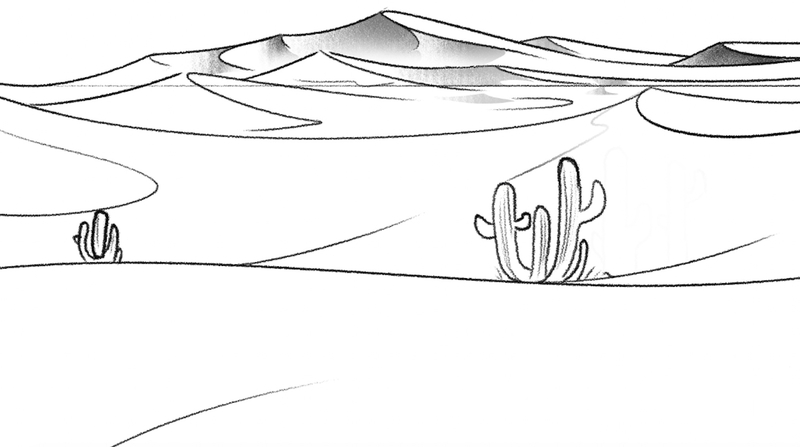
We placed ours high on the right, which means that we’ll add darker tones to the left side of the dunes.
You can start by adding a soft grey color to the edges of the dunes.
We’re coloring the left and front parts, like this:
Next, you can use a 4B pencil to color the cacti in a dark grey hue, like so:
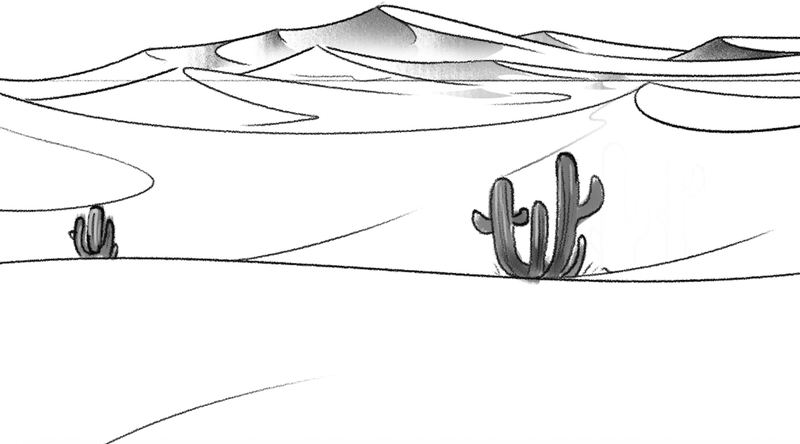
Keep shading the desert until you color the dunes in a combination of darker and lighter shades of grey.
Of course, the parts of the desert that are directly under the sun should be the brightest.
You can use a blending stump to ensure that there are no sharp color transitions. If you don’t have a blending stump, feel free to blend the colors with your fingers!
And if you wish to highlight some parts of your drawing, use your kneaded eraser!
Finished Your Desert Drawing? Try these Next!
Want to keep those creative juices flowing? Give these tutorials a try:
- How to draw mushrooms
- How to draw a horse
- How to draw a wolf
- How to draw a cat
- How to draw a dog
- How to draw a panda
We encourage you to explore the BIOWARS’ vast collection of beginner-friendly tutorials and use them to improve your drawing skills!
Meet The Artist
The resident BIOWARS artist is Goncalo Lopes — a talented creative from Portugal who has experience in animation, film, games, and, of course, comics.
Aside from creating beginner-friendly how-to-draw tutorials, Goncalo also works with some pretty big industry names.
Some of the projects he has participated in include Transformers, GI-Joe, TMNT, Adventure Time, Godzilla and many others!
A Recap On Desert Drawing
To master the steps to easy desert drawing, it’s important to start small and draw one dune at a time.
Combine curved and wavy lines of different sizes to outline the sandy terrain; then, slowly form the pyramid shapes to sketch the dunes and connect them to one another.
You can also sketch cacti to enrich your drawing, and draw the sun in the sky.
