Related Resources
Did you know that the tradition of bringing an entire Christmas tree into a home and decorating it originated in Germany in the 16th century?
The Germans decorated their Christmas trees with apples back then, but today, you can choose between baubles and ornaments of various shapes, sizes and colors.
With the holidays fast approaching, it’s time to get into the festive mood and we have a real treat for you!
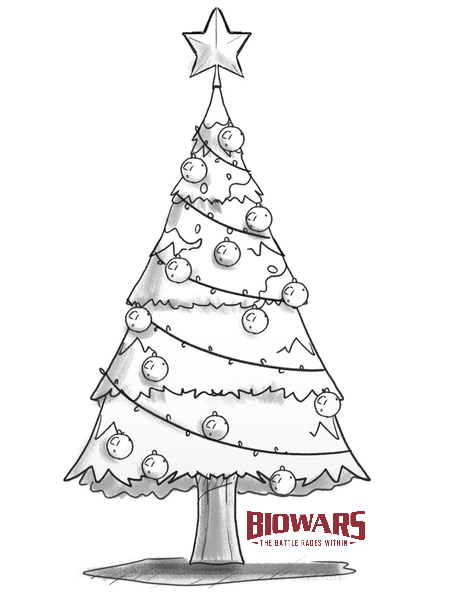
We prepared a simple guide on Christmas tree drawing to help you easily create your own evergreen symbol and add it to your comic book or sketch:
The Tools You Need When Learning How To Draw A Christmas Tree
Before you start learning how to draw a Christmas tree, you’ll need the right tools for the job.
We recommend getting your hands on these:
- An H pencil: “H” stands for “hard.” These pencils have a very hard lead, which allows them to leave a thin and gentle trace on paper — making them ideal for outlining.
- An HB pencil: HB pencils have a “hard black” lead. They’re medium hard and are the best choice when adding details to sketches and softly shading them.
- A 4B pencil: “B”, i.e. “black,” is the softest of the three mentioned pencil types. You can use it to create darker shadows and add depth to your Christmas tree drawing.
- A kneaded eraser: These highly malleable erasers are great not just for removing mistakes, but also for accentuating highlights.
- Lightly textured paper: This kind of paper has micro-perforations, and its smooth surface ensures your pencil can easily glide over it, ensuring a more enjoyable drawing experience.
If you don’t have these tools — don’t worry about it! Any pencil, eraser and paper will do as long as you’re comfortable using them. Besides, what matters most is your determination to learn how to draw!
Oh, and if you prefer using digital drawings, that’s also fine! In that case, check out our guide on digital drawing tools to find the one that works best for you!

How To Draw A Christmas Tree In 6 Steps
Drawing a Christmas tree may seem challenging — especially for beginners — but we’ll show you how to easily sketch it in just six steps!
1. Sketch The Christmas Tree Base
Recommended tool: H pencil
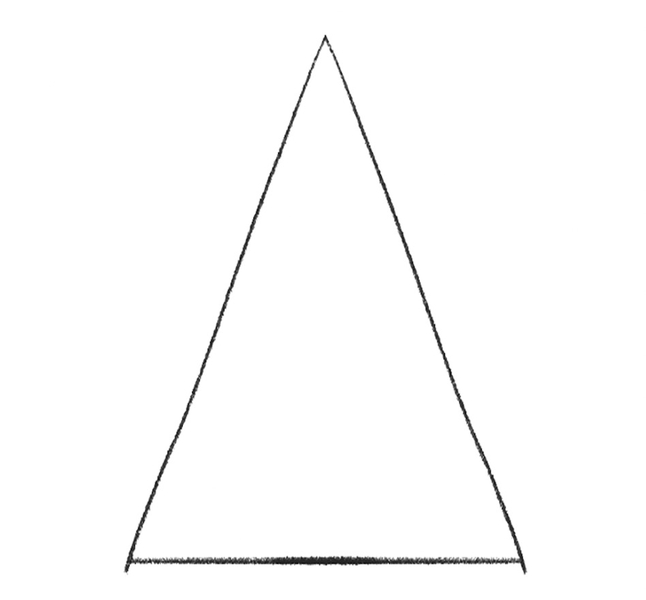
The simplest way to outline a Christmas tree is to draw isosceles triangles one by one. You know — the triangles that have two sides equal in size.
For starters, draw a large isosceles triangle to determine the size of your Christmas tree, like so:
2. Add Layers
Recommended tool: H pencil
For the time being, let’s stick to drawing triangles.
We’ll use them to add layers to the tree.
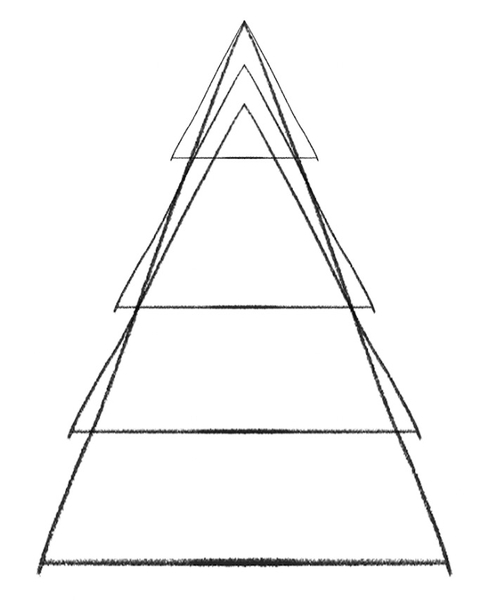
We’ll draw four layers but you can add as many as you like. The more layers, the richer the tree.
Of course, the number of layers depends on their width and how many of them can fit the large base triangle you drew first.
Okay, now let’s start at the top.
Make the sides of the triangle slightly wider than the base triangle, like so:
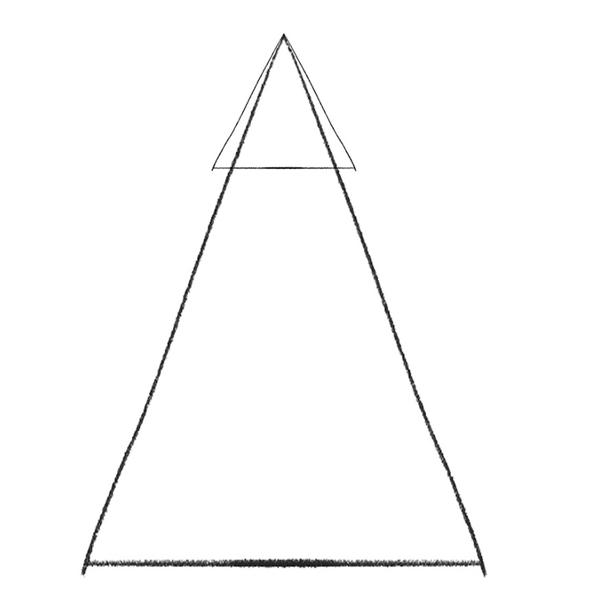
When drawing the second triangle, i.e., layer, make sure to place its top slightly below the top of the first layer.
As for the sides of the triangle, draw them slightly wider than the base triangle, like so:
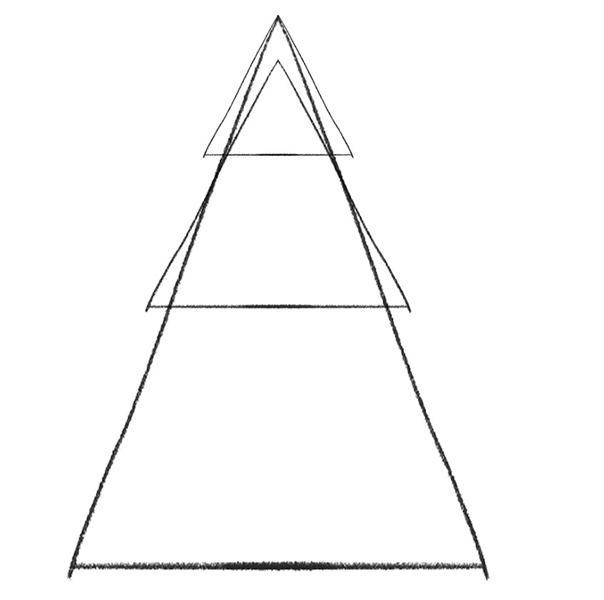
When outlining a Christmas tree, you’ll want to make each layer gradually bigger than the one above it.
That being said, the next layer should be the largest of the three, but still slightly smaller than the bottom of the tree, which is its widest part:
3. Draw The Foot Of The Christmas Tree
Recommended tool: H pencil
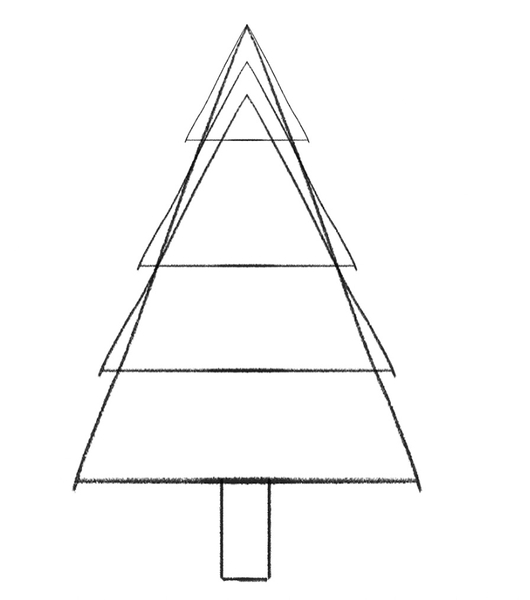
Once you finish drawing the layers, it’s time to add the foot of the tree.
We’ll stick to sketching geometry shapes, but this time, instead of triangles, we’ll switch to rectangles.
All you need to do is add a simple 2D rectangle at the bottom of your Christmas tree, like this:
4. Add Details
Recommended tool: HB pencil
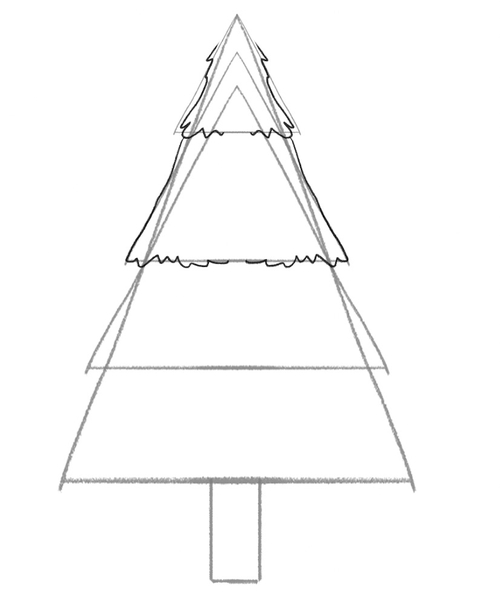
Once the rough sketch is ready, it’s time to soften the lines and start adding details to the tree.
At this point, you can switch to an HB pencil. If you don’t have one, that’s okay! Simply apply more pressure to your pencil of choice to create slightly darker lines than before.
Now, to add texture to the tree, let’s add wavy lines along the tree layers. We’ll start with the top two layers:
Continue doing the same for the next two layers to get a drawing that looks like this:
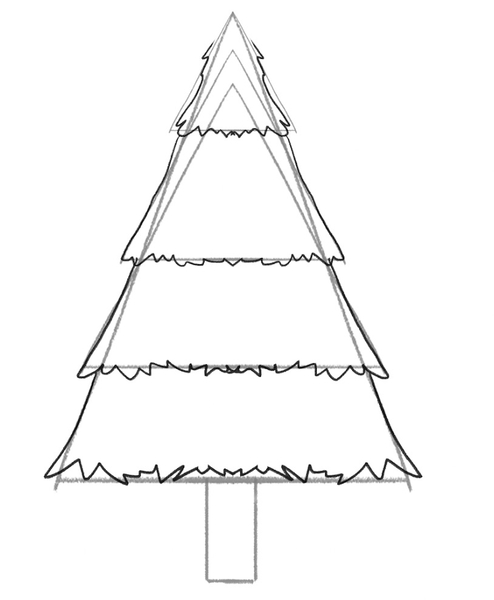
To add more volume to the tree and to make it look richer, let’s split each layer in half and add wavy lines close to the sides, like this:
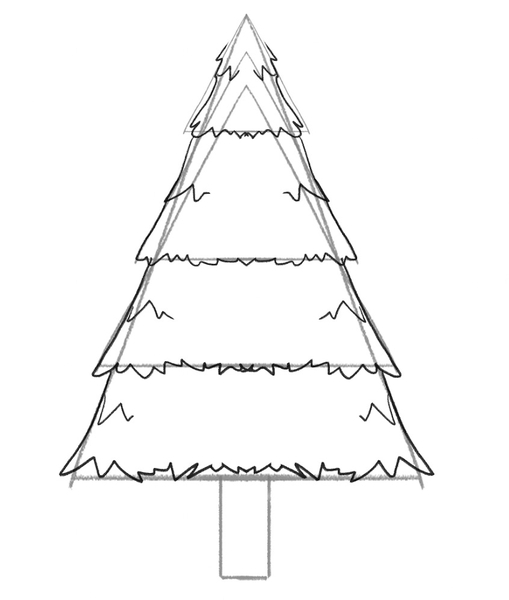
Now, we can’t forget about the top and the foot of the tree.
Let’s take care of the top first.
Instead of softening it, we want to make it extra pointy, so feel free to go above the original outline and extend it upwards.
As for the foot of your Christmas tree, simply enhance its edges and add a few short, vertical lines over its surface to mimic the texture of the wood, like so:
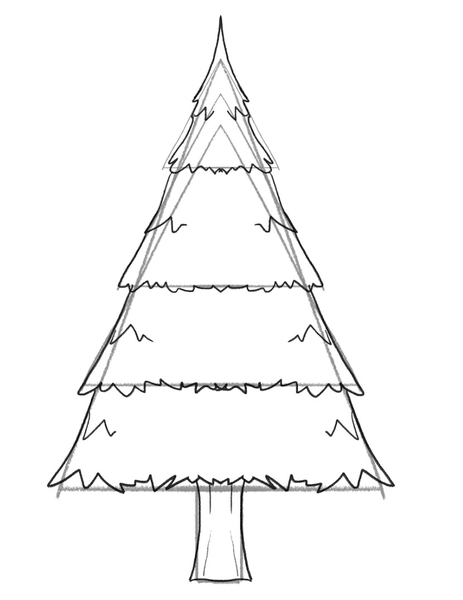
5. Add Ornaments
Recommended tools: HB pencil, kneaded eraser
Once the basic sketch of the Christmas tree is done, it’s time to decorate it!
We’ll start at the top by adding a big star to it, like so:
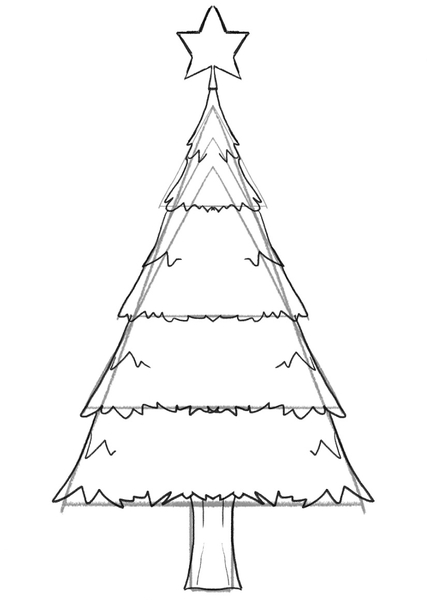
Next up, let’s add baubles to the tree!
You don’t have to overdo it with decorations, but of course, if you want your tree to resemble the one in front of Rockefeller Center, go for it!
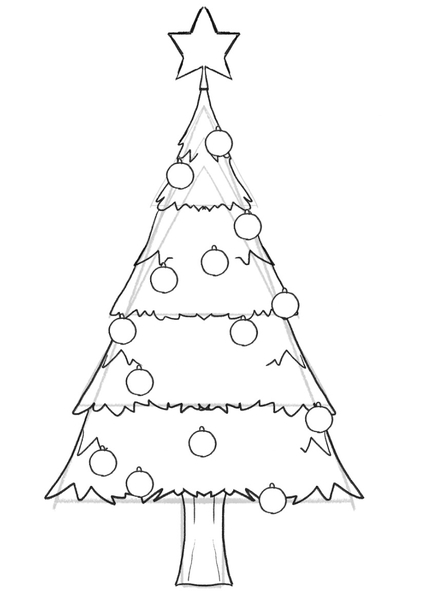
Last but not least, let’s draw the fairy lights!
Do this by drawing soft, curved lines and placing them diagonally over the tree. We kept the shape of the lights simple and round, like this:
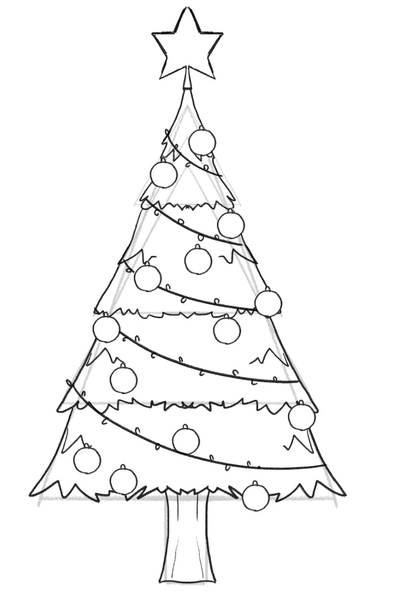
Before you proceed, grab your eraser and remove the guidelines if they’re showing.
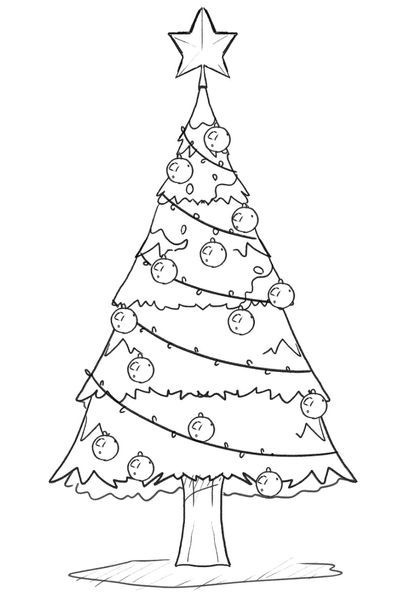
Next, you can add some details to the ornaments, to make the sketch look richer.
For example, you can draw some tiny shapes on each bauble, to mimic the light refraction — that will add more dimension to these simple shapes.
You can also make the star appear as if it were a 3D decoration by adding lines from each corner of the star that point toward its center.
Now, why don’t we give the entire tree a 3D look?
It’s as simple as adding a line to the bottom of the tree, under the lowest layer; the line will look like the back of the tree, which will give your sketch more dimension.
Oh, and since we’ll shade the area under the Christmas tree afterward, let’s sketch an irregular shape under the tree now — that’s where the shadow will be.
6. Shade Your Christmas Tree Sketch
Recommended tools: HB and 4B pencils
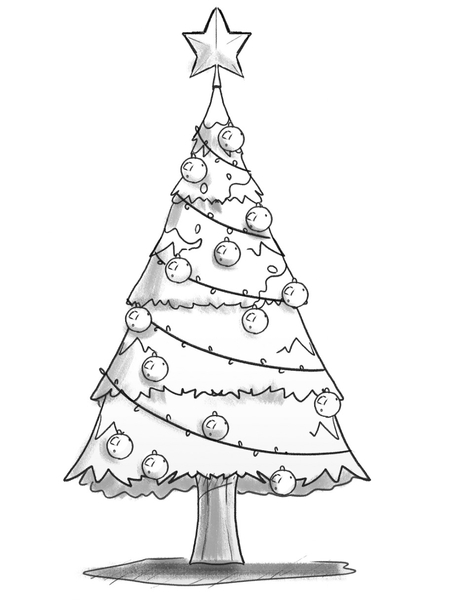
The last step to Christmas tree drawing is shading.
You can combine HB and 4B pencils to create several shades of grey, or you can also use a single pencil and apply different levels of pressure for lighter and darker grey hues.
For a beginner, shading may seem challenging at first, so we recommend keeping it simple.
It’s enough if you make one side of the Christmas tree slightly darker than the rest of it. You can also softly shade the star at the top, while the foot of the tree and the area below the tree itself should be darker than the rest of the sketch, like so:
Finished Your Christmas Tree Drawing? Try These Next!
How fun was learning how to draw a Christmas tree?!
We enjoyed making this tutorial and we invite you to keep on honing your drawing skills! We have a bunch of beginner-friendly tutorials ready, including:
- How to draw Santa Claus
- How to draw a snowflake
- How to draw a forest
- How to draw a tree
- How to draw a rose
- How to draw a desert
- How to draw a pumpkin
And many more!
Meet The Artist
The artist behind this video on how to draw a Christmas tree is Goncalo Lopes — the lead BIOWARS artist who designed the main characters for the BIOWARS comic book.
Goncalo boasts extensive experience in the field of art, having contributed his skills to renowned projects like Godzilla, TMNT, Transformers, GI-Joe, Adventure Time and many others.
A Recap On Easy Christmas Tree Drawing
The easiest way to learn how to draw a Christmas tree is to use geometrical shapes.
You can outline the entire tree by using triangles of various sizes and a rectangle to sketch the foot of the tree.
Then, to soften the outline and add more dimension to the sketch, you can use wavy lines.
Once the outline is done, next comes decorating the tree with simple baubles and fairy lights.
To finalize your drawing, shade the sketch to give it more dimension and bring it to life!
And lastly, we want to wish you happy holidays — Merry Christmas and Happy New Year!

