Related Resources
Did you know that rabbits are the third most popular pet in the U.S.?
This fact might come as no surprise considering how cute, social and intelligent these animals are. It’s no wonder so many people want them as companions!
In this guide, we’ll show you the steps to easy bunny drawing. Even if you’re a beginner, you’ll have no problem following the tutorial — we’ve included a video and illustrations to accompany each step:
The Tools We Recommend For Your Bunny Drawing
To make drawing a bunny easier, try these tools:
- An H pencil: This pencil is a good choice when sketching because its hard lead leaves a light trace on the paper, so you can easily erase it when you’re unhappy with a sketch.
- An HB pencil: The medium-hard lead allows you to create darker strokes, which makes it ideal when you want to make some details more pronounced and add soft shadows to your sketch.
- A B pencil: The softest lead leaves the darkest trace on paper, so, when shading, we recommend you pick up a B pencil.
- A kneaded eraser: You can easily change the shape of these erasers as needed, which allows you to not only erase mistakes but also highlight some parts of your bunny drawing.
- Lightly textured sketch paper: We always recommend drawing on lightly textured paper because your pencil will easily glide over its surface. Plus, erasing parts you’re unhappy with is also easier!
When working on your bunny drawing, don’t feel obligated to get all of these tools.
These are just recommendations and you should use whatever pencil you’re most comfortable with!

How To Draw A Bunny In 7 Steps
When you’re a beginner learning how to draw a bunny, the easiest way to learn how is to break the sketch into simpler shapes.
So, let’s start slow and outline one part of the bunny’s body at a time.
1. Outline The Bunny’s Belly, Lower Body And Head
Recommended tool: HB pencil
The best way to draw a proportional bunny is to first position its head, belly and feet.
Don’t worry — at this stage, you’re outlining, so we’re going to keep things verrrry simple.
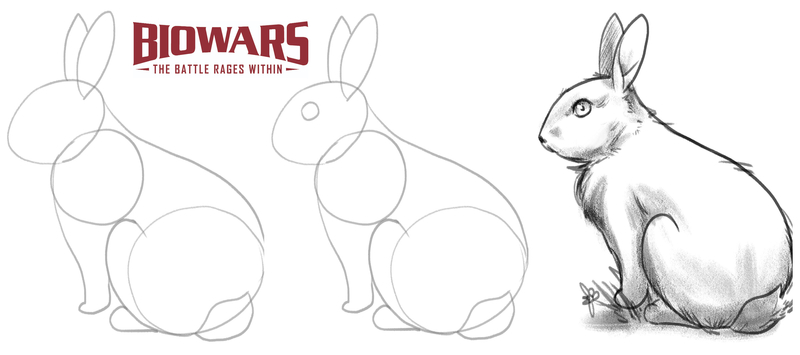
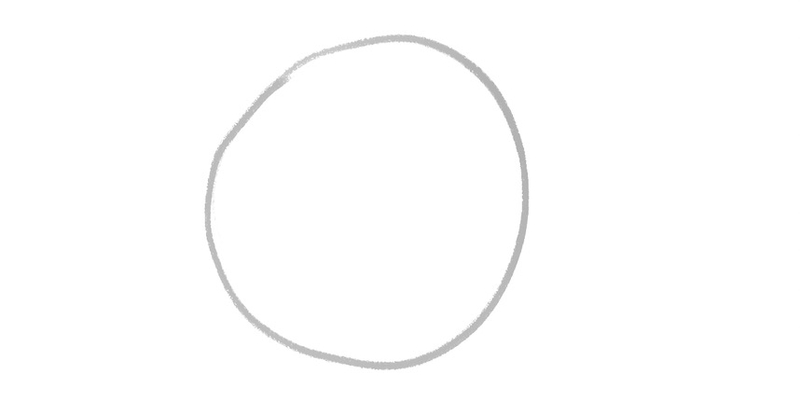
Draw the bunny’s belly first by sketching a circle.
Make sure to leave enough space above and below the circle to add other parts of the bunny’s body:
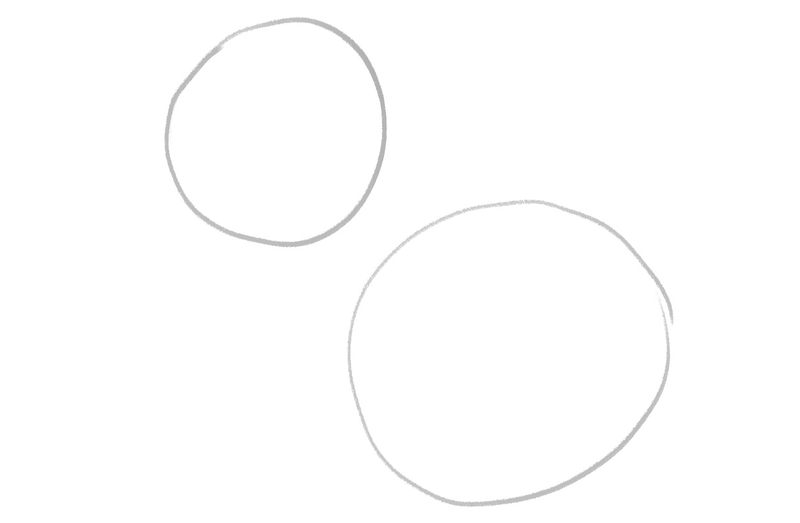
To draw the lower part of the bunny’s body, add another circle under the belly.
This one should be about one-third bigger than the circle above.
When drawing it, pay attention to where you position it.
Leave some space between the circles, but also imagine a diagonal line cutting the top circle in half; that line should also go through the middle of the bottom circle:
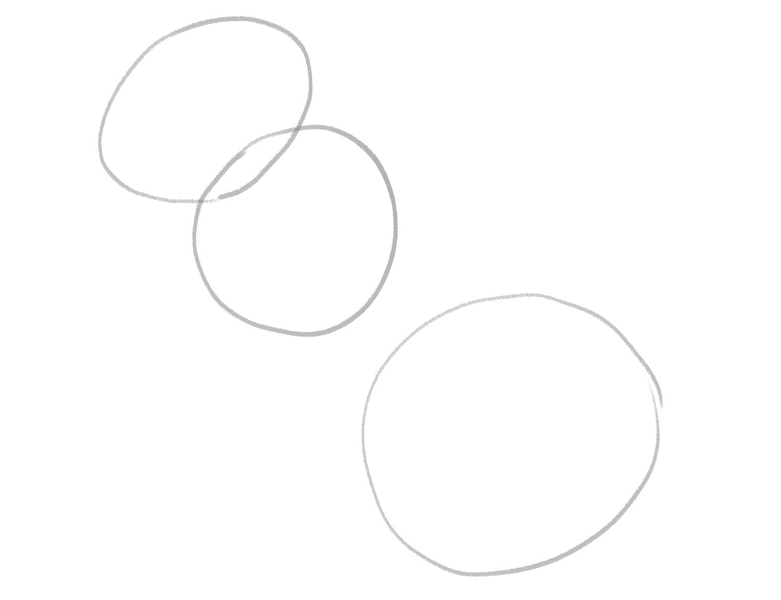
The last step in this phase of the outlining process is to position the bunny’s head.
Draw an oval shape and have it go slightly over the belly circle. The sizes of the oval shape and the belly circle should be similar.
Make sure that the left side of the oval shape is slightly pointy — that’s where you’ll add the nose soon!
Again, make sure that the imaginary diagonal line goes through the middle of the oval shape; that will help you position it correctly:
2. Draw The Back
Recommended tool: HB pencil
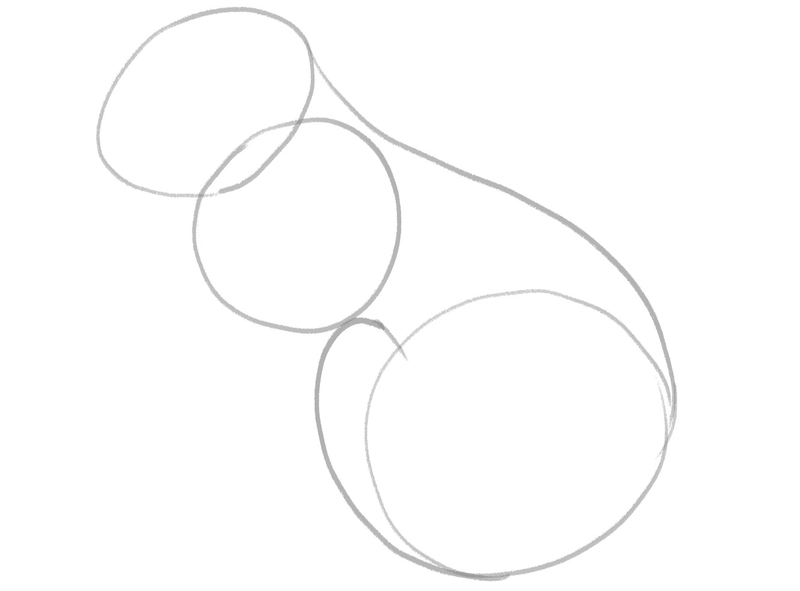
Once you position the three largest parts of the bunny’s body, it’s time to connect them.
First, connect the back of the top circle with the front of the middle circle.
To do that, draw a line from the back of the head and bring it close to the middle circle, but don’t let the two touch.
Then, point the line toward the lower part of the bunny’s body.
Depending on how chubby you want the bunny to be, curve the line and point it toward the bunny’s lower part; have the line touch the back of the bottom circle.
Next, connect the belly and the lower part with a curved line to form a leg, like so:
3. Draw The Tail And The Ears
Recommended tool: HB pencil
Did you know that rabbit’s tail isn’t just a fluffy ball of fur?
Tails contain bone, muscle and nerves!
To add this delicate part to the bunny’s body, draw a leaf-like shape at the very bottom of your sketch, like this:
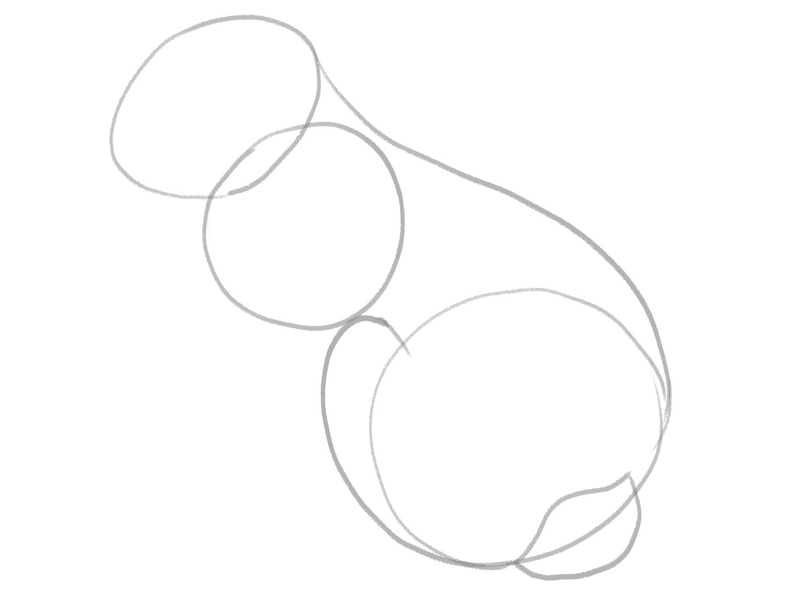
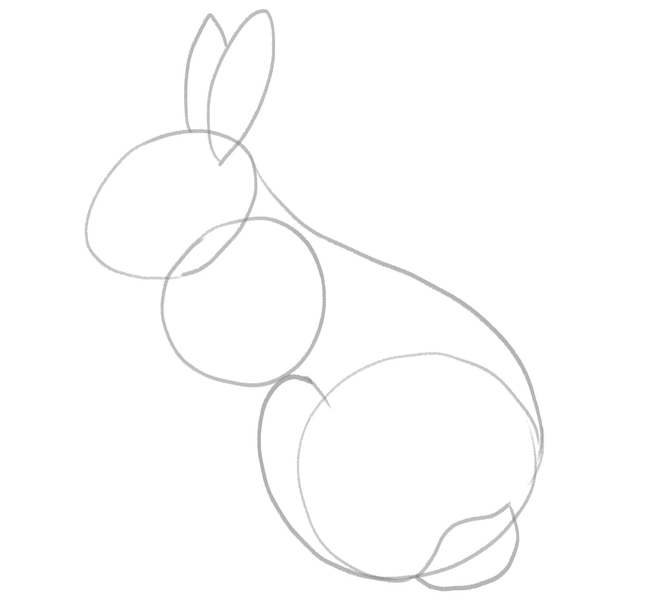
Once you add the tail, it’s time to draw one of the most recognizable bunny features — its long ears!
Rabbit’s ears can rotate up to 270 degrees, even independently of each other. That way, bunnies can pick up sounds coming from several different directions at once!
To outline the ears, draw elongated oval shapes and position them at the top of the head.
Since we’re drawing the bunny’s side profile, its right ear should slightly peek behind the left:
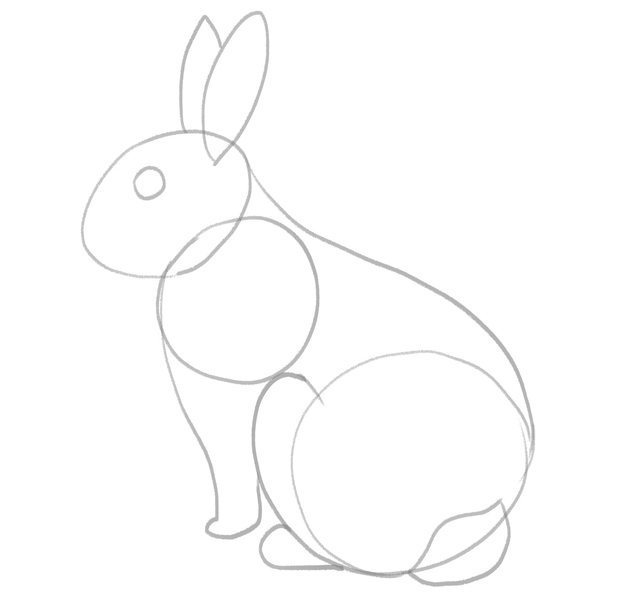
4. Draw The Legs And The Eye
Recommended tool: HB pencil
Now, let’s give this bunny something to stand on.
Draw a foot at the bottom of the leg you added earlier.
Your sketch should look like a horizontal letter “J”.
Then, draw a line from the front side of the middle circle and point it downwards. Make the line slightly curved at the top, because the thigh area needs to be wider than the rest of the leg.
Next, bring the line inwards and add a foot at the bottom of the leg; you should position the foot just above the back leg, like this:
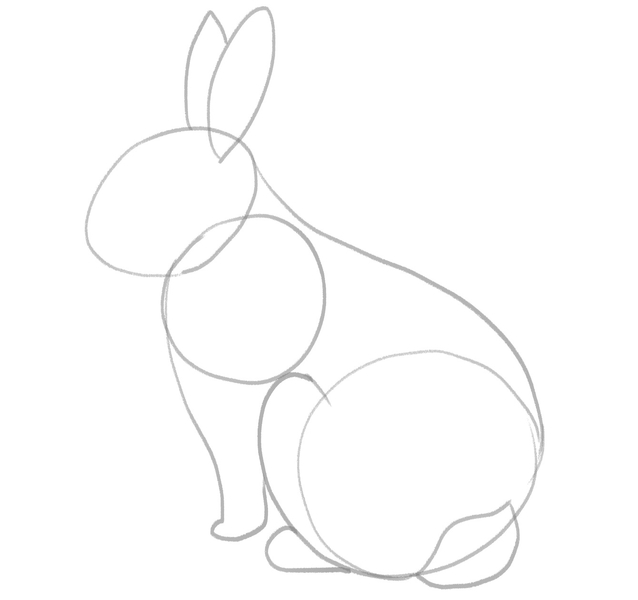
Now, add the eye.
To outline it, draw a tiny circle on the head.
Remember the imaginary diagonal line that goes through the middle of every circle in this sketch? Position the eye so that the line goes through its center, too:
5. Add The Details
Recommended tool: HB pencil
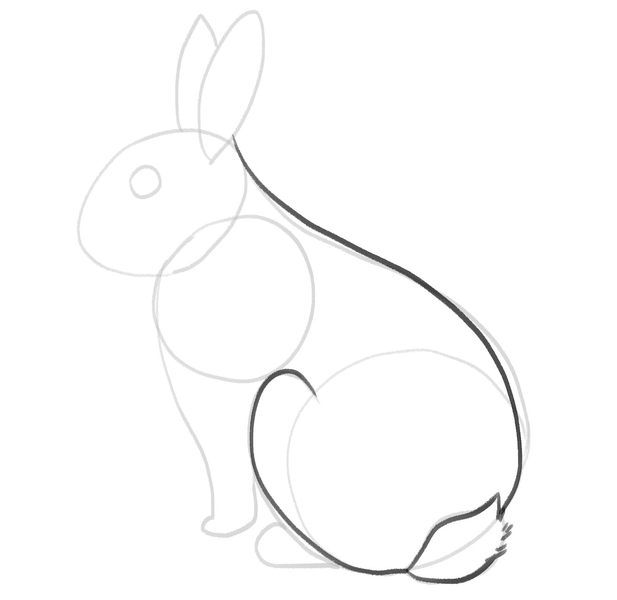
Now that the outline is ready, you can take an HB pencil to go over the lines and make them darker.
You can start from the back, go over the tail outline and move to the back leg:
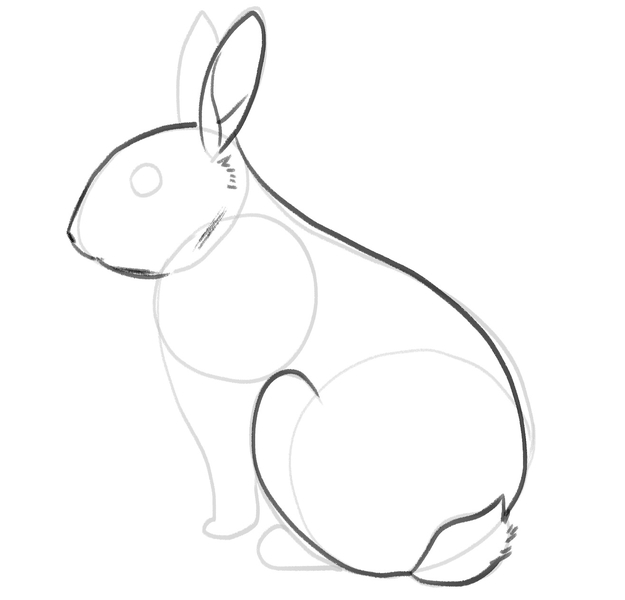
Next, go over the head and ear outlines.
Add some short, thin lines below the left ear and along the bunny’s jaw.
Don’t forget to draw the inside of the bunny’s left ear, like this:
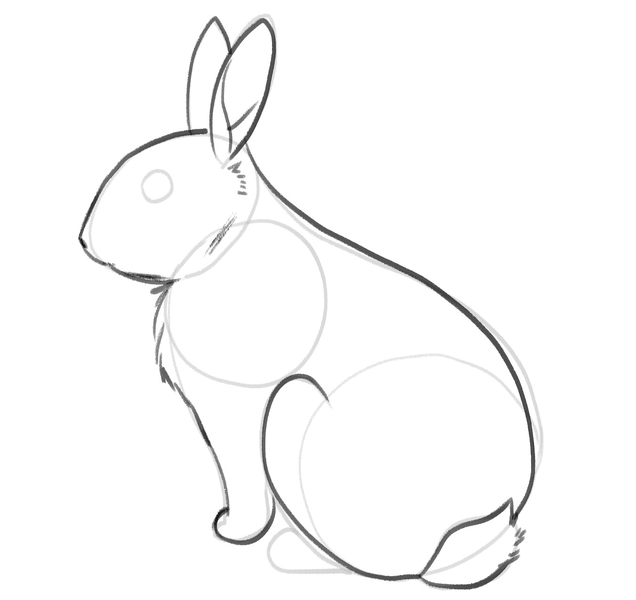
While outlining the bunny’s front leg, make sure not to draw a straight line.
You want it to look fluffy because it’s covered with fur, so add some short lines below the bunny’s chin and at the top of its front leg, like so:
Now, outline the bunny’s back foot.
Make sure to add a short line on the foot to mark the bunny’s toes:
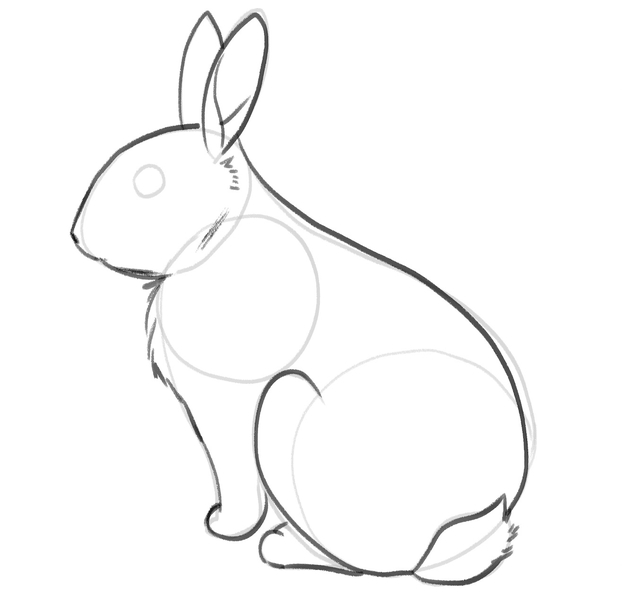
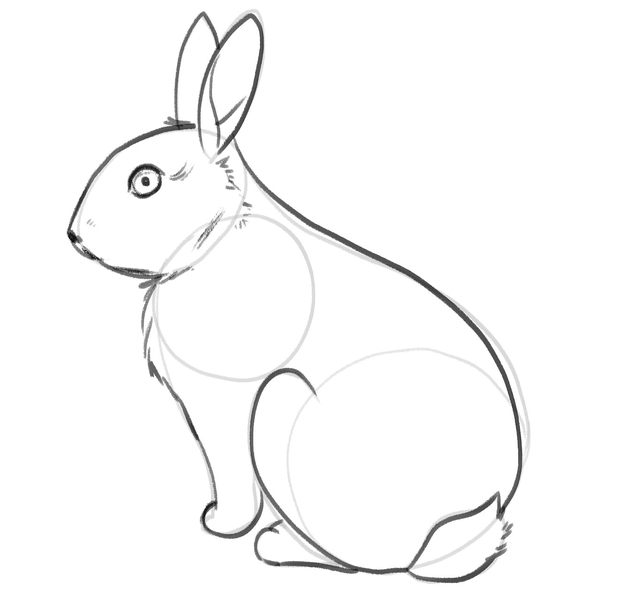
Next, it’s time to make the eye more pronounced and add a pupil to the eye.
You can also draw several angled lines around the eye’s corner.
Go over the tip of the bunny’s nose and make it more noticeable with your darker lead:
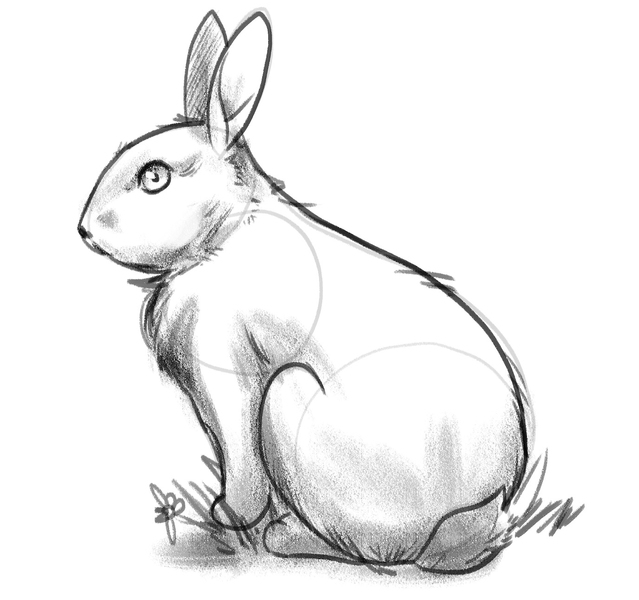
6. Shade Your Drawing
Recommended tool: B pencil
Finalize your drawing by shading with a B pencil.
You can start from the bunny’s right ear. Go over its surface and add some horizontal lines to cover the entire ear.
Then, draw lines around the bunny’s hind leg and at the top of its head to add more fur to the sketch:
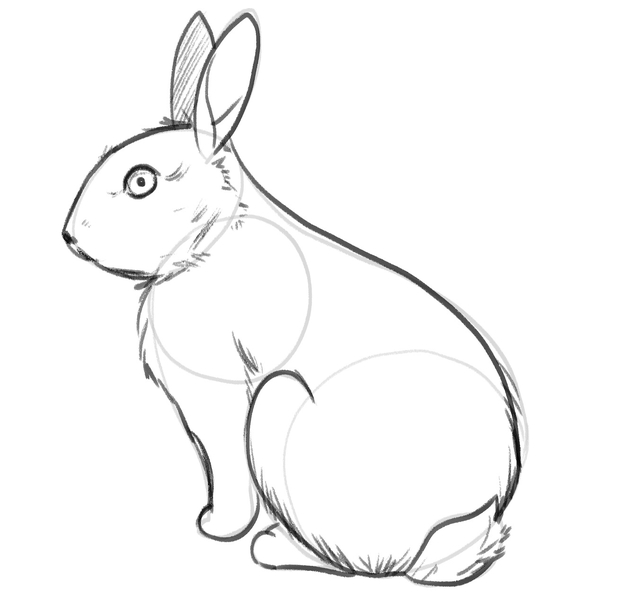
Shade the area around the bunny’s neck, at the back of its rear leg, and along the bottom part of its lower body:
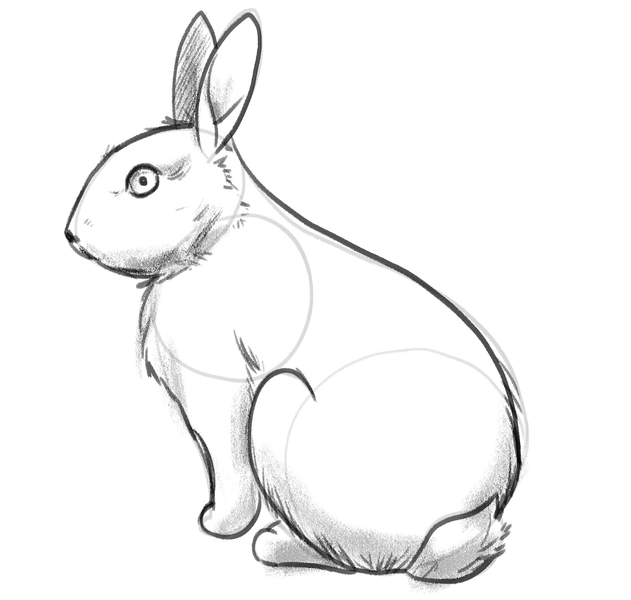
After you add the soft shadow around the bunny’s body, feel free to apply more pressure to your pencil and make the shade darker.
You can also draw grass and flowers around the bunny. After all, that’s what its natural habitat usually looks like:
7. Erase The Unnecessary Details And Finalize Your Bunny Drawing
Recommended tool: kneaded eraser
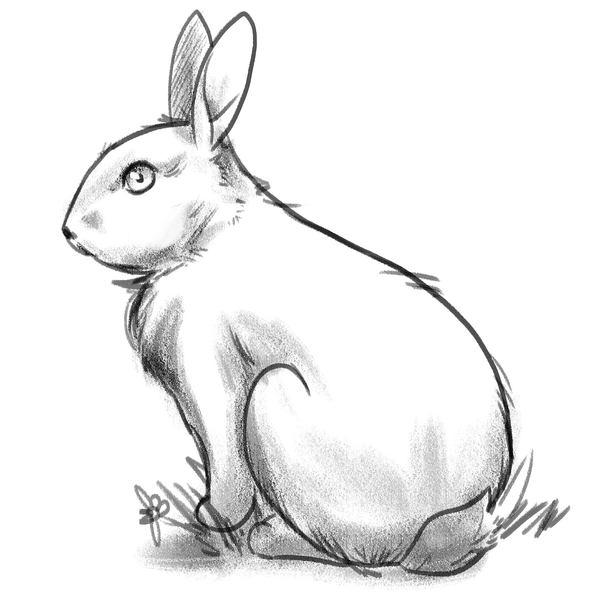
Congrats, you’ve made it to the very end of this bunny drawing tutorial!
The last step is the sweetest – it’s time to get rid of the unneeded details.
So, grab your eraser and remove the leftover parts of the circles on the inside of the bunny’s body that you no longer need:
Finished Your Bunny Drawing? Try These Next!
Up for some more drawing now that you’ve successfully finished your bunny drawing?
We’ve prepared more guides on drawing other adorable representatives from the animal kingdom, including our tutorials on:
We even have a guide on how to draw a dragon!
Meet The Artist
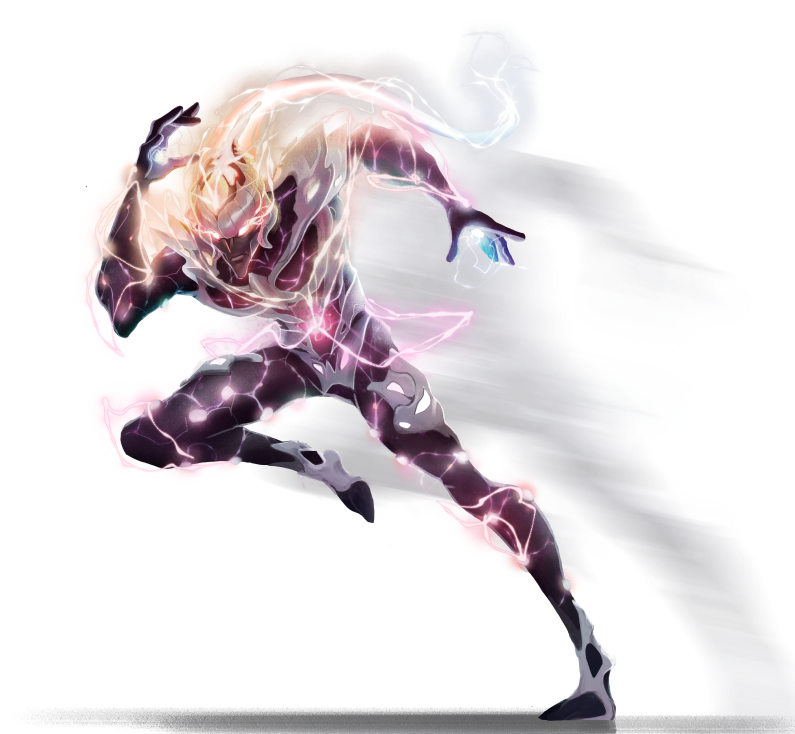
Goncalo Lopes is the creator of this easy-to-follow guide on bunny drawing.
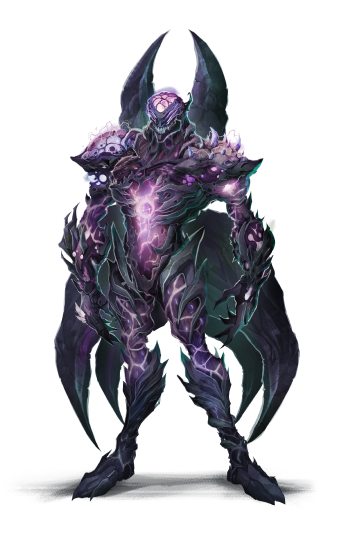
He’s the resident BIOWARS artist in charge of giving the BIOWARRIORS and their archenemies — pathogens — a distinct look and feel.
Aside from making comic books, Goncalo also has vast experience in working on many widely popular projects, including Transformers, GI-Joe, TMNT, Adventure Time, Godzilla, and more.
You can learn a lot from him, so make sure to pay attention to his tips and tricks to learn how to drwa without too much hassle!
A Recap On How To Draw A Bunny Easy
The best way to learn how to draw a bunny the easy way is to:
- Use simple geometrical shapes to create the base for the bunny’s body
- Outline one body part at a time
- Shade the sketch to bring it to life
- Erase the unneeded parts of the sketch

