Related Resources
Did you know that there are between 50 billion and 430 billions birds on Earth?
Birds are paramount for the well-being of our planet for many reasons, including their spore-spreading, pest-controlling and pollinating qualities that help maintain healthy ecosystems around the globe.
In this guide, we’ll share the tricks to simple bird drawing and show you how to easily draw a member of the avian species in only five steps:
If you prefer to practice drawing by looking at images instead, we’ve got you covered! Keep reading to find detailed illustrations and step-by-step instructions to draw a bird.
Sketching Tools To Draw A Bird
Tools you might want to use for your bird drawing include:
- An H pencil: These pencils have a hard lead that leaves a light trace on the paper. That’s why H pencils are perfect for sketching — you can easily erase mistakes but also enhance the lines once you create your basic bird sketch.
- An HB pencil: A medium-hard lead is good for adding details and soft shading.
- A 4B pencil: This kind of lead is particularly soft and dark. You can use it for shading and adding dark grey details to your drawing.
- A blending stump: This pencil-like tool makes blending easier, helping you make the transitions from lighter to darker areas and vice versa.
- A kneaded eraser: Kneaded erasers are customizable, meaning you can change their shape and size depending on what you want to erase.
- Lightly textured sketch paper: This paper’s soft surface is perfect because your pencil can easily glide over it. Plus, it’s also easier to erase unneeded lines.
You don’t need all of these tools; not even Goncalo — the lead BIOWARS artist and the author of this video has them all!
These are just recommendations, but you can stick to the pencils you enjoy drawing with!
How To Draw A Bird In 5 Steps
The simplest way to draw a bird is to sketch its body parts one by one.
Once you have a good foundation, it’s easy to add the details and create a proportional bird drawing.
Step 1. Draw The Base
Recommended tool: H pencil
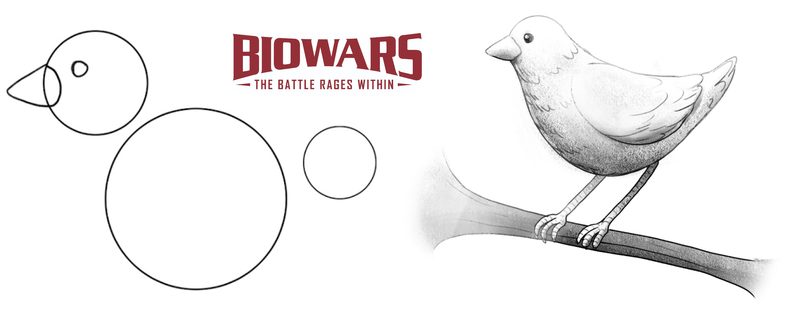
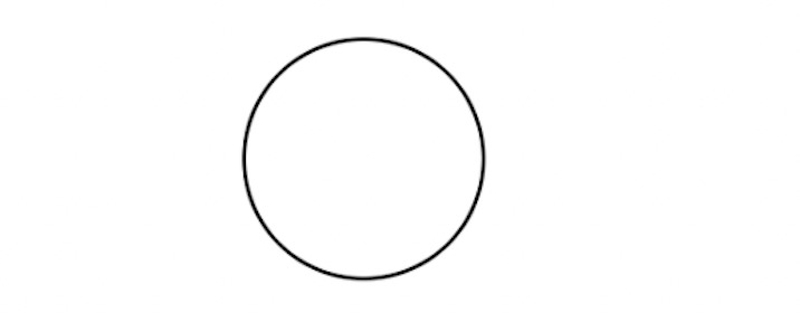
Let’s start drawing a bird by sketching the base for its head.
To do that, we’re going to draw a medium-sized circle.
The bird we’re drawing is facing left, so we’ll make sure to leave enough room on the right to sketch the rest of its body.
Now, let’s draw the first circle:
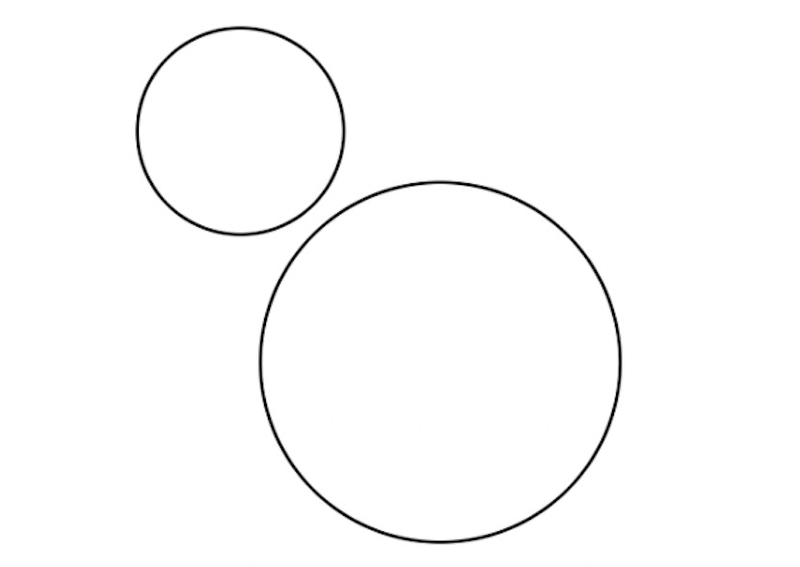
Then, draw another circle below the first one and make it about three times larger.
This is the bird’s belly.
Imagine there’s a diagonal line passing through the center of the first circle, and make sure that the same line goes through the middle of the body. This little trick will help you get your proportions right:
Step 2. Draw The Bird’s Tail, Head And Legs
Recommended tool: H pencil
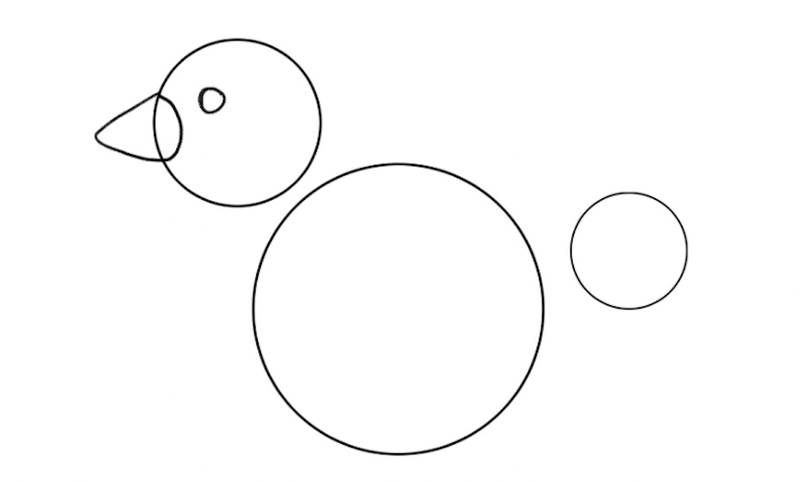
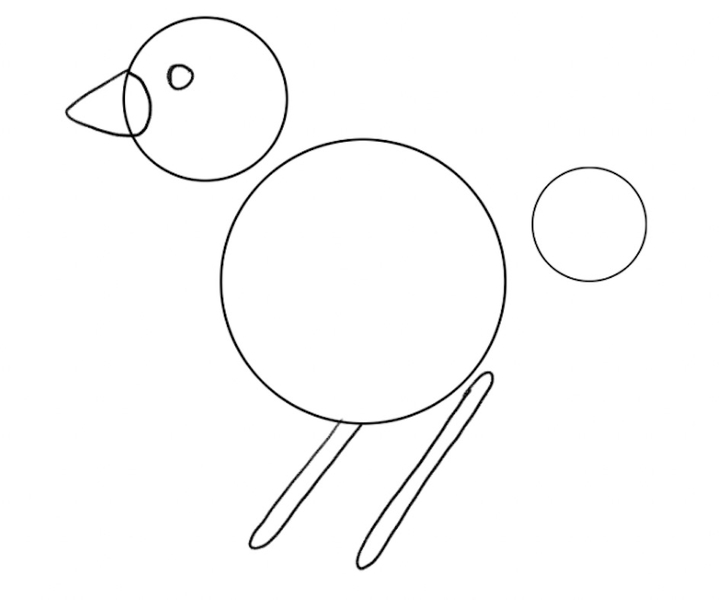
Let’s add one more circle in the back, for the tail. Draw a small round shape and place it to the right of the belly.
Again, imagine a diagonal line going through the middle of the belly. The same line should split the third circle in half.
Then, it’s time to start adding details to the head.
First, draw a small circle for the eye and a cone for the beak, like so:
For the legs, add two parallel stick-like shapes below the bird’s belly.
We can’t see the entire right leg from this perspective, since about one-quarter of it is covered by the belly.
As for the length of the legs, make them approximately as long as the belly is wide:
Step 3. Draw The Wings, Feet And Outline The Bird’s Body
Recommended tool: H pencil
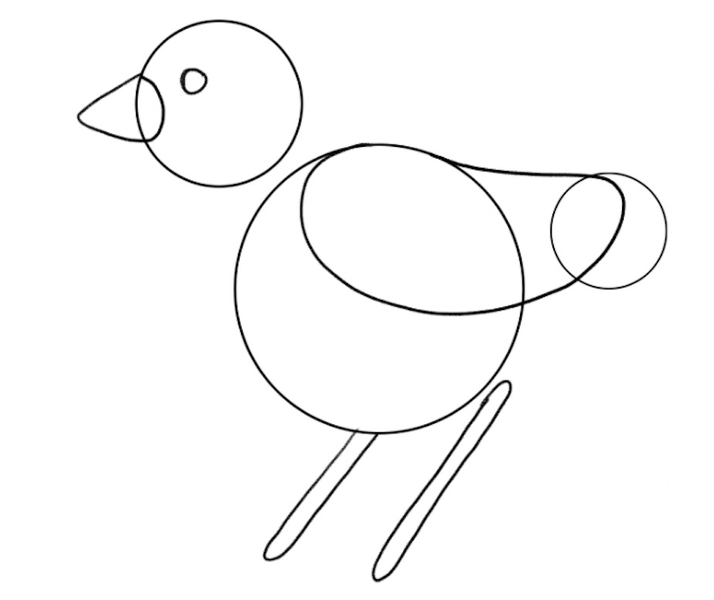
To add the bird’s wing, draw a line starting at the top of the largest circle.
Point the line toward the circle’s center and then curve it toward the tail.
From there, bring the line back to the top of the circle, so that the wing has the shape of a horizontal teardrop, like so:
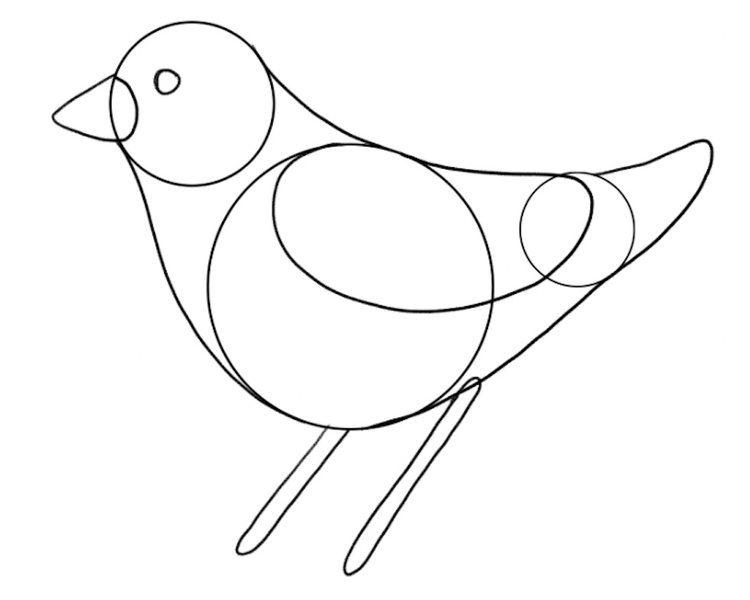
Now that all of the elements of the bird’s upper body are in place, let’s connect them to form a cohesive outline.
Connect the head to the middle of the body with a thin line. Then, stretch that line toward the small circle in the back and go over it a bit to finalize the tail.
Connect the tail to the belly and then extend the line toward the head, just below the beak, so that your sketch looks like this:
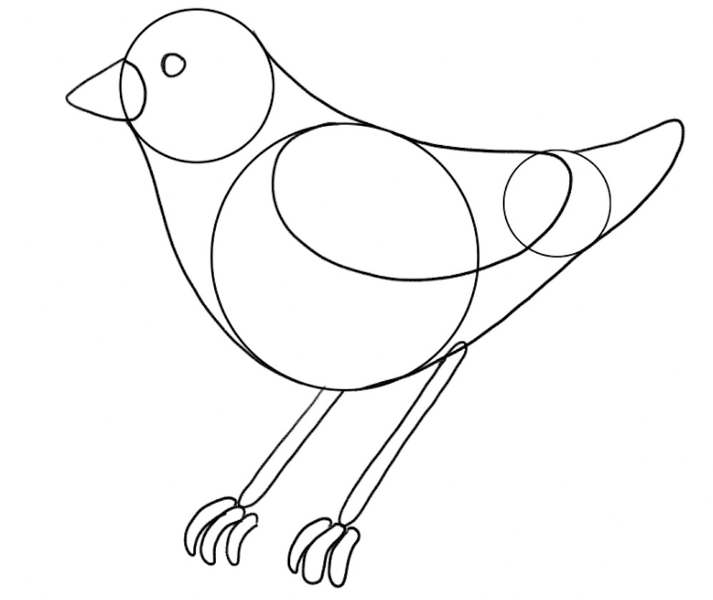
Next, let’s draw the bird’s toes — three on each leg.
Sketch them as short, slightly curved 2D lines, like this:
Step 4. Erase The Guidelines And Add The Details
Recommended tool: H and HB pencils, kneaded eraser
Now’s the time to erase the guidelines.
Carefully go between the outline of the bird’s body and remove the lines that you no longer need:
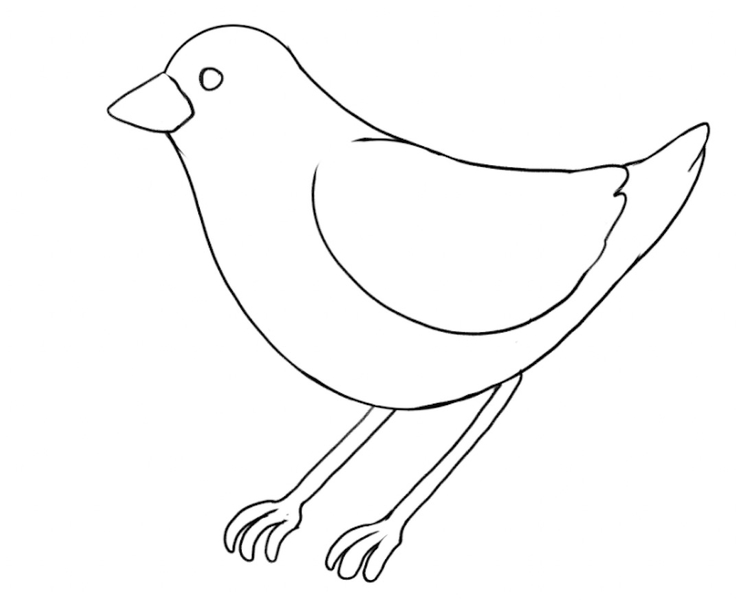
Now, all birds have claws or talons on their feet, so let’s add them to our sketch.
Make them small and sharp, like this:
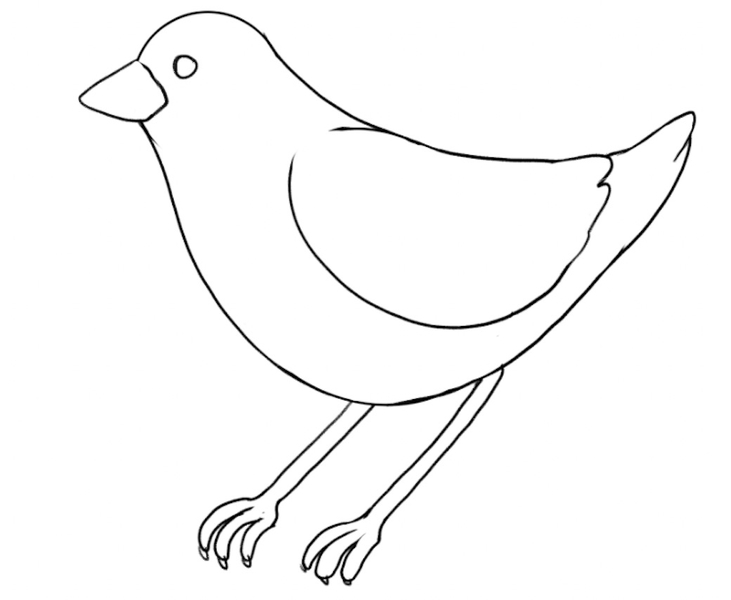
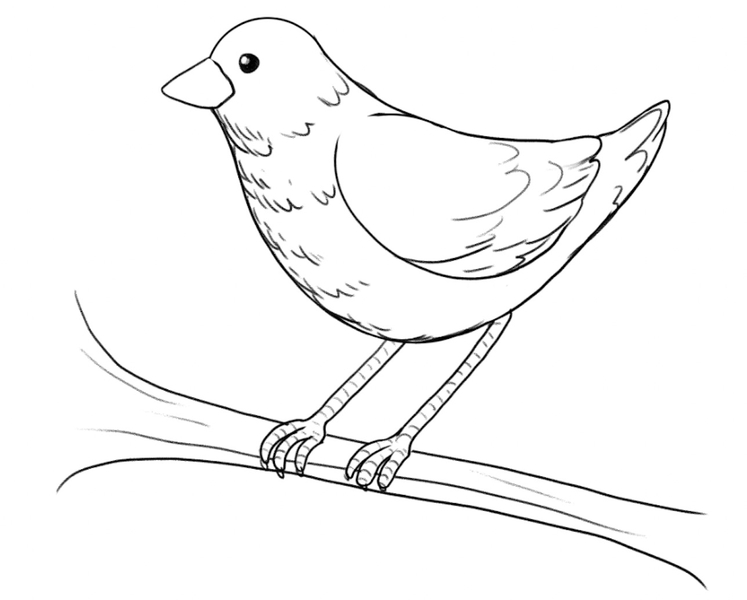
You can switch to an HB pencil now or apply more pressure to the pencil you’re using, to make the outline darker.
Go over the lines to make them more prominent and then color the eye dark grey or black. Don’t forget to leave the pupil white!
Then, draw the feathers starting from the neck; move to the belly and then add some at the bottom of the wing and the end of the tail.
The feathers look like a bunch of “W” letters of all sizes spread across the bird’s body:
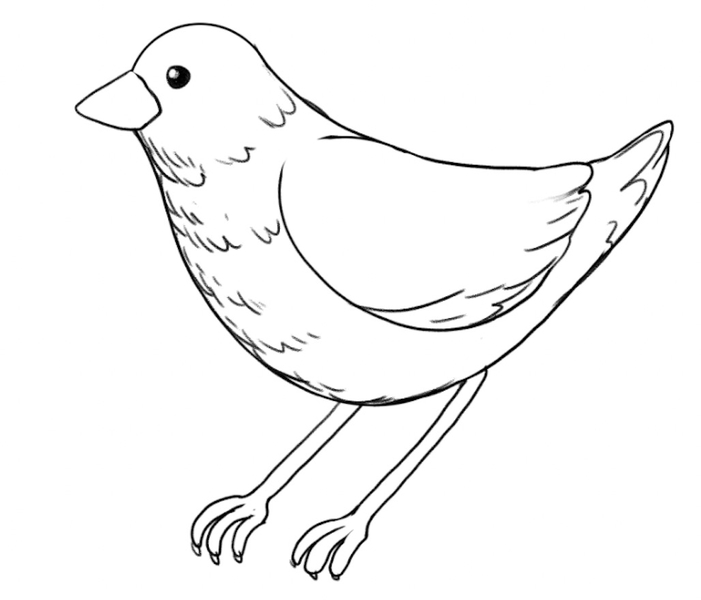
Next, let’s add horizontal lines on the bird’s feet and legs, like this:
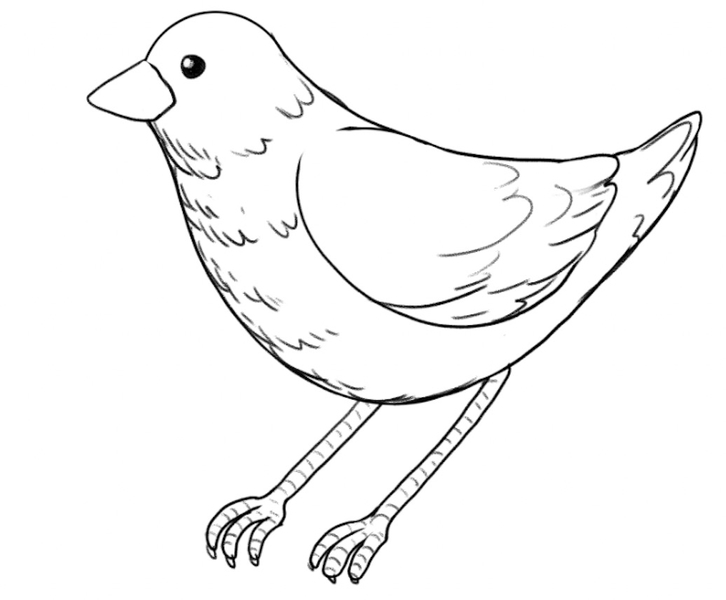
Now, let’s give this bird something to stand on.
Draw a simple branch under the bird’s feet.
Start by adding two parallel lines to outline the branch. Then add smaller lines on the inside, to depict the wood texture, like so:
Step 5. Shade Your Bird Drawing
Recommended tool: HB and 4B pencils, blending stump
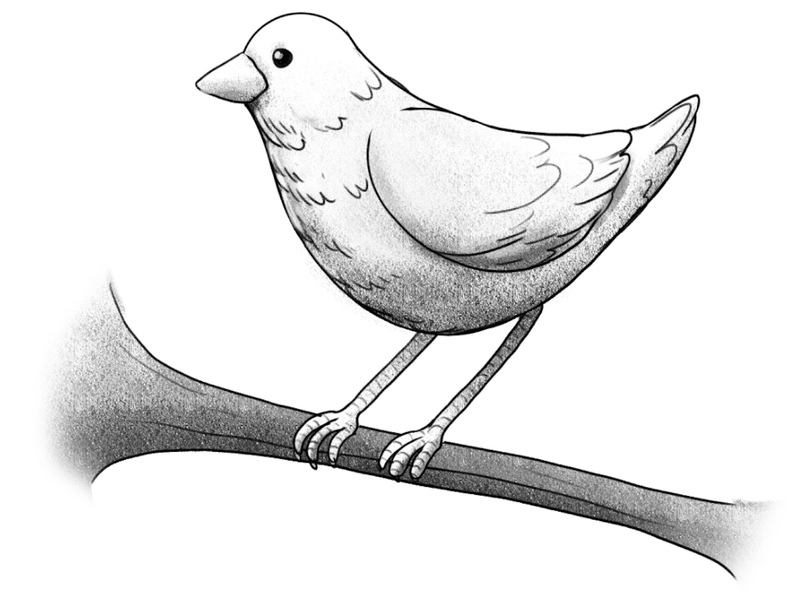
Since the sketching phase is over, it’s time to shade your bird drawing!
You can first go in with an HB pencil to shade the bird’s body in soft grey tones.
Make the belly darker than the rest, since less light reaches this part.
As for the branch, color it with a 4B pencil in dark grey:
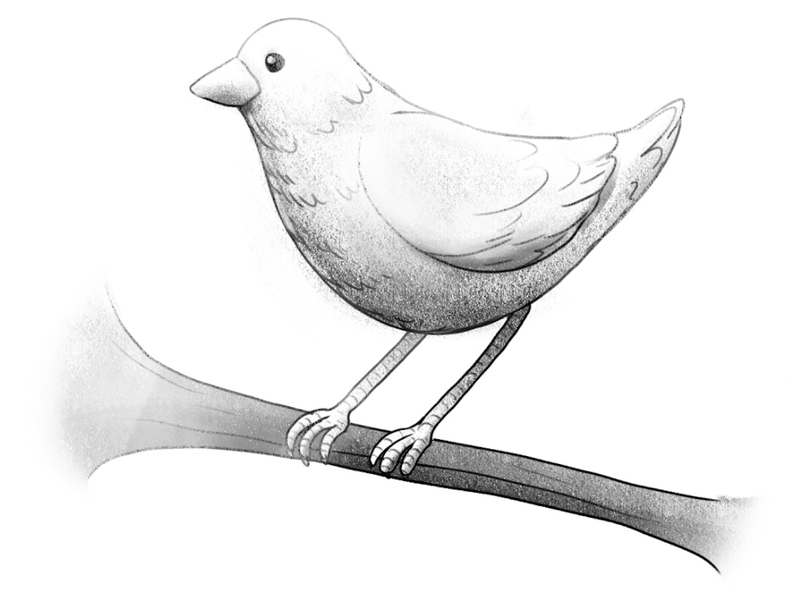
To finalize the drawing, use your blending stump (or your fingers!) to soften up the shadows and make the lines less sharp.
You can also use your eraser to highlight the upper part of the body, like this:
Finished Your Bird Drawing? Try These Next!
Since you successfully finished our guide on bird drawing, why stop here?
You like drawing and we enjoy making helpful art tutorials for you, so check them out and continue practicing!
If drawing animals is your thing, these guides are for you:
- How to draw a fish
- How to draw a penguin
- How to draw a bat
- How to draw a wolf
- How to draw a horse
- How to draw a cat
- How to draw a dog
- How to draw a dragon
- How to draw a turkey
We have a lot more how-to’s in store, and you’ll find them all on our blog and YouTube channel!
Meet The Artist
We asked Goncalo Lopes — the resident BIOWARS artist — to create this beginner-friendly guide on bird drawing (and many more how-to-draw tutorials!).
Goncalo has years of experience as a professional artist and he’s worked on some pretty notable projects, such as Godzilla, GI-Joe, TMNT, Transformers, Adventure Time and more.
You’re in more than capable hands, so make sure to follow Goncalo’s tips and tricks to hone your artistic skills!
A Recap On Bird Drawing
When learning how to draw a bird, rely on geometrical shapes to create the basic sketch, position the body parts and draw them all symmetrically.
Use circles for the head, the belly and the back part of the body. Then, slowly start adding details, such as the hone-shaped beak and the tear-shaped wing.
For the legs, use simple 2D lines; then add the toes and claws.
Draw the feathers as “W’s” and sketch a branch so that the bird doesn’t look like it’s floating mid-air.
Lastly, shade the bird to enhance its features and bring your sketch to life!

