Table Of Contents
Did you know that jack-o’-lanterns come from an Irish myth about a man named Stingy Jack?
According to legend, Stingy Jack was a trickster.
When he died, he wasn’t welcome either in heaven or in hell. And so, he was left to roam the Earth for eternity.
The Irish, scared of Stingy Jack’s wandering spirit, started to carve lanterns out of turnips, potatoes and beets to ward Jack off.
When the Irish came to America, they discovered that pumpkins were much larger and easier to carve than other veggies they used back home.
That’s how the tradition of carving pumpkins for Halloween began!
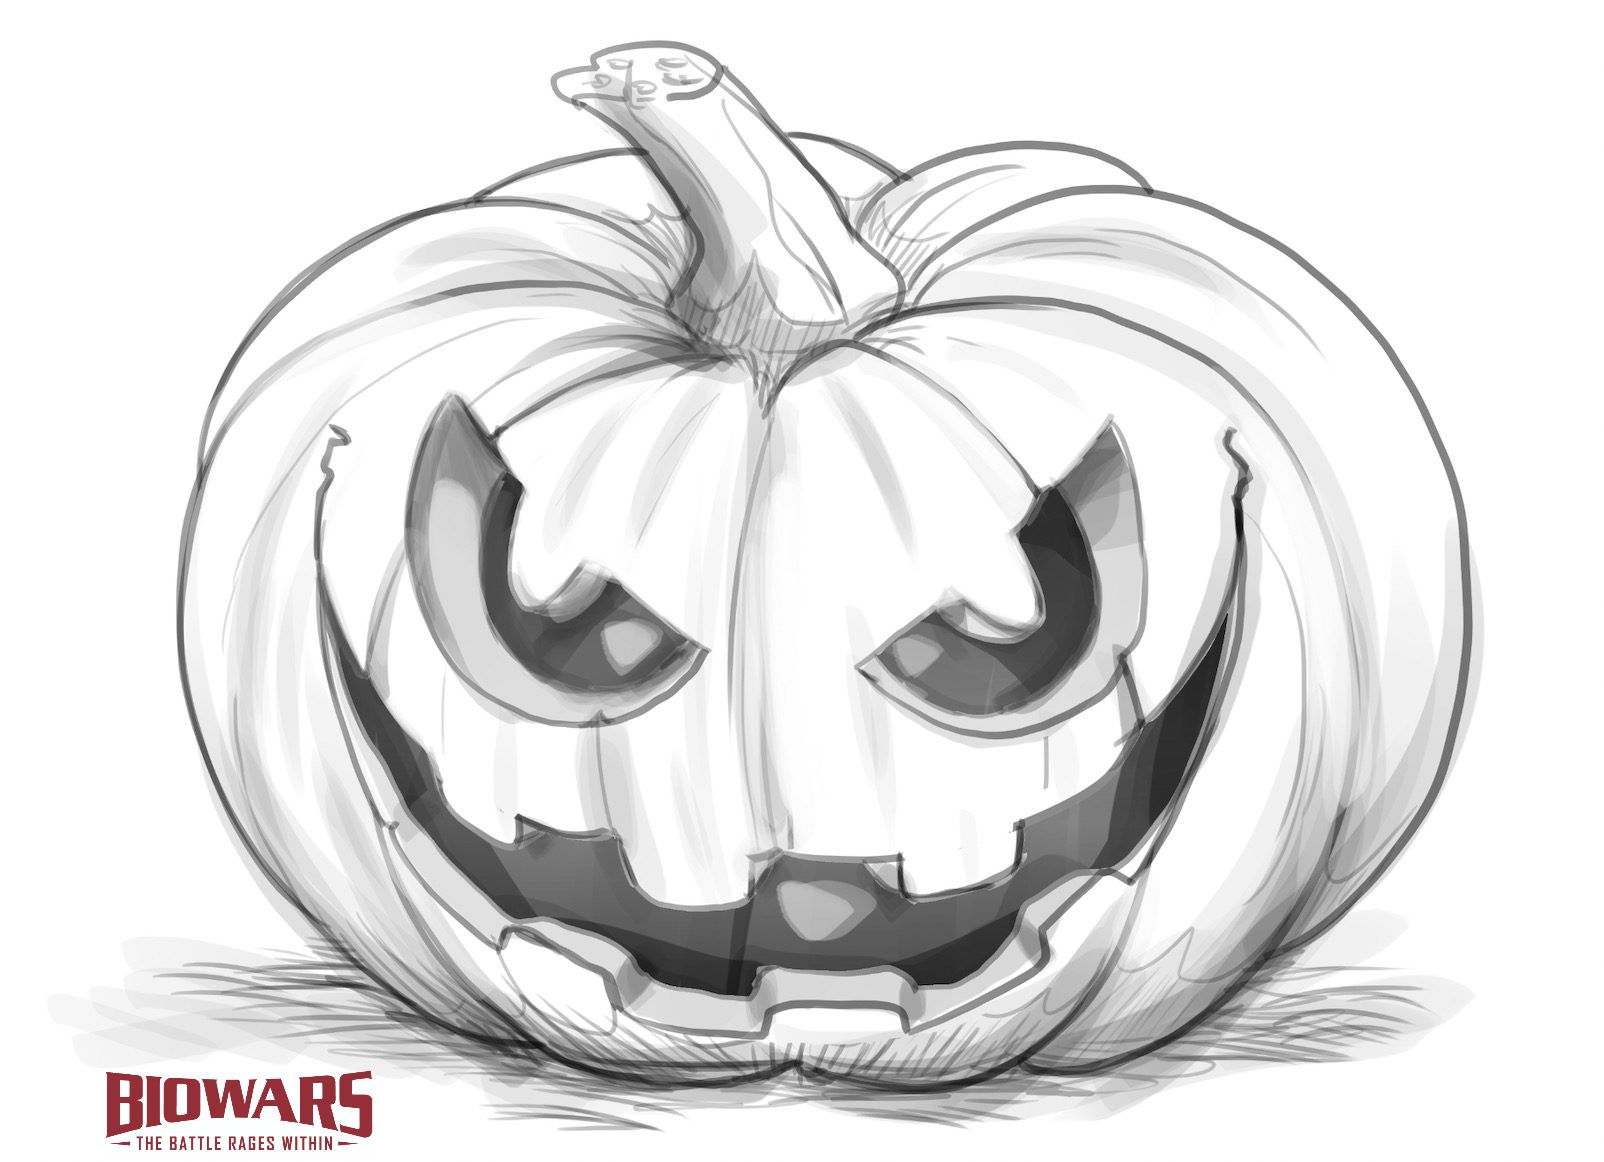
In this guide, we’ll show you the steps to easy pumpkin drawing so you can have some Halloween fun!
The Tools You Need For An Easy Pumpkin Drawing
Before you start your pumpkin drawing, it’s essential to gather the right tools to make the drawing process as smooth as possible.
Here’s a list of drawing supplies that will make your spooky pumpkin drawing easier:
- H Pencil: With a hard lead, this pencil is ideal for creating delicate lines, which makes it perfect for the initial sketching phase. Its precision allows you to carefully outline shapes with control and accuracy.
- HB Pencil: The HB pencil has a balanced graphite core that allows you to create lines that are neither too light nor too dark. It’s great for refining details and adding gentle shading to enhance your drawing with subtle contrasts.
- 4B Pencil: This pencil has a softer core compared to the HB, allowing for richer, darker strokes. Its softness makes it perfect for smooth shading and adding depth with bold tones.
- Blending Stump: A blending stump is a useful tool for softening lines, creating smooth transitions between shades and achieving soft gradients on your pumpkin drawing.
- Kneaded Eraser: This flexible eraser can be shaped as needed, making it ideal for erasing small details or creating highlights. Its malleability offers precision and allows for subtle adjustments in your sketch.
These are just recommendations — you don’t have to use all of the tools above!
You can stick to your favorite pencil and an eraser of your choice.
What matters most is your willingness to practice your drawing skills.
And if you prefer digital drawing to traditional pen and paper, check out our guide on the best drawing tablets to find the one that best suits your needs.
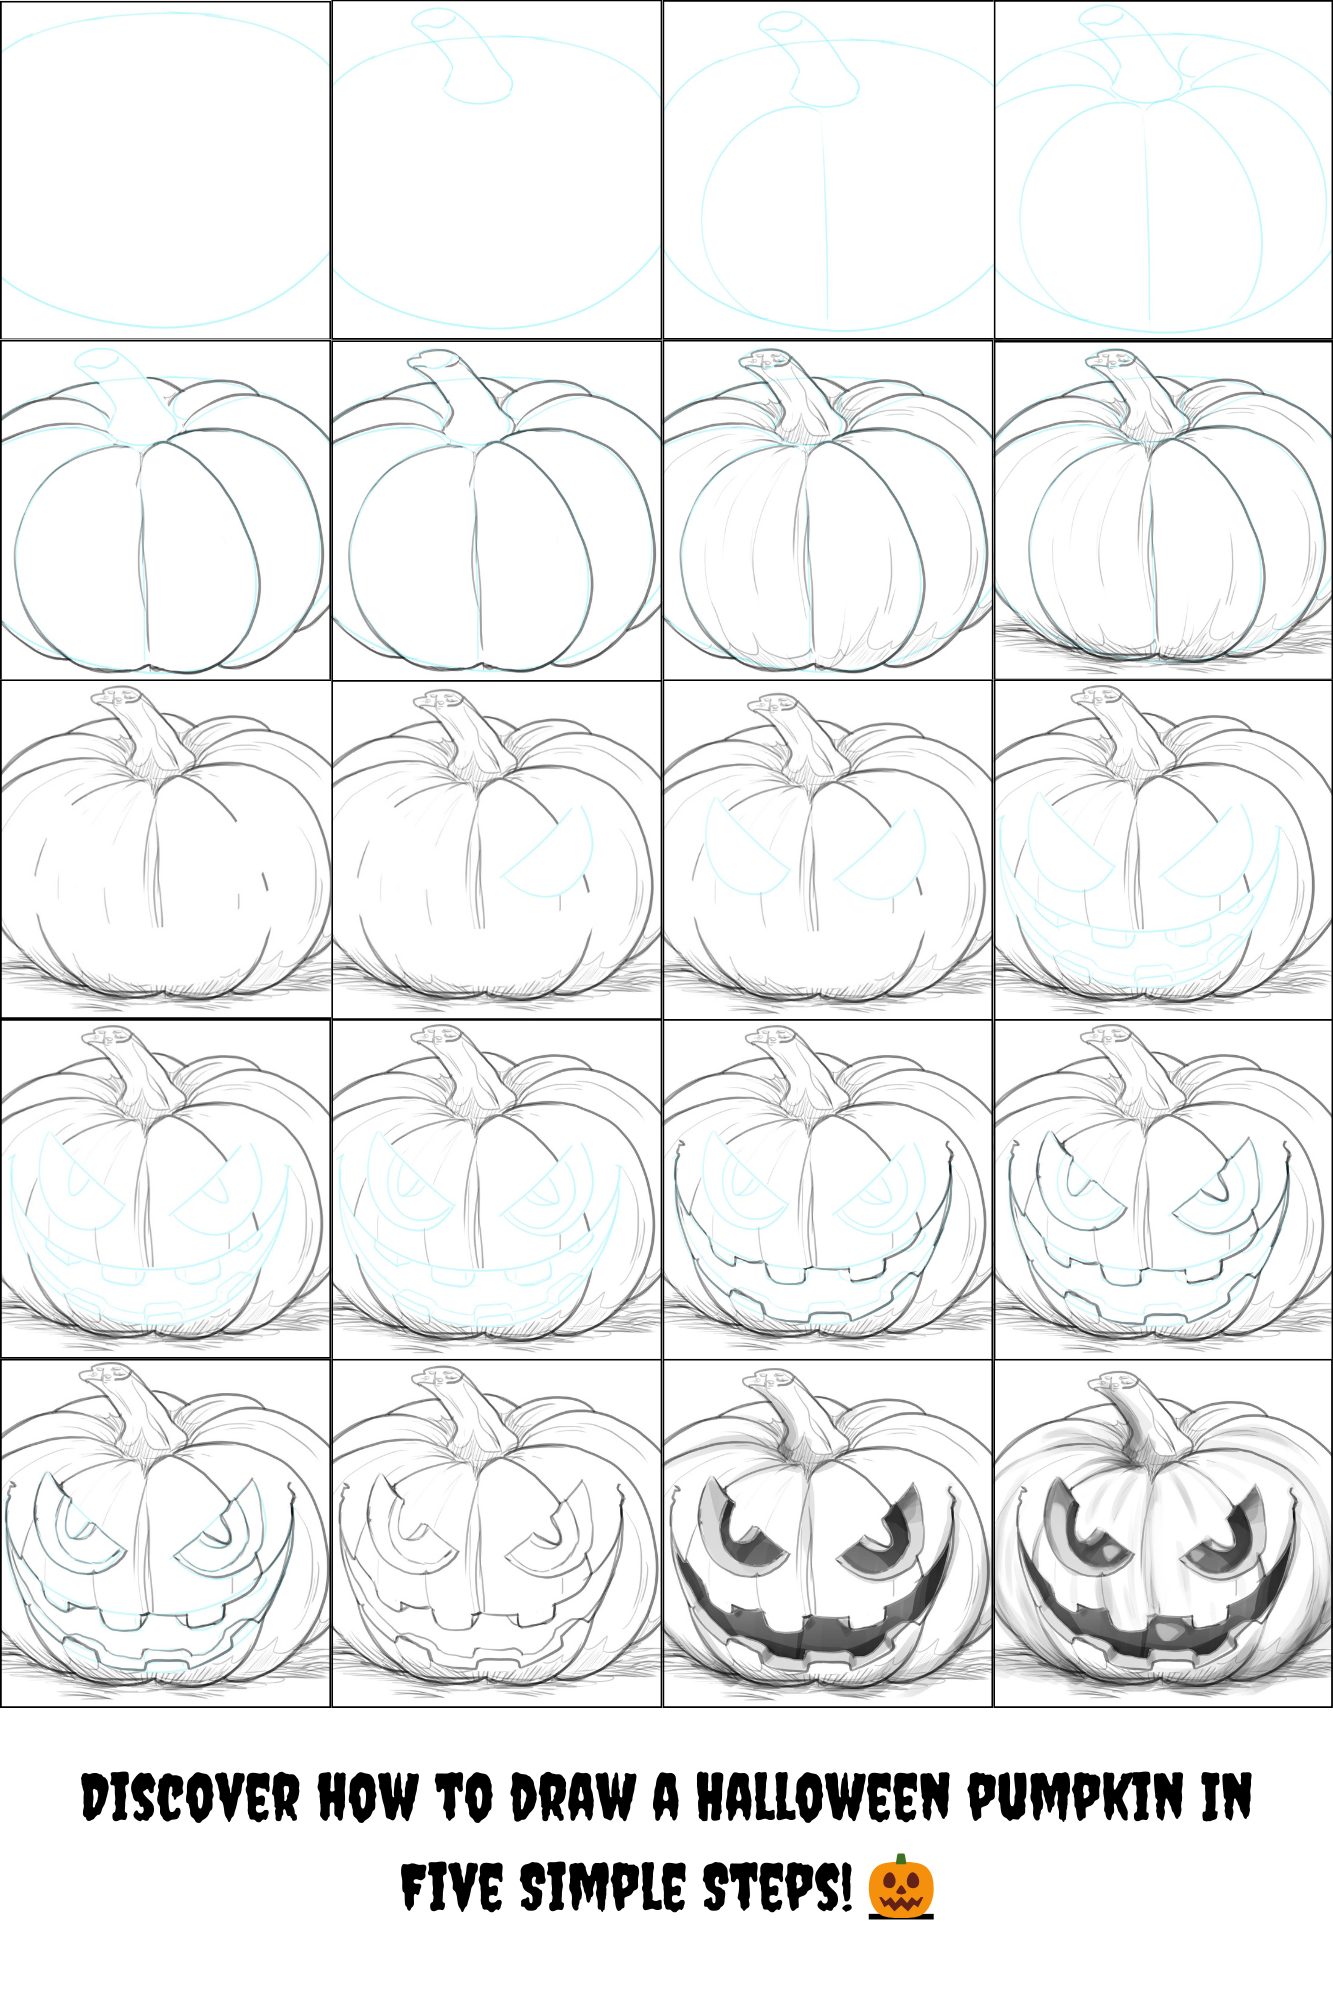
How To Draw A Pumpkin In 5 Steps
Once you get your tools ready, it’ time to bring your pumpkin to life on paper.
Follow these five simple steps to sketch your jack-o’-lantern!
1. Draw The Base
Recommended tool: H pencil
To create the base for your pumpkin drawing, sketch an oval shape like so:

2. Add The Details And Enhance The Lines
Recommended tools: H pencil, HB pencil
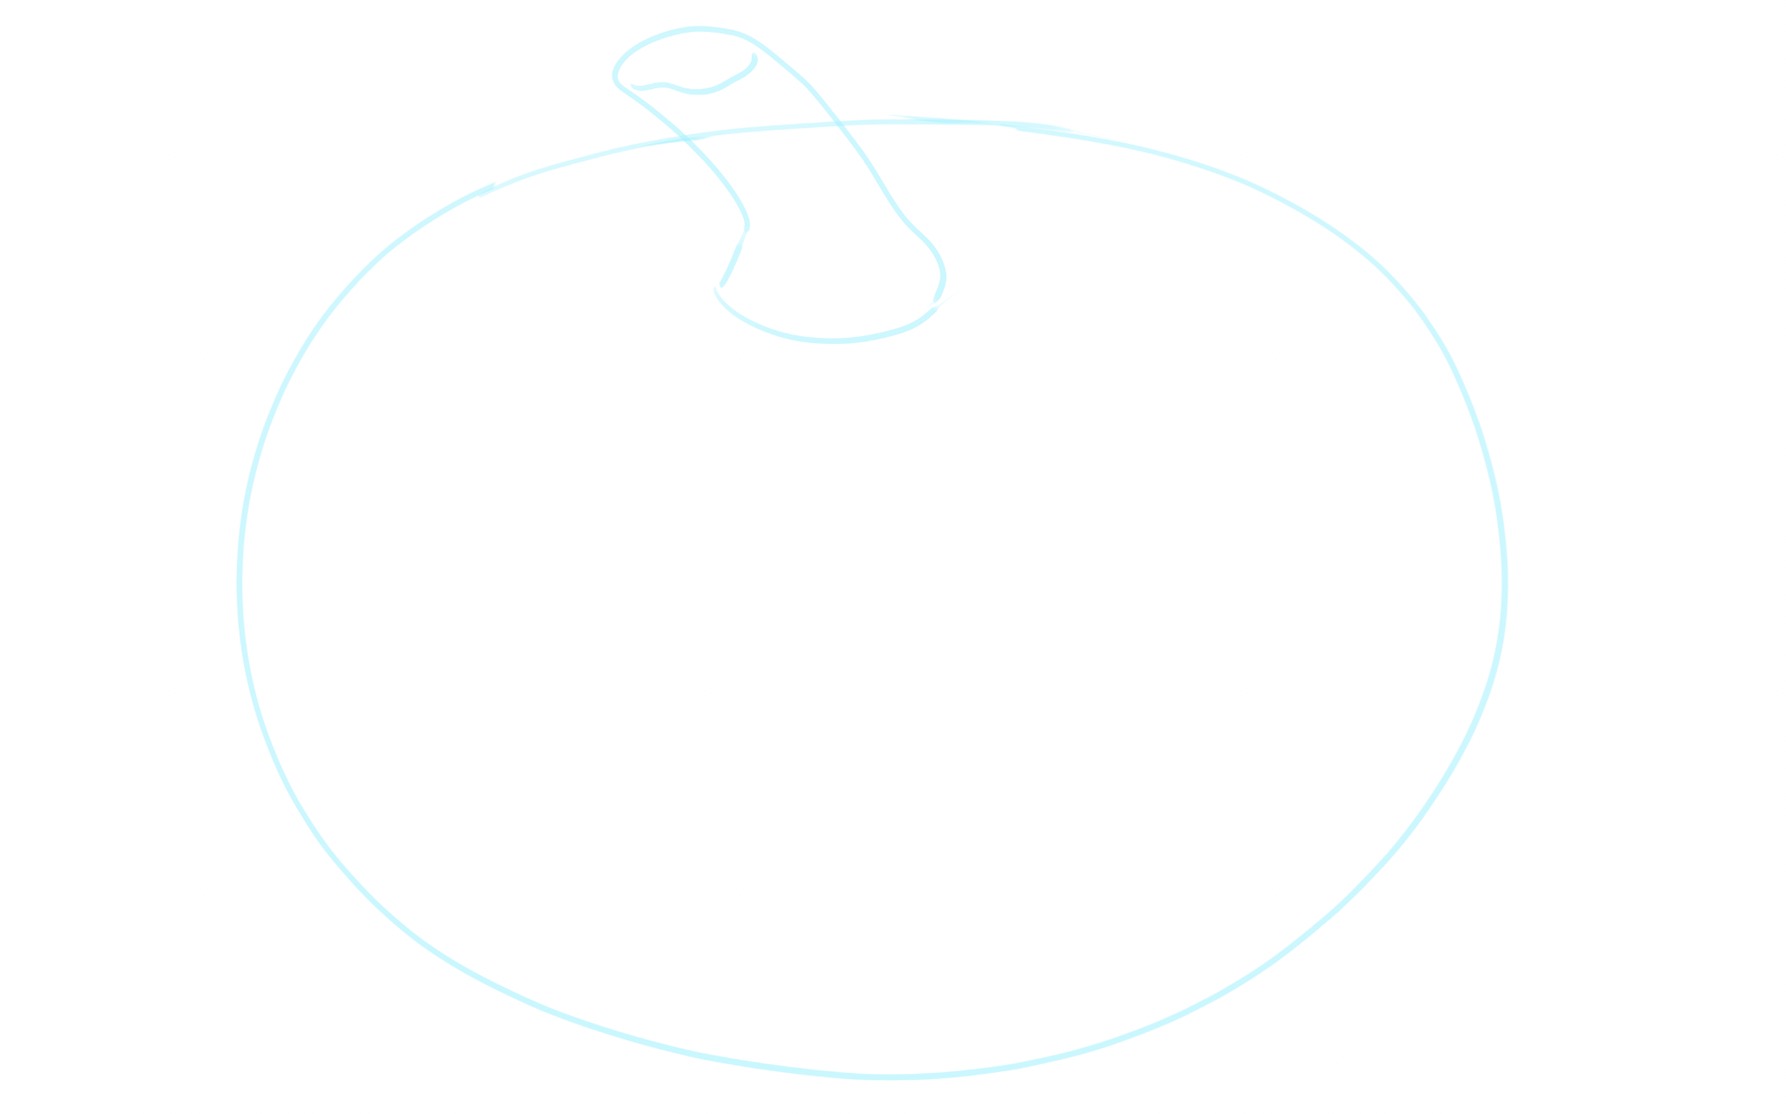
Now, let’s add a stem, a.k.a., a peduncle to the sketch.
Pumpkin stems are thick and slightly curved, with a woody texture.
Position the stem at the center of the pumpkin, near its top, like so:
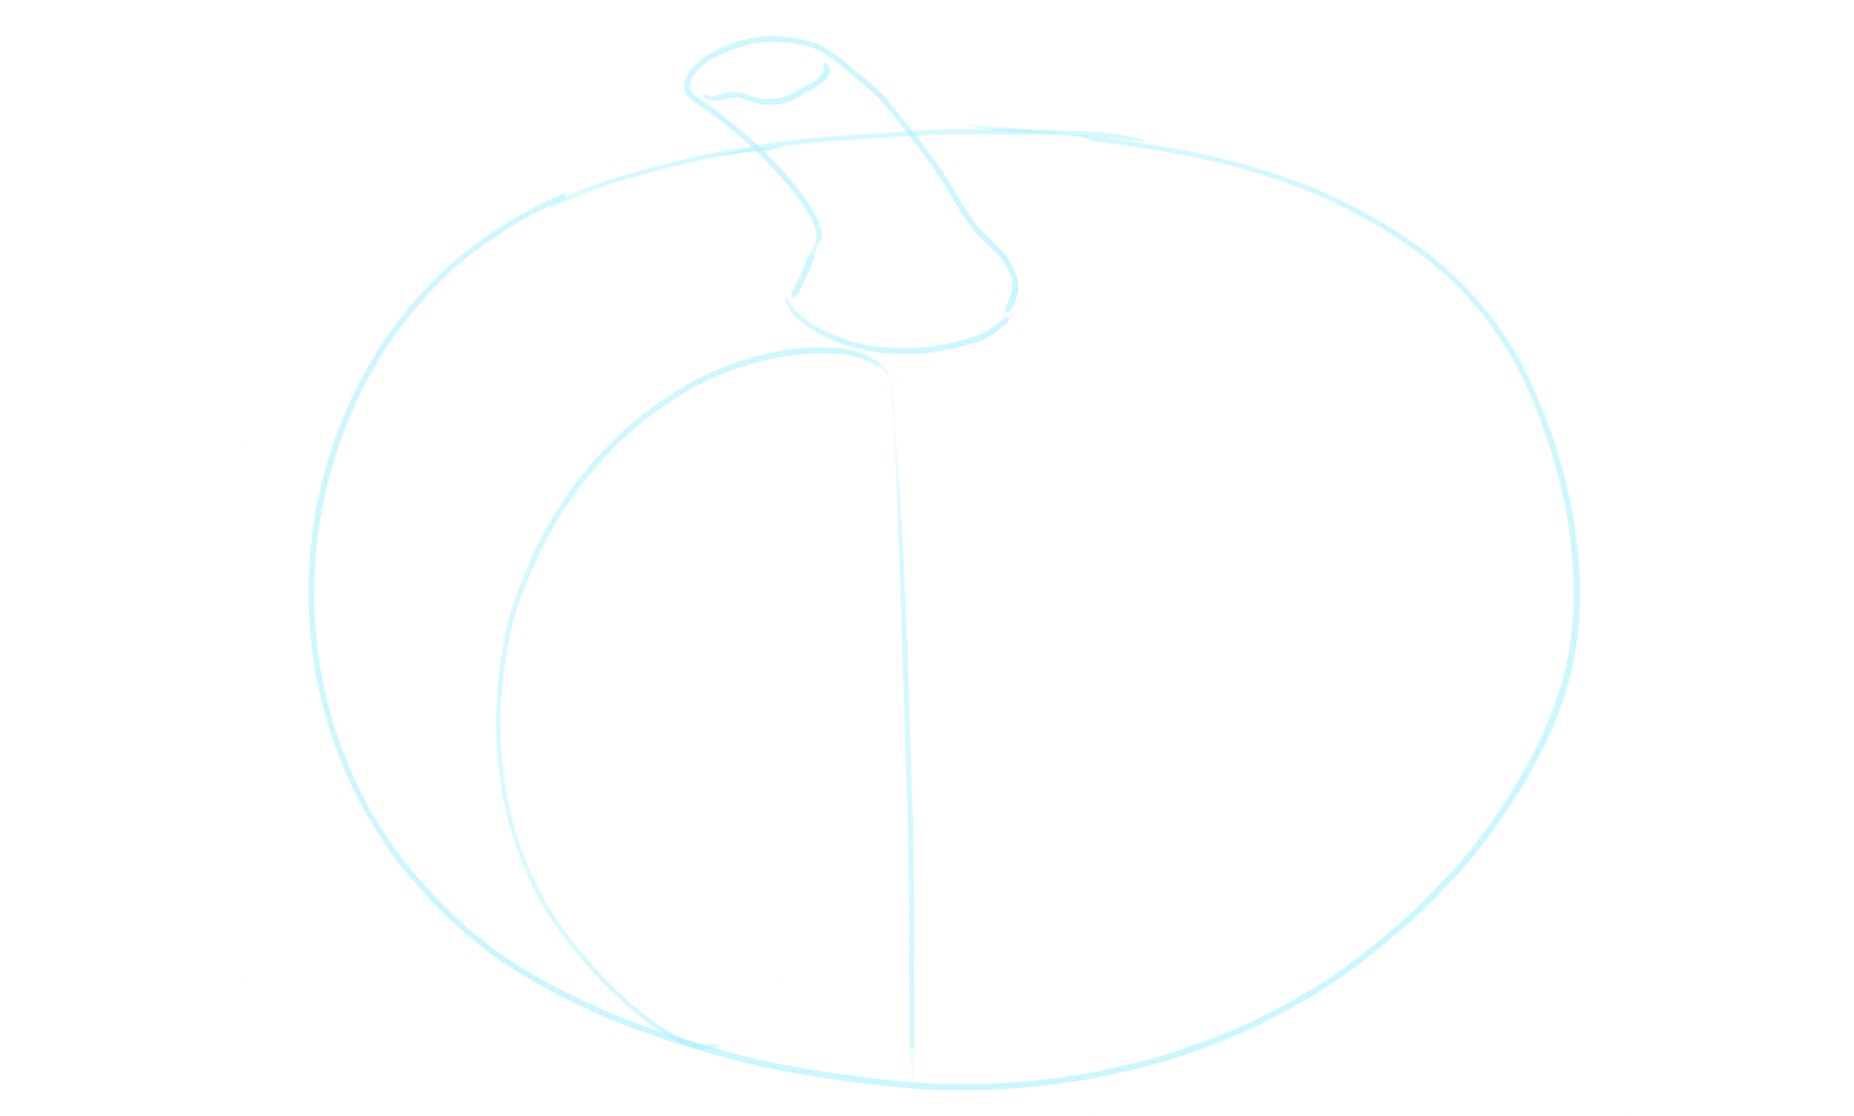
Now it’s time to start drawing ribs — the vertical ridges that go from the stem to the base of the pumpkin.
Ribs give pumpkins their recognizable segmented appearance but also provide natural guidelines you can use to create symmetry when drawing your pumpkin.
Start by drawing a curved line to the left of the stem. Then, add a straight line to the right, around the middle of the pumpkin:
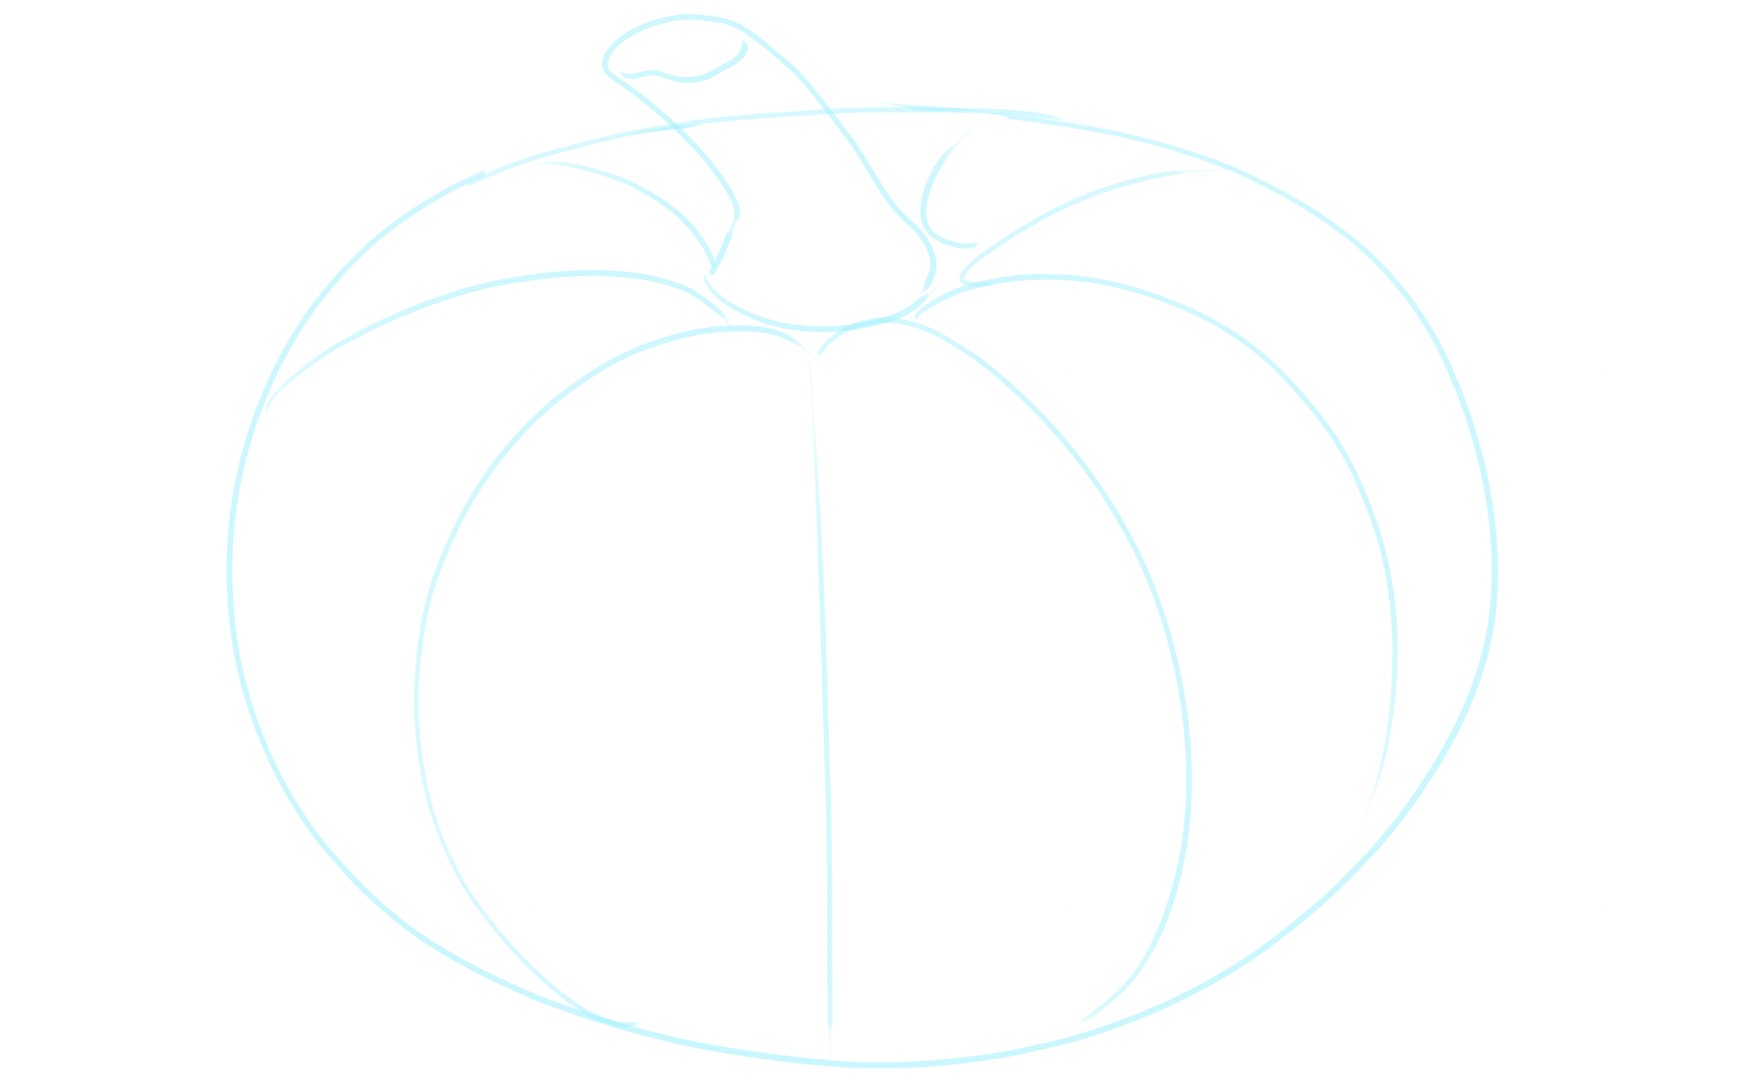
Keep adding the ribs around the rest of the pumpkin, from top to bottom.
Of course, you can’t see the ribs that are further in the back, so draw them by connecting the area around the stem to the edges of the pumpkin.
Make sure that the ribs are evenly spaced out, like this:
Now that the basic outline is ready, it’s time to enhance the lines using a darker lead.
We recommend going over the lines with an HB pencil, or you can simply apply more pressure using your preferred pencil to create dark grey lines:
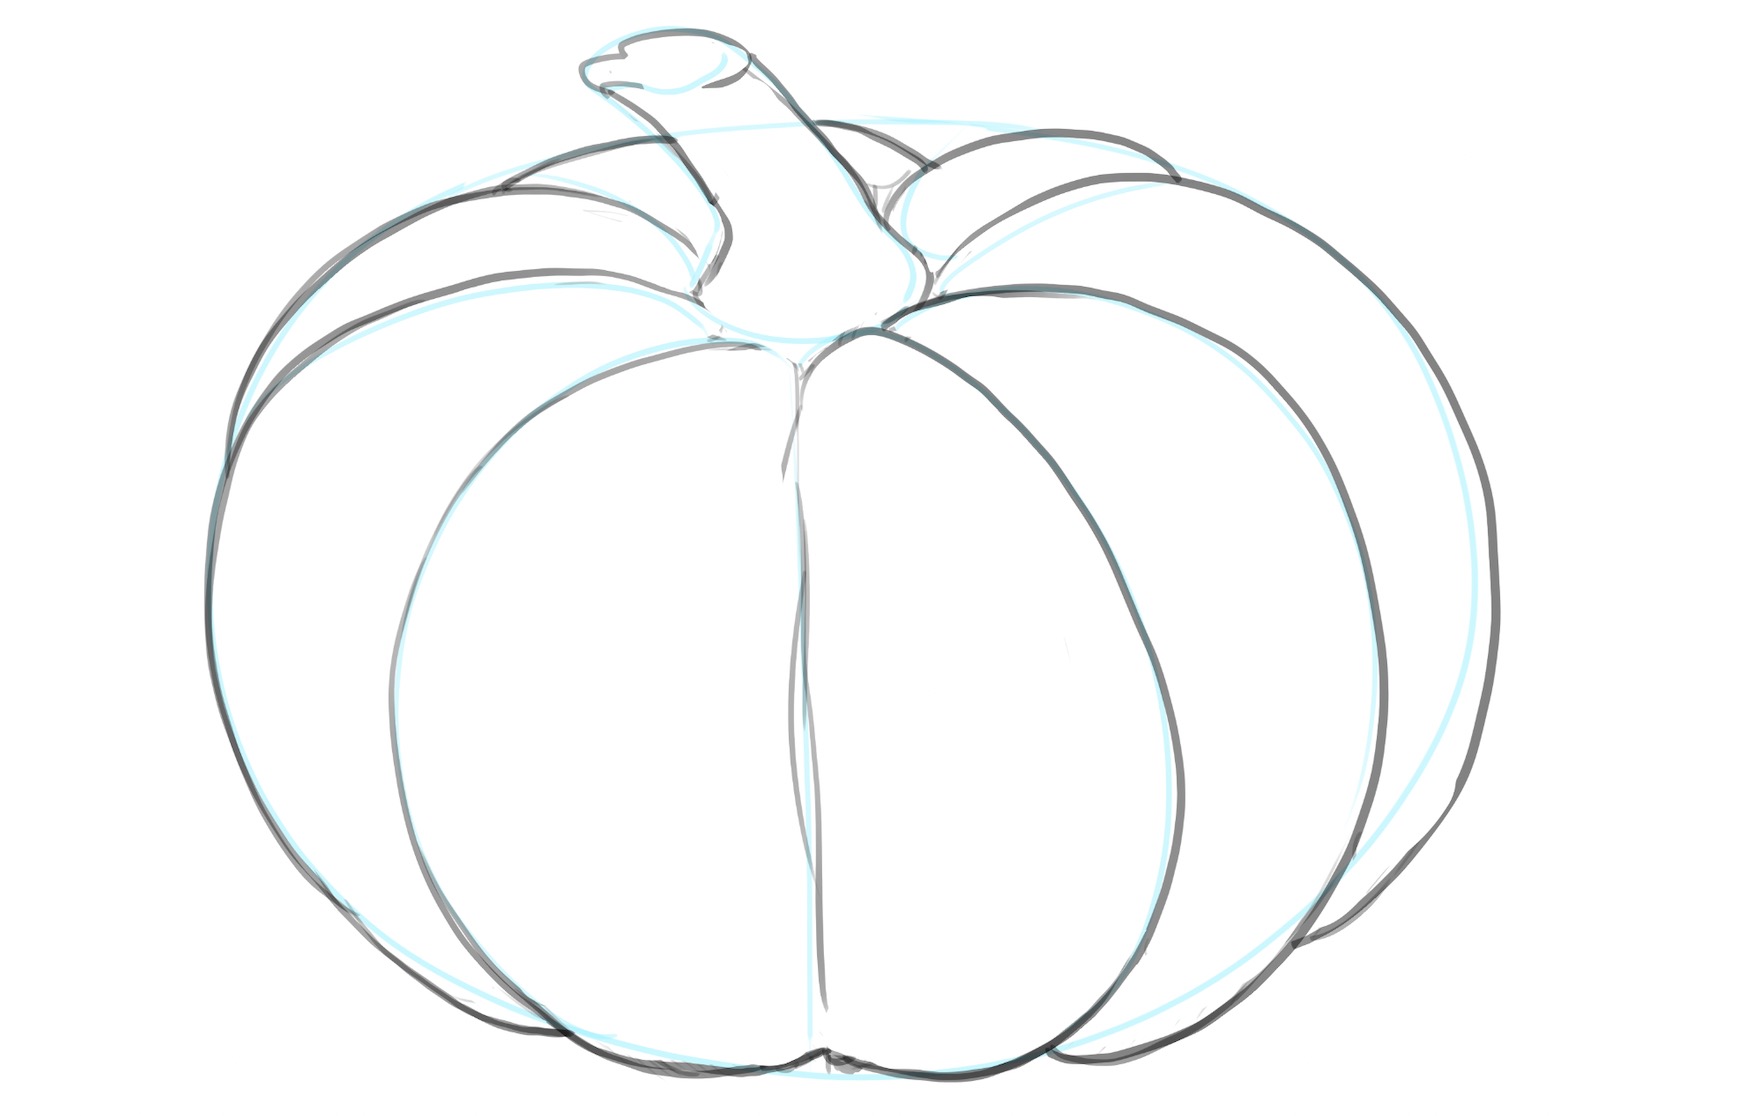
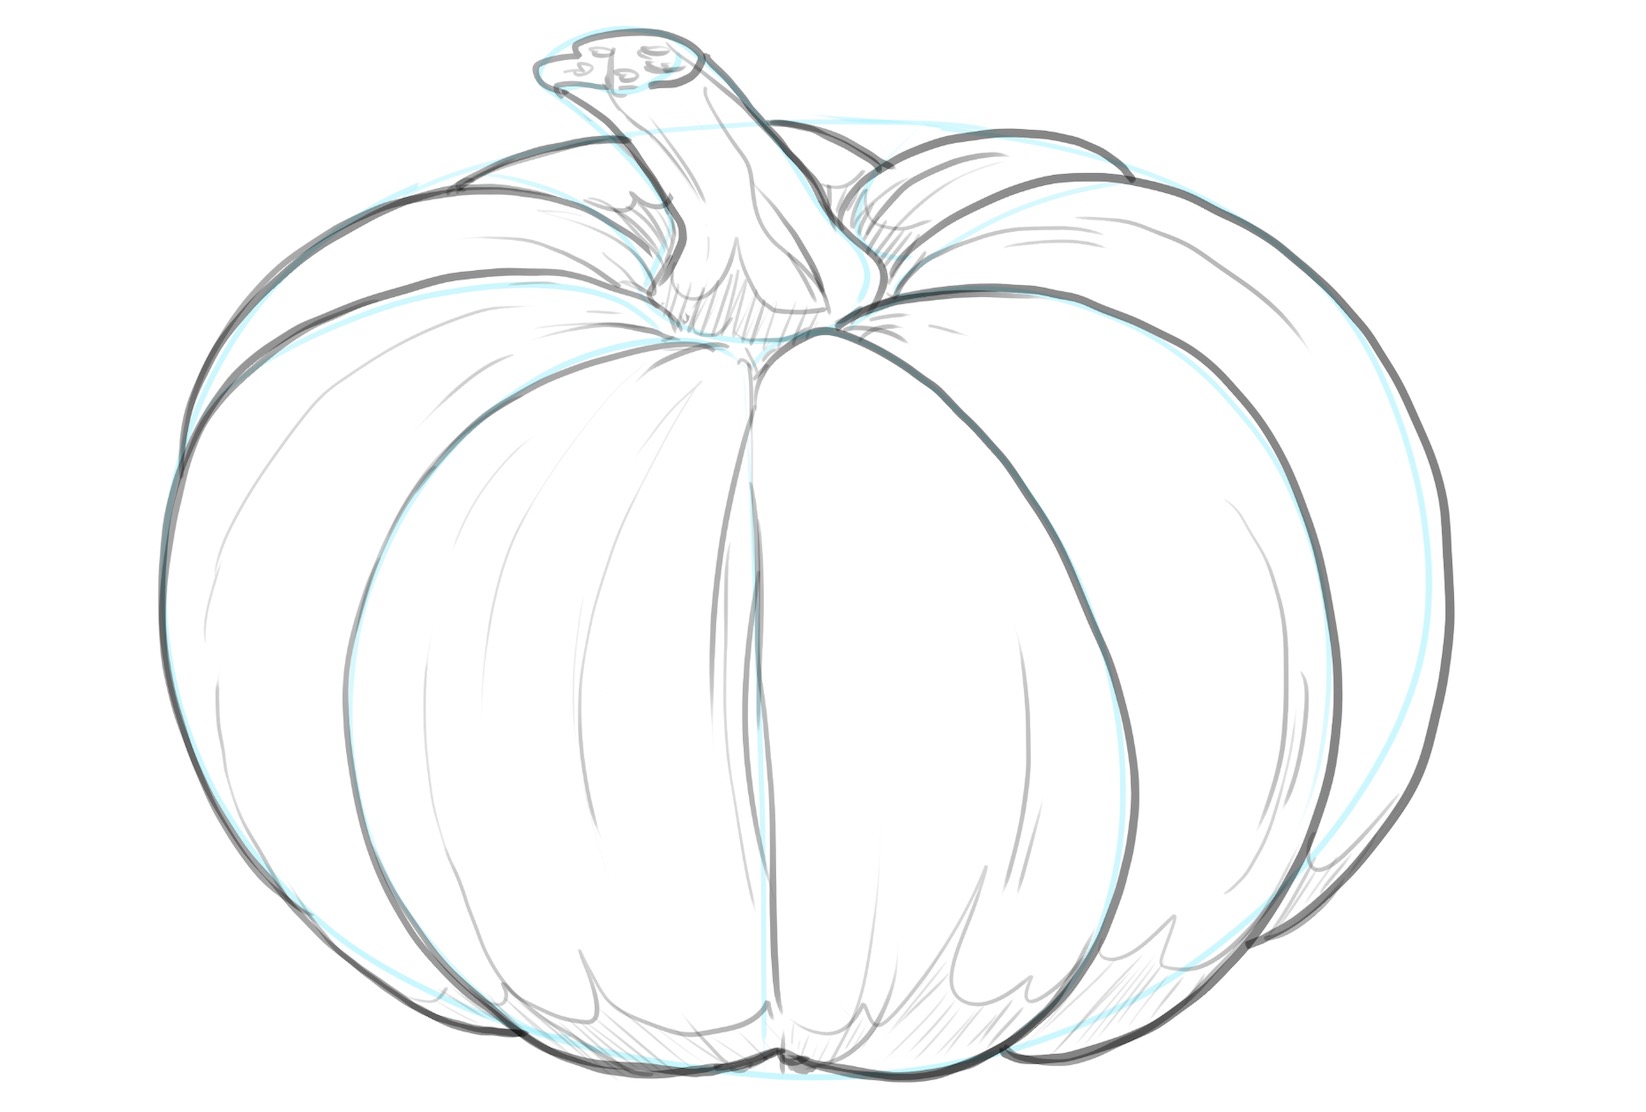
Now, let’s add some details to the pumpkin’s surface to make it look more natural.
Sketch some gentle, curved lines around the stem, the middle of the pumpkin and close to its bottom.
Then, add a few tiny circles to the top of the stem and some straight, parallel, angled lines to its root, to mimic ridges and bumps that reflect the woody nature of real pumpkin stems:
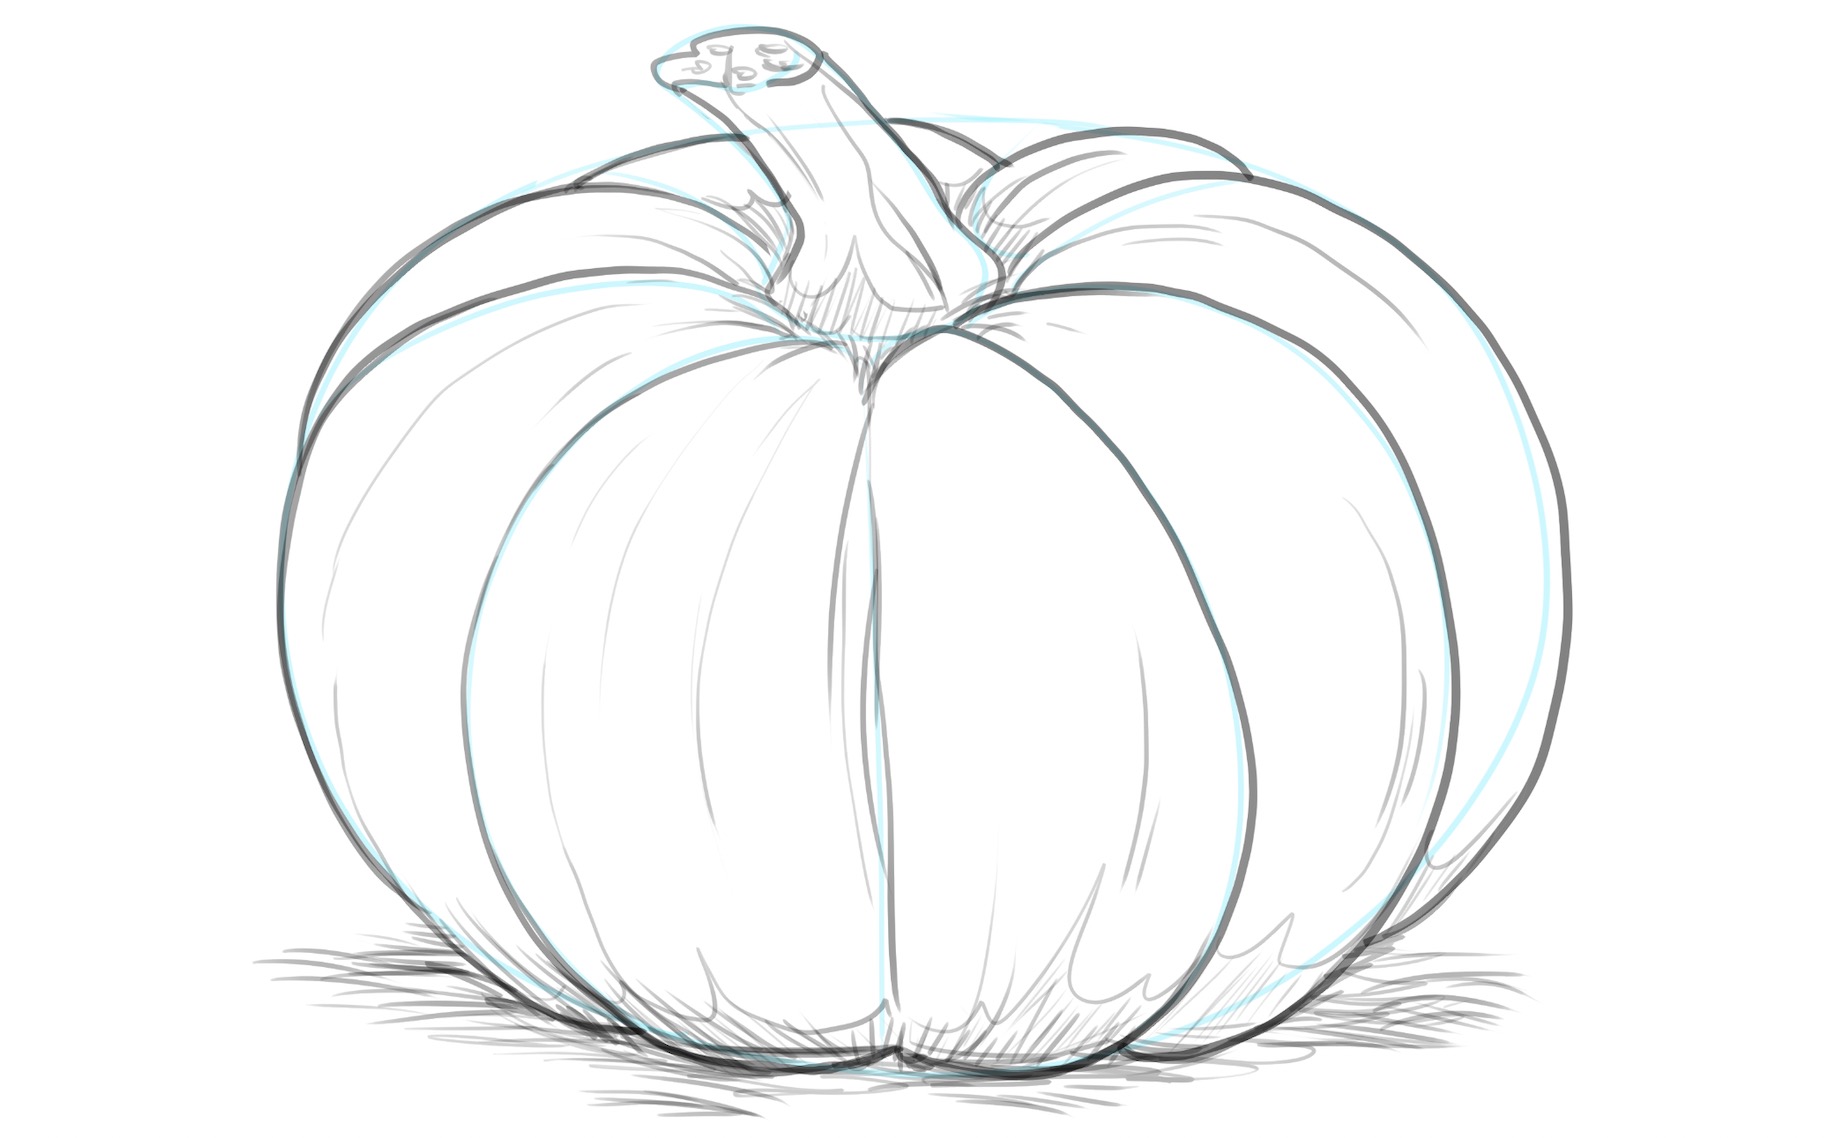
To add volume and depth to your pumpkin drawing, add short, horizontal lines under the pumpkin, like so:
3. Add The Eyes, The Nose And The Mouth
Recommended tools: HB pencil, kneaded eraser
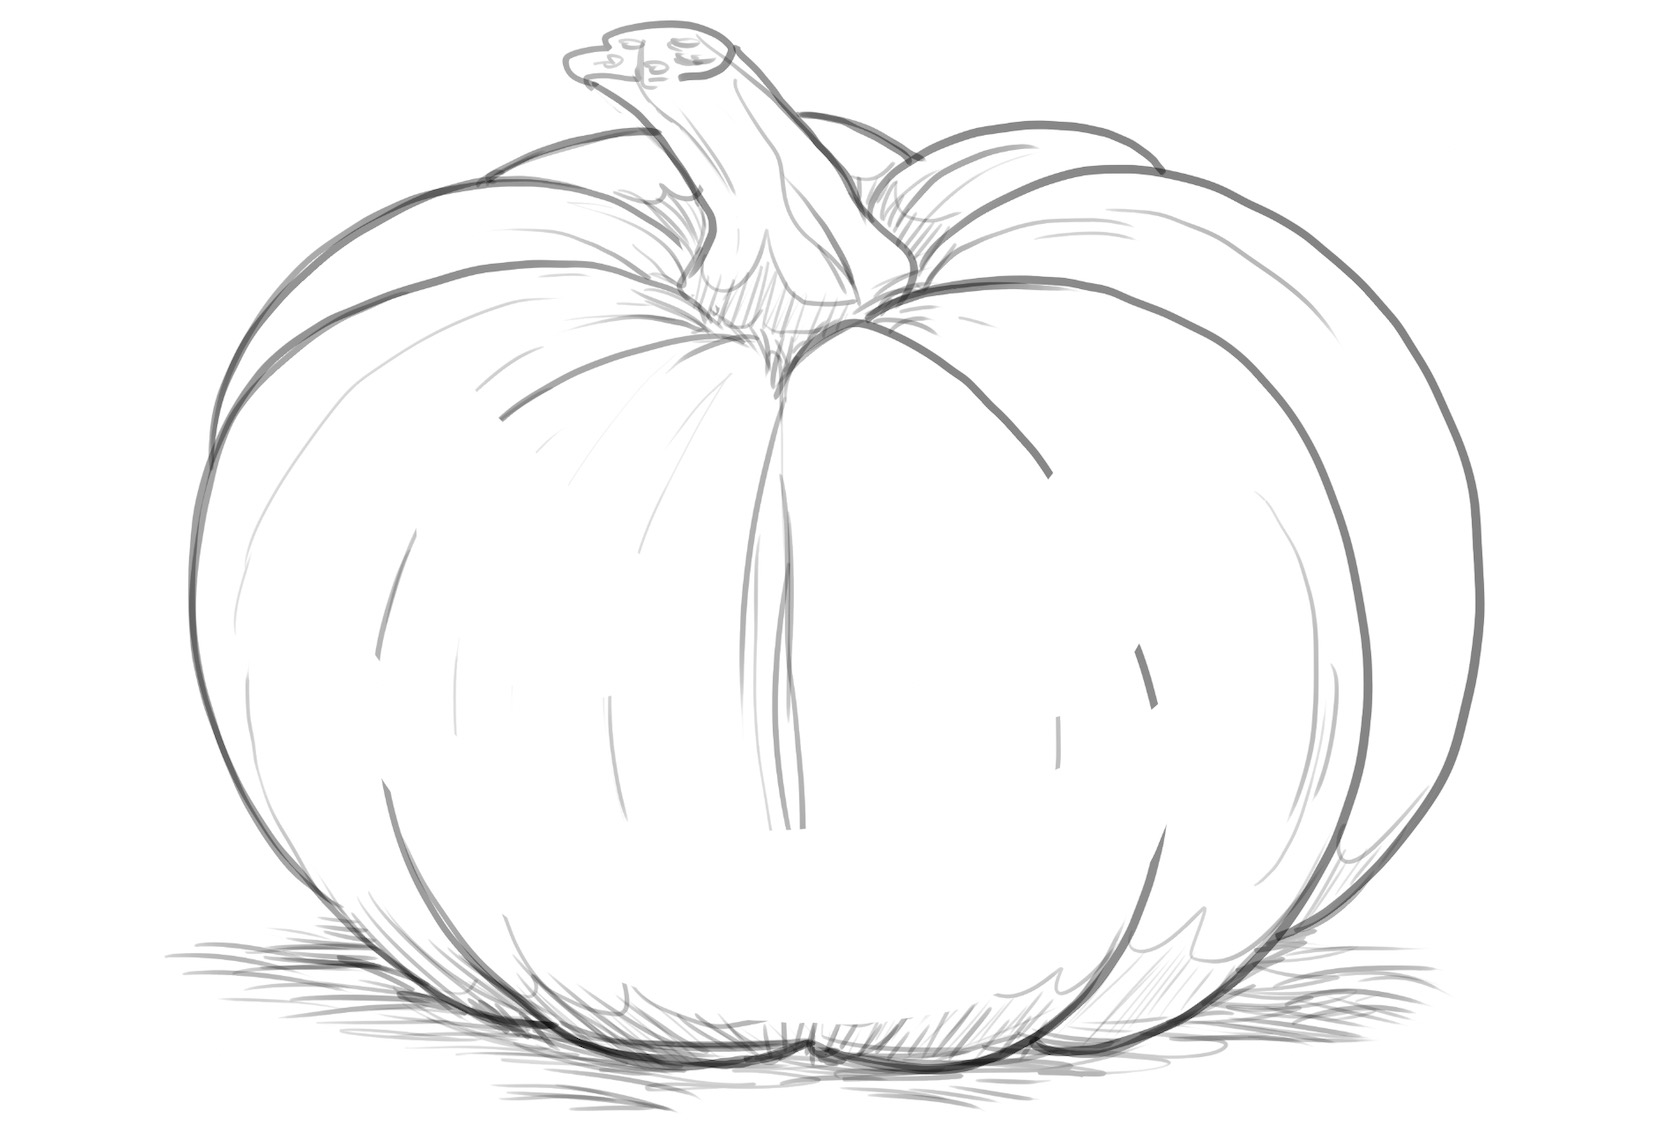
Before you start “carving” the pumpkin, let’s first prepare the terrain and erase the lines where the eyes, the nose and the mouth will be.
For greater precision, you can use a kneaded eraser (or any eraser of your choice):
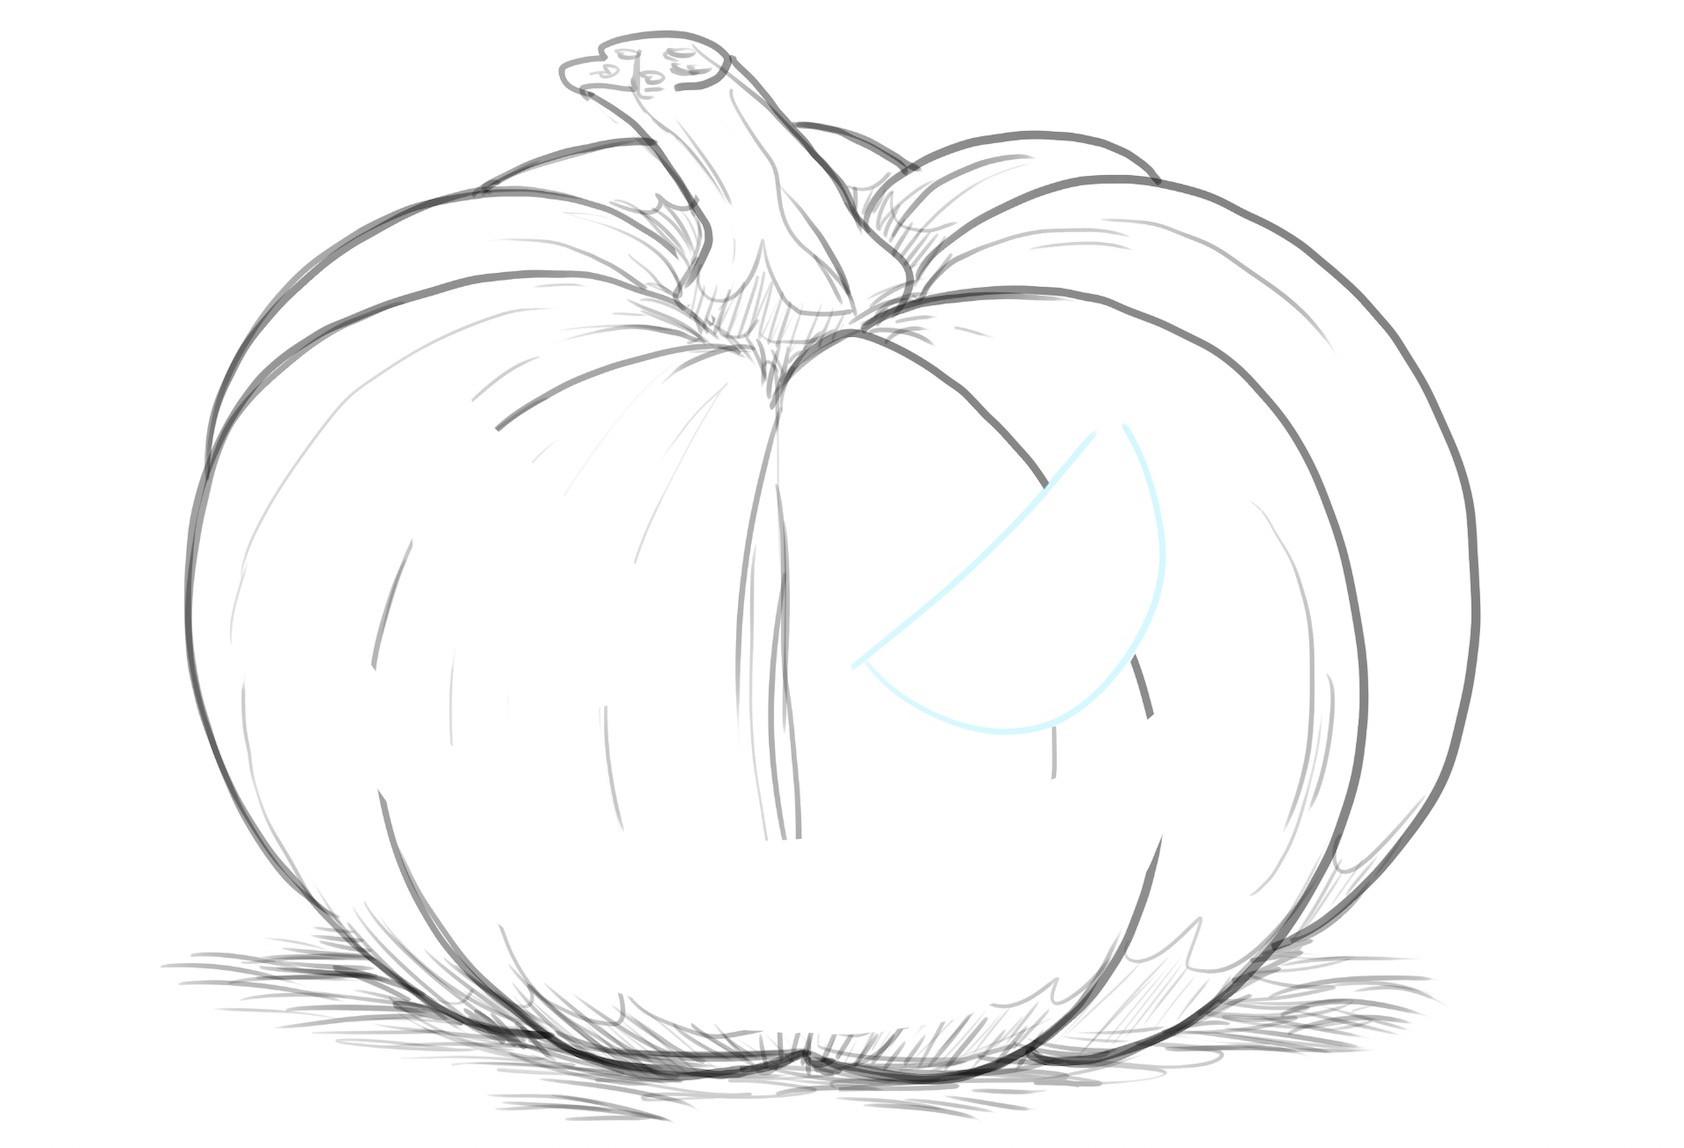
Then, let’s add the first eye.
To draw it, sketch one angled straight line and connect its ends with a curved line, like this:
Next, draw the left eye following the same principle:
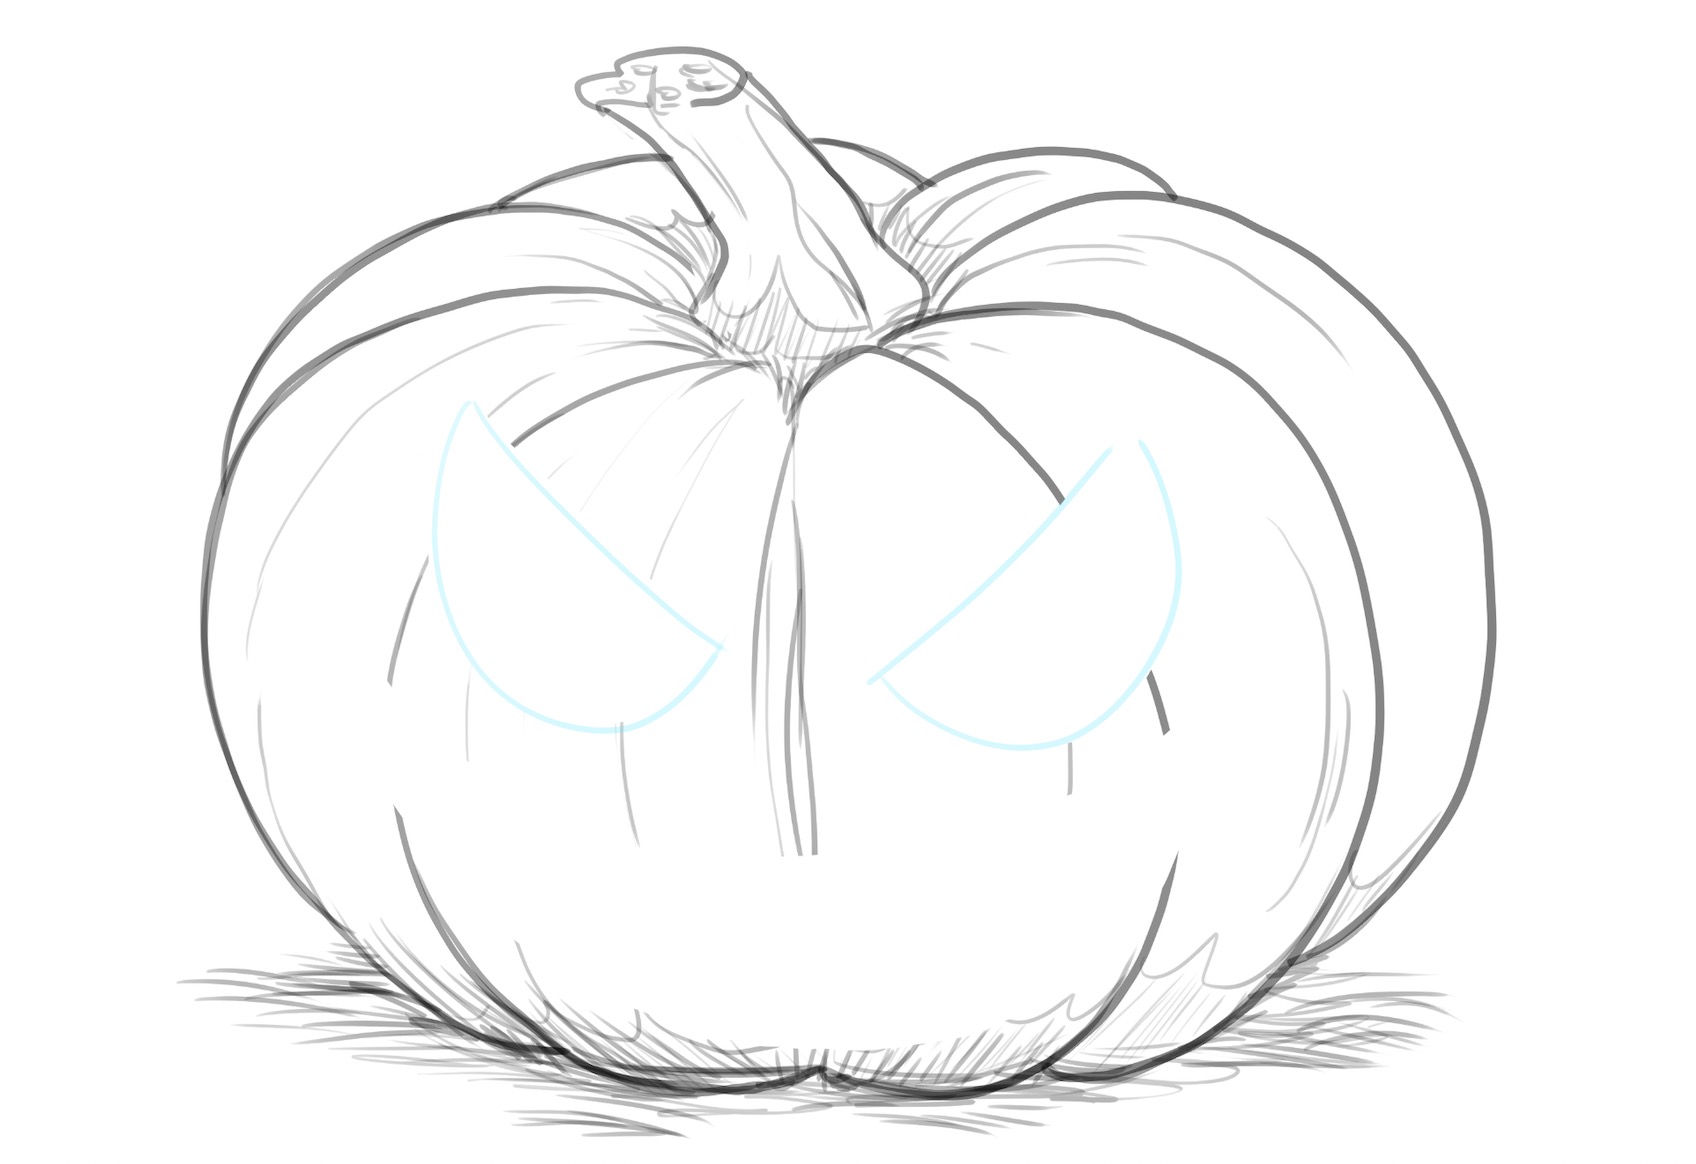
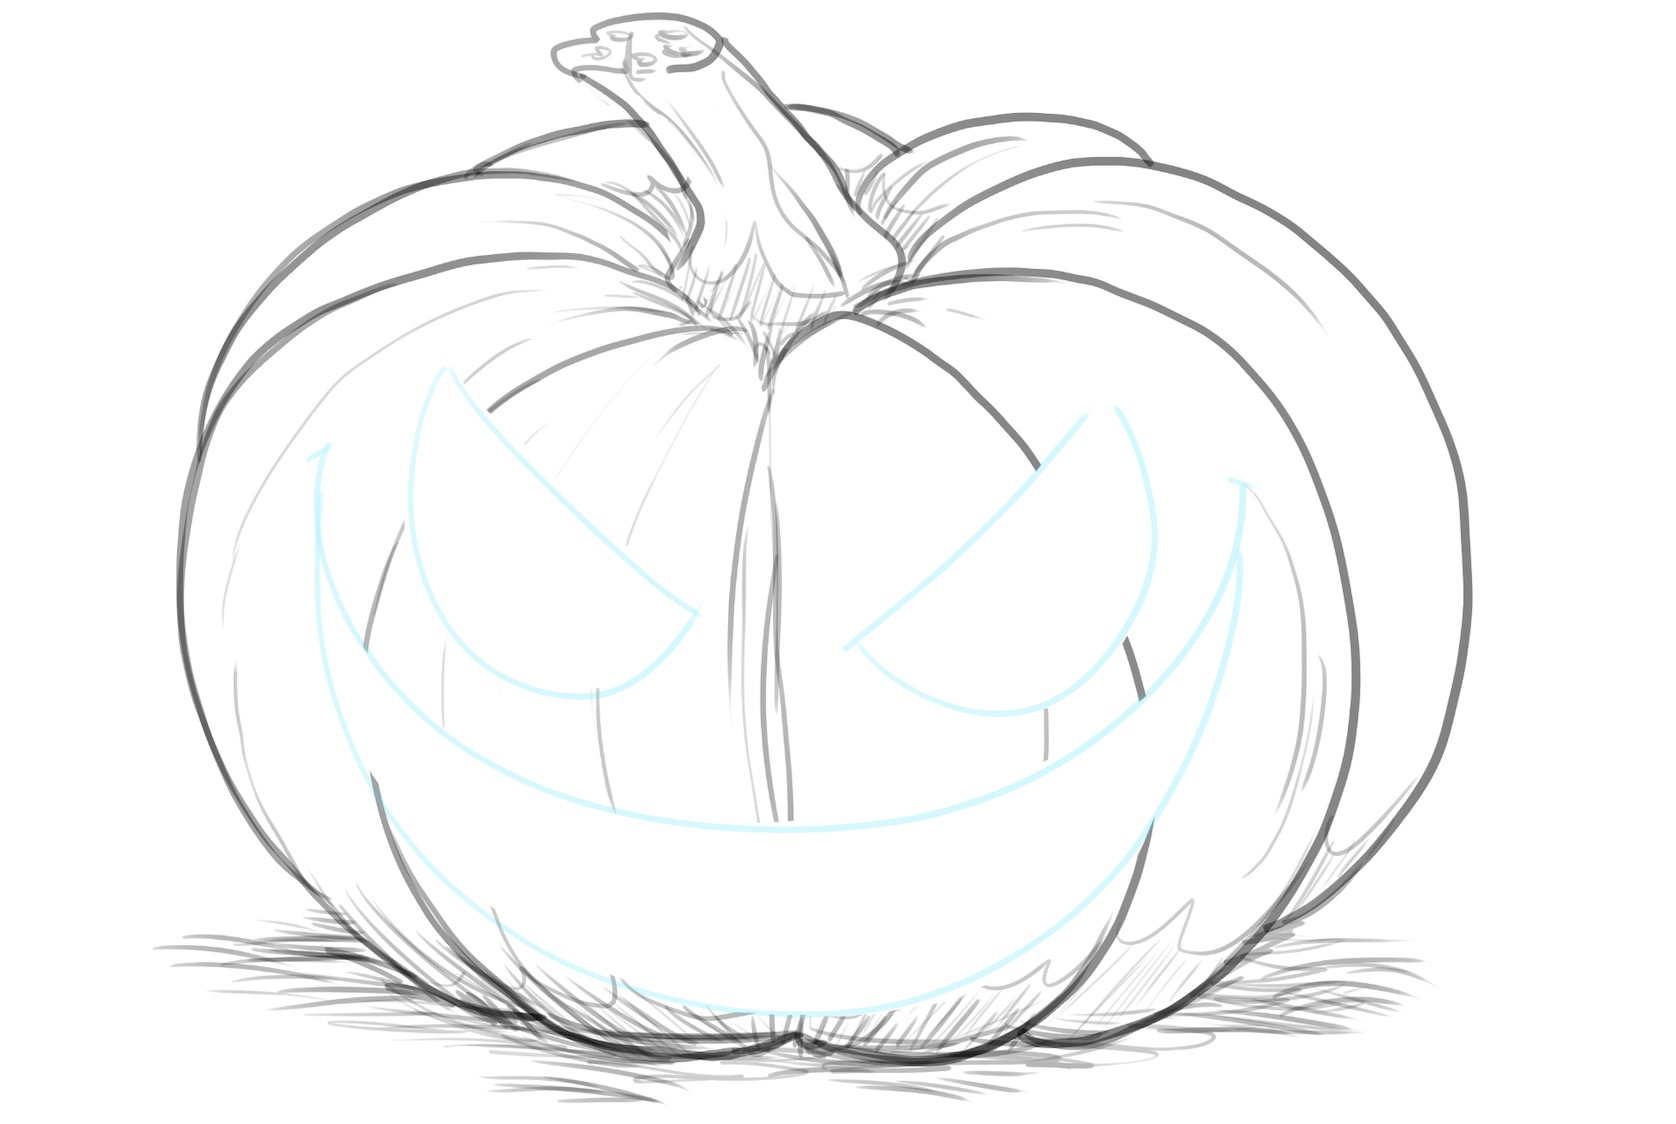
Once the eyes are in place, it’s time to “carve” the recognizable grinning mouth.
First up, outline the mouth — start from one end of the pumpkin, right next to the eye and draw a curved line all the way to the other side, under the other eye.
Make sure to draw a big mouth so that there’s enough space for the teeth, which we’ll draw next:
4. Add The Details
Recommended tool: H and HB pencils
Once the basic eyes and mouth outlines are ready, we want to add more details to the pumpkin sketch to make it look proper scary.
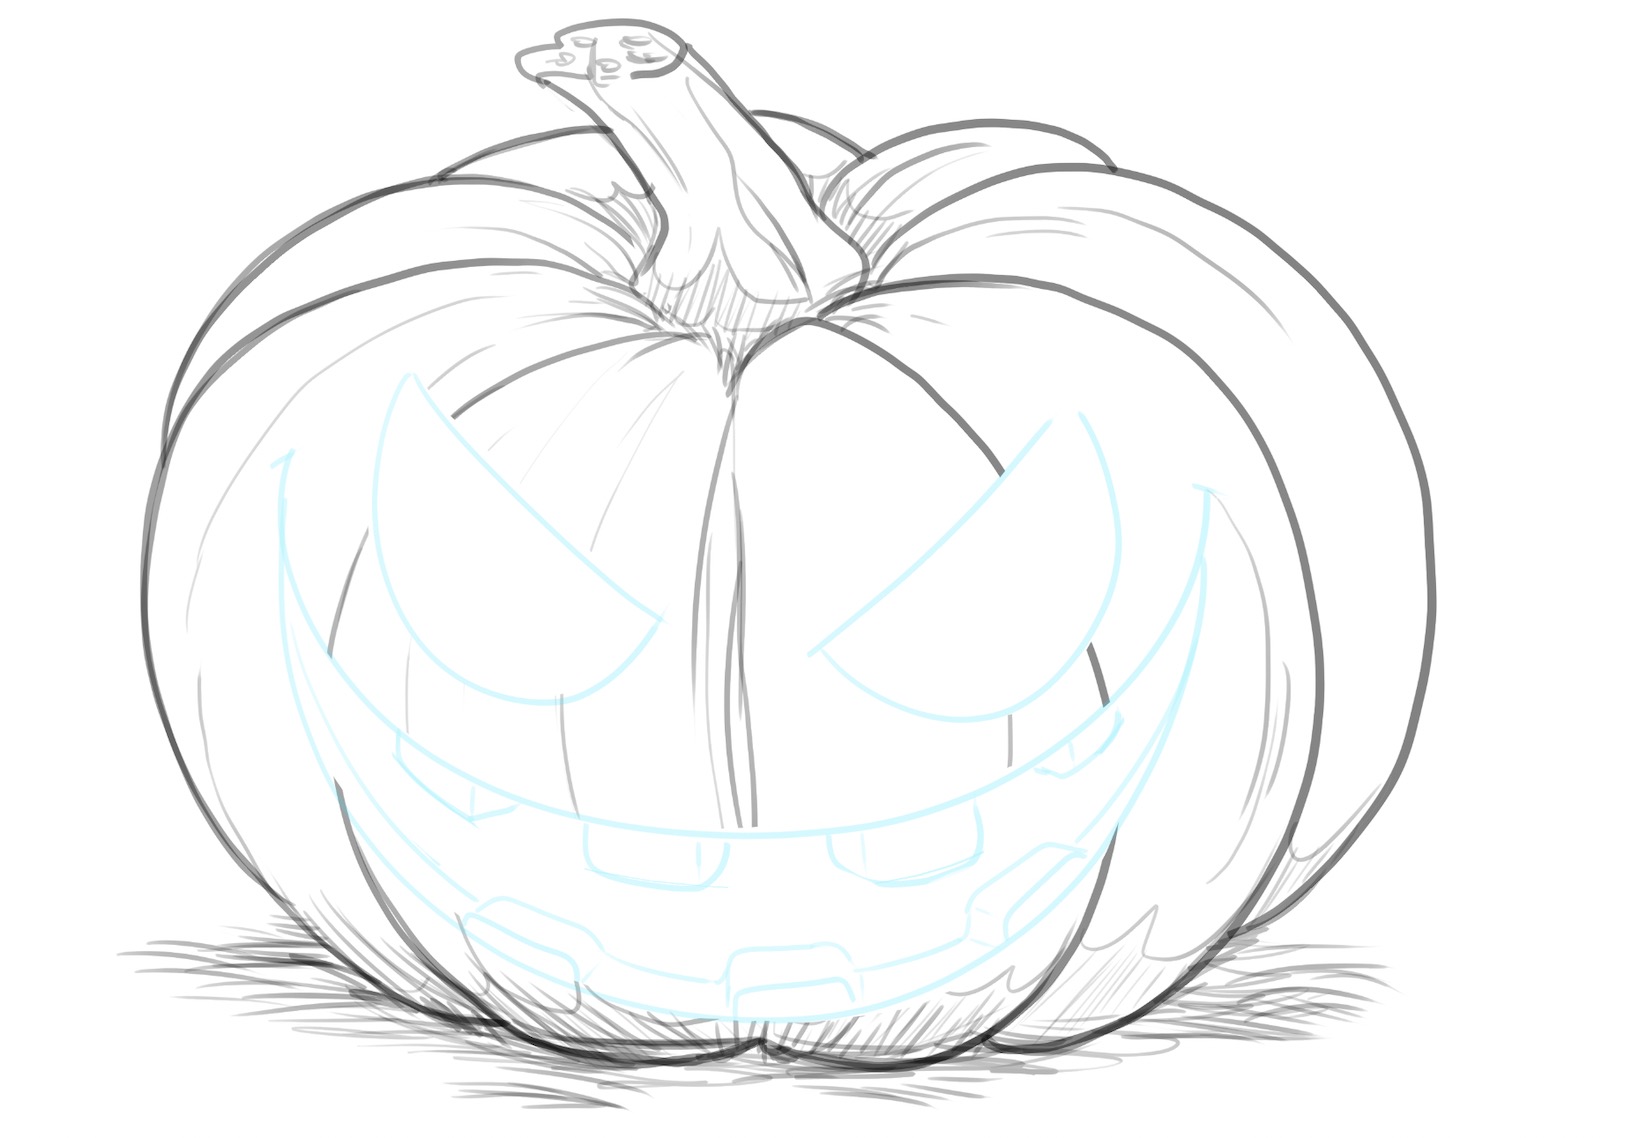
Let’s start by adding teeth to the sketch using an H pencil (or by applying less pressure to your preferred pencil).
You can draw the teeth as big, cube-like shapes, like so:
At this point, the pumpkin looks scary as is, but let’s keep adding more details to make it frightening.
Right now, we’ll focus on the eyes.
Let’s draw two small, curved shapes inside each eye — these will be the pupils:
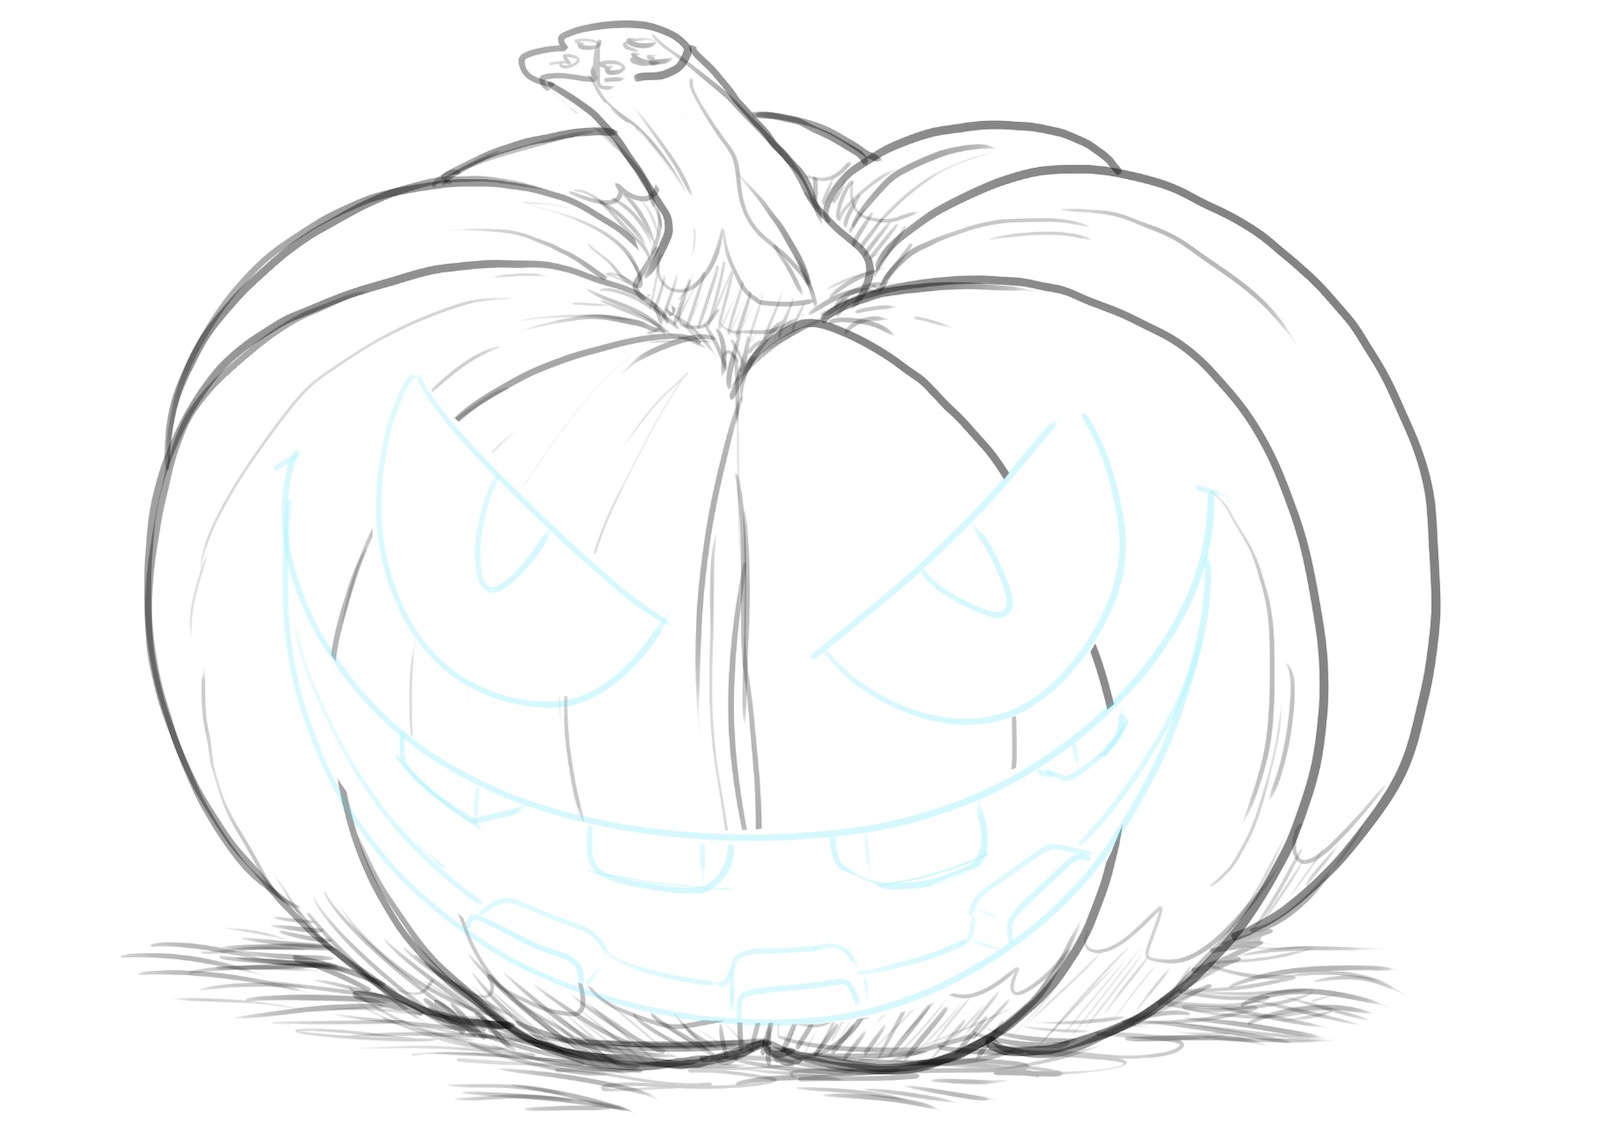
Then, we need to make these elements 3D to give the sketch more dimension. After all, we are depicting a carved pumpkin.
Start with the pupils and then go with the eye itself:
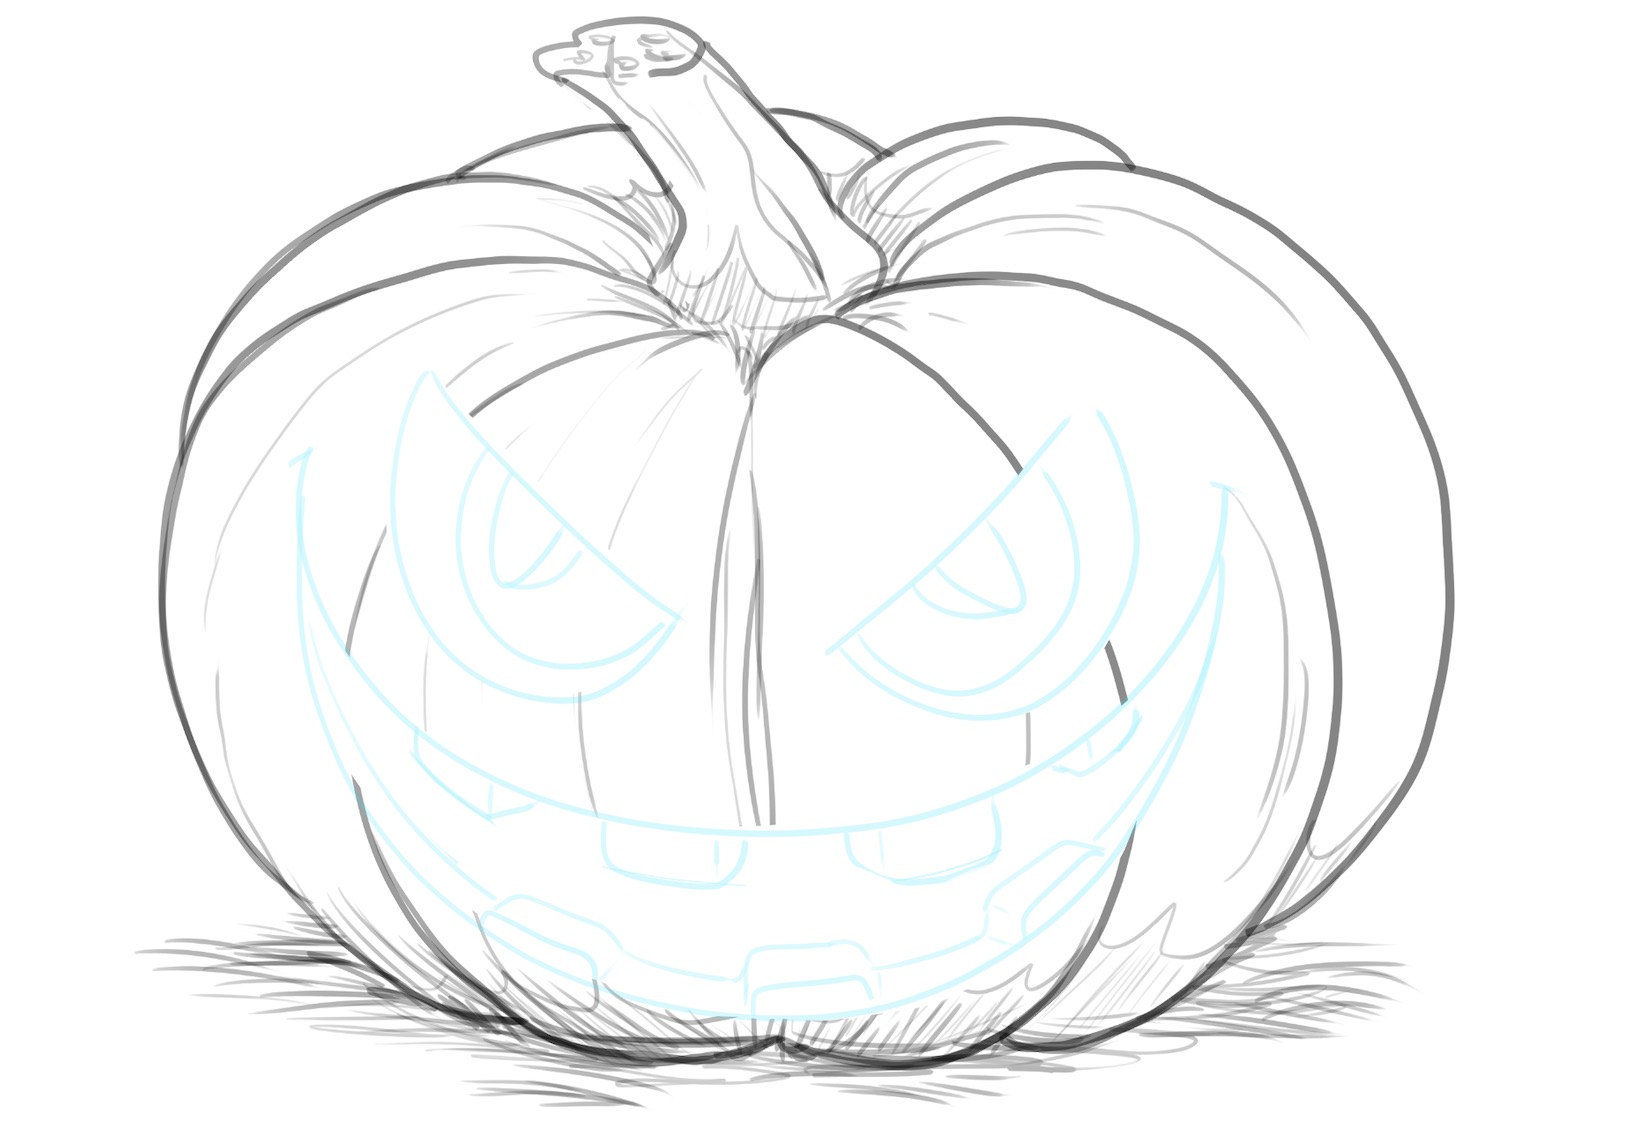
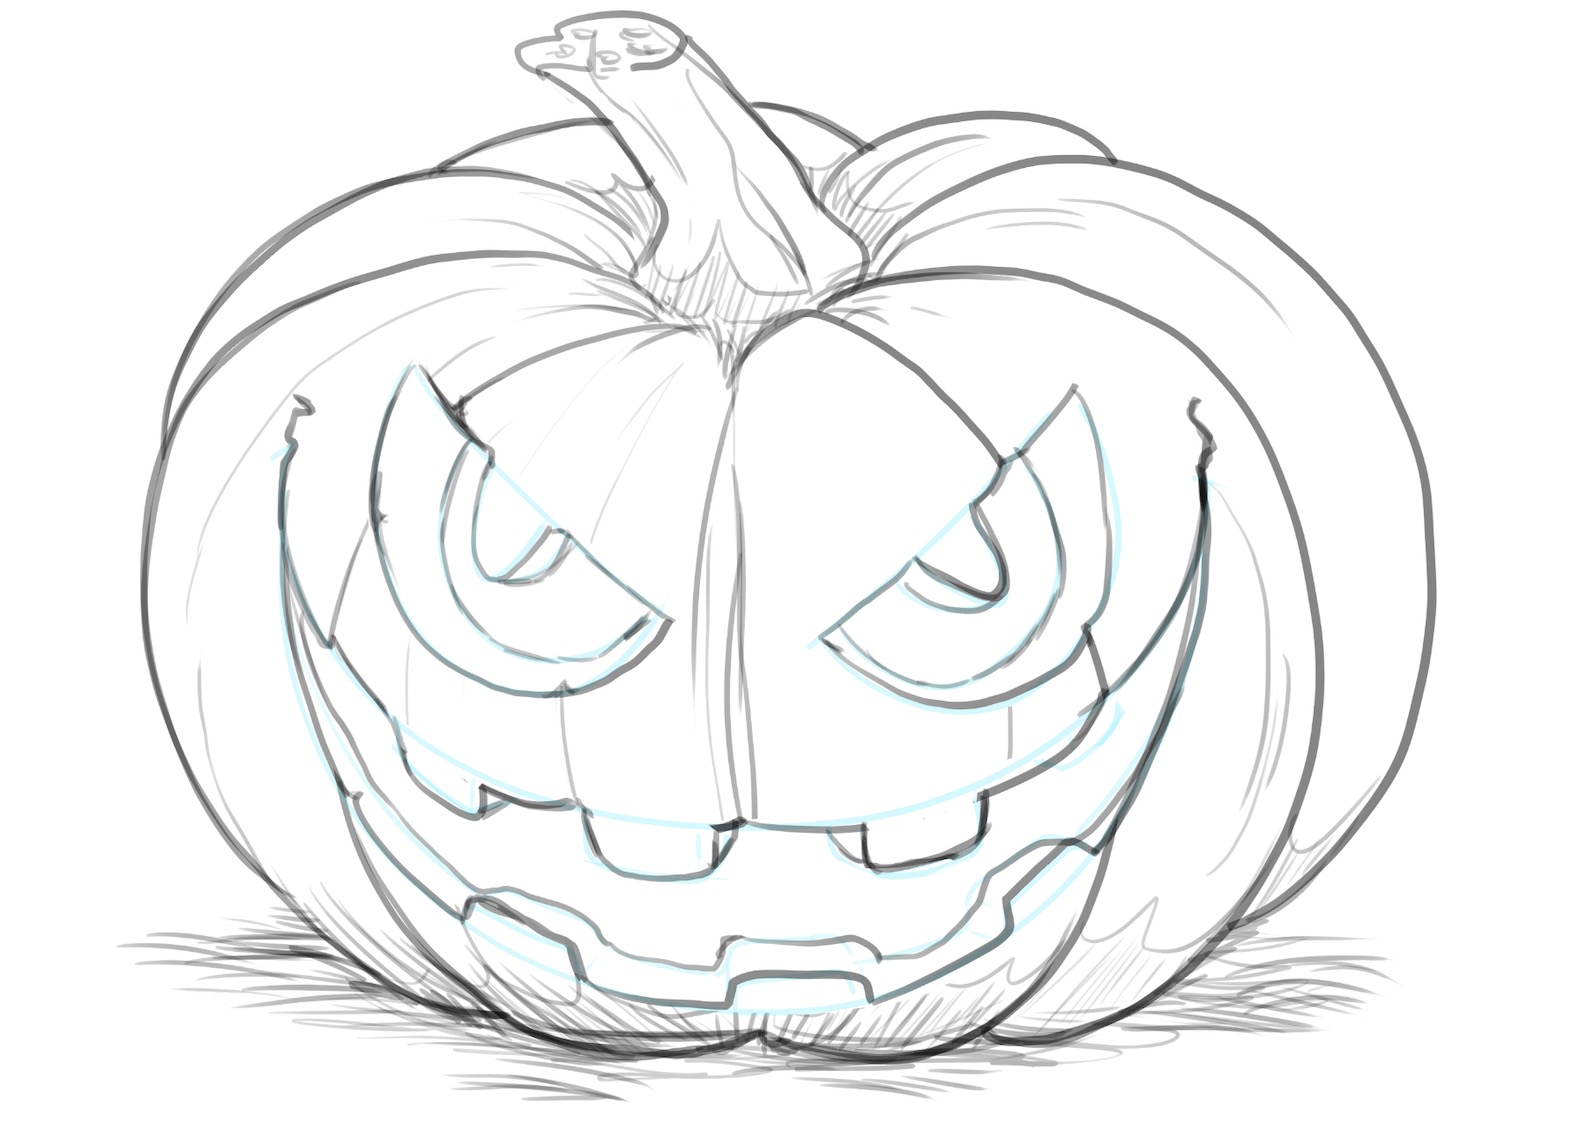
The basic elements of the eyes and teeth are in place, so let’s grab an HB pencil to make the lines more pronounced and the details more obvious.
We’ll start from the mouth.
Extend the edges of the mouth toward the eyes so that they’re almost aligned.
Then, go over the teeth, like this:
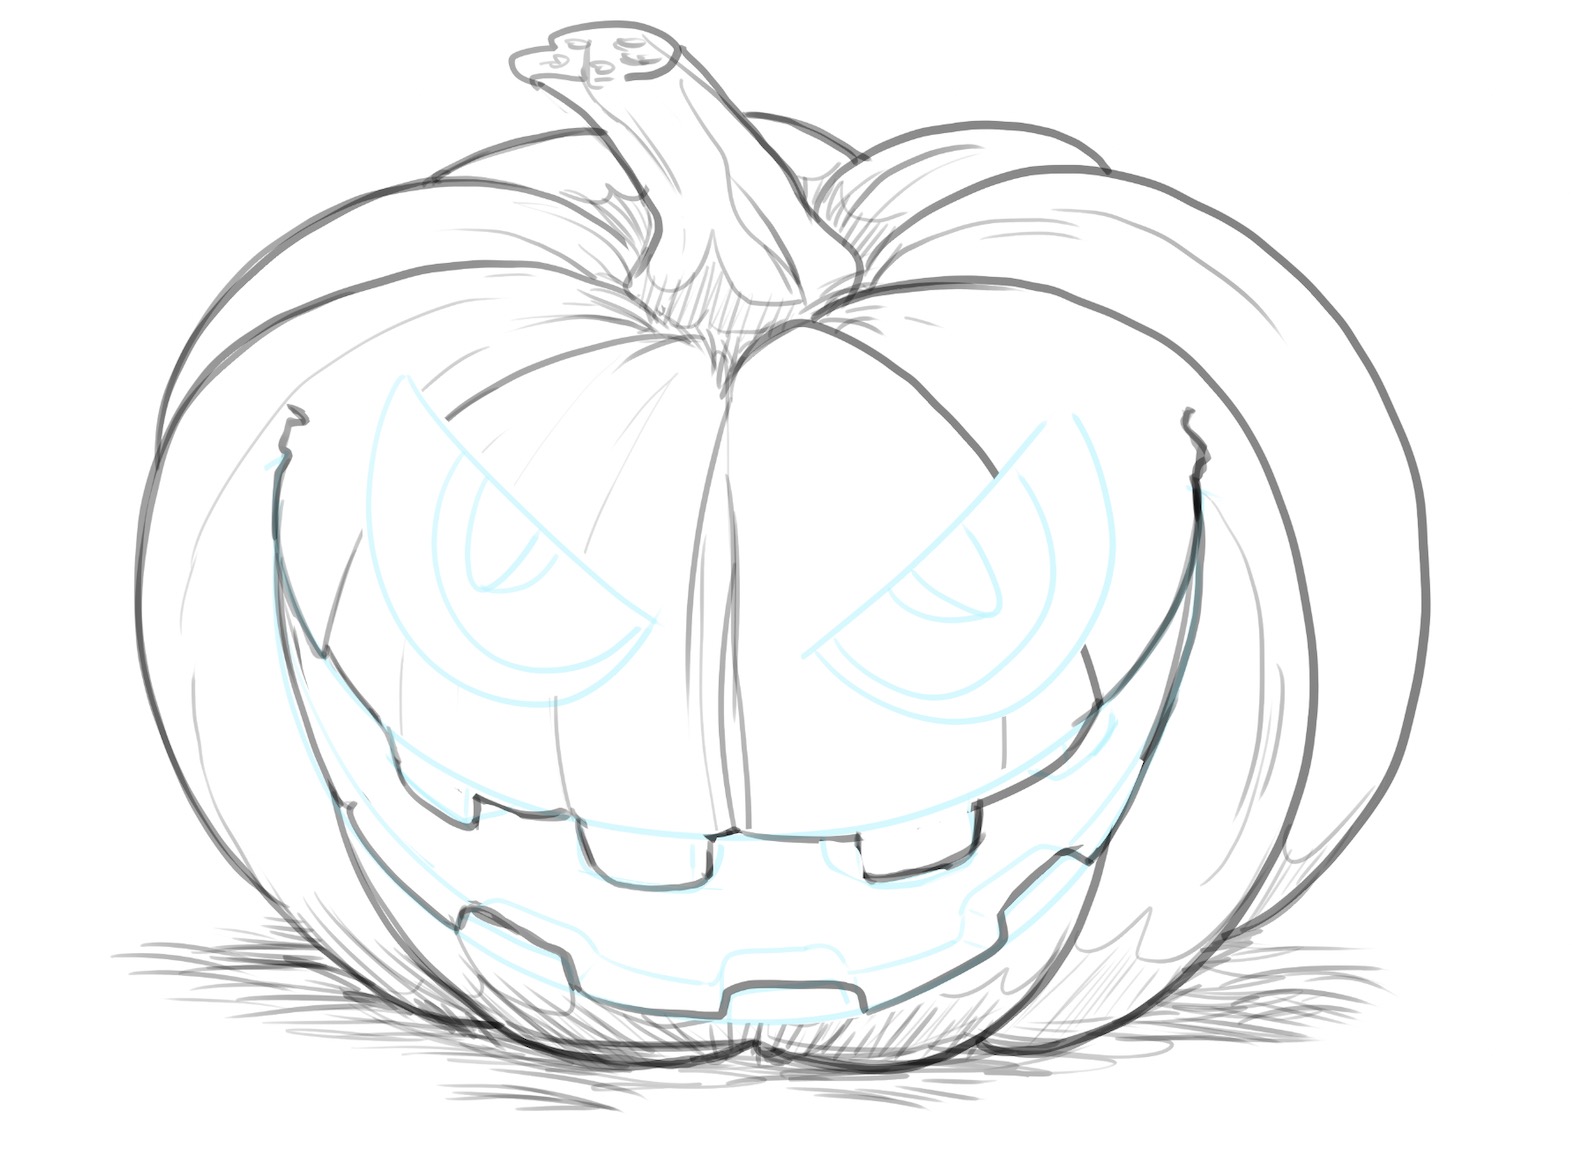
Now, let’s focus on the eyes.
Follow the guidelines like this:
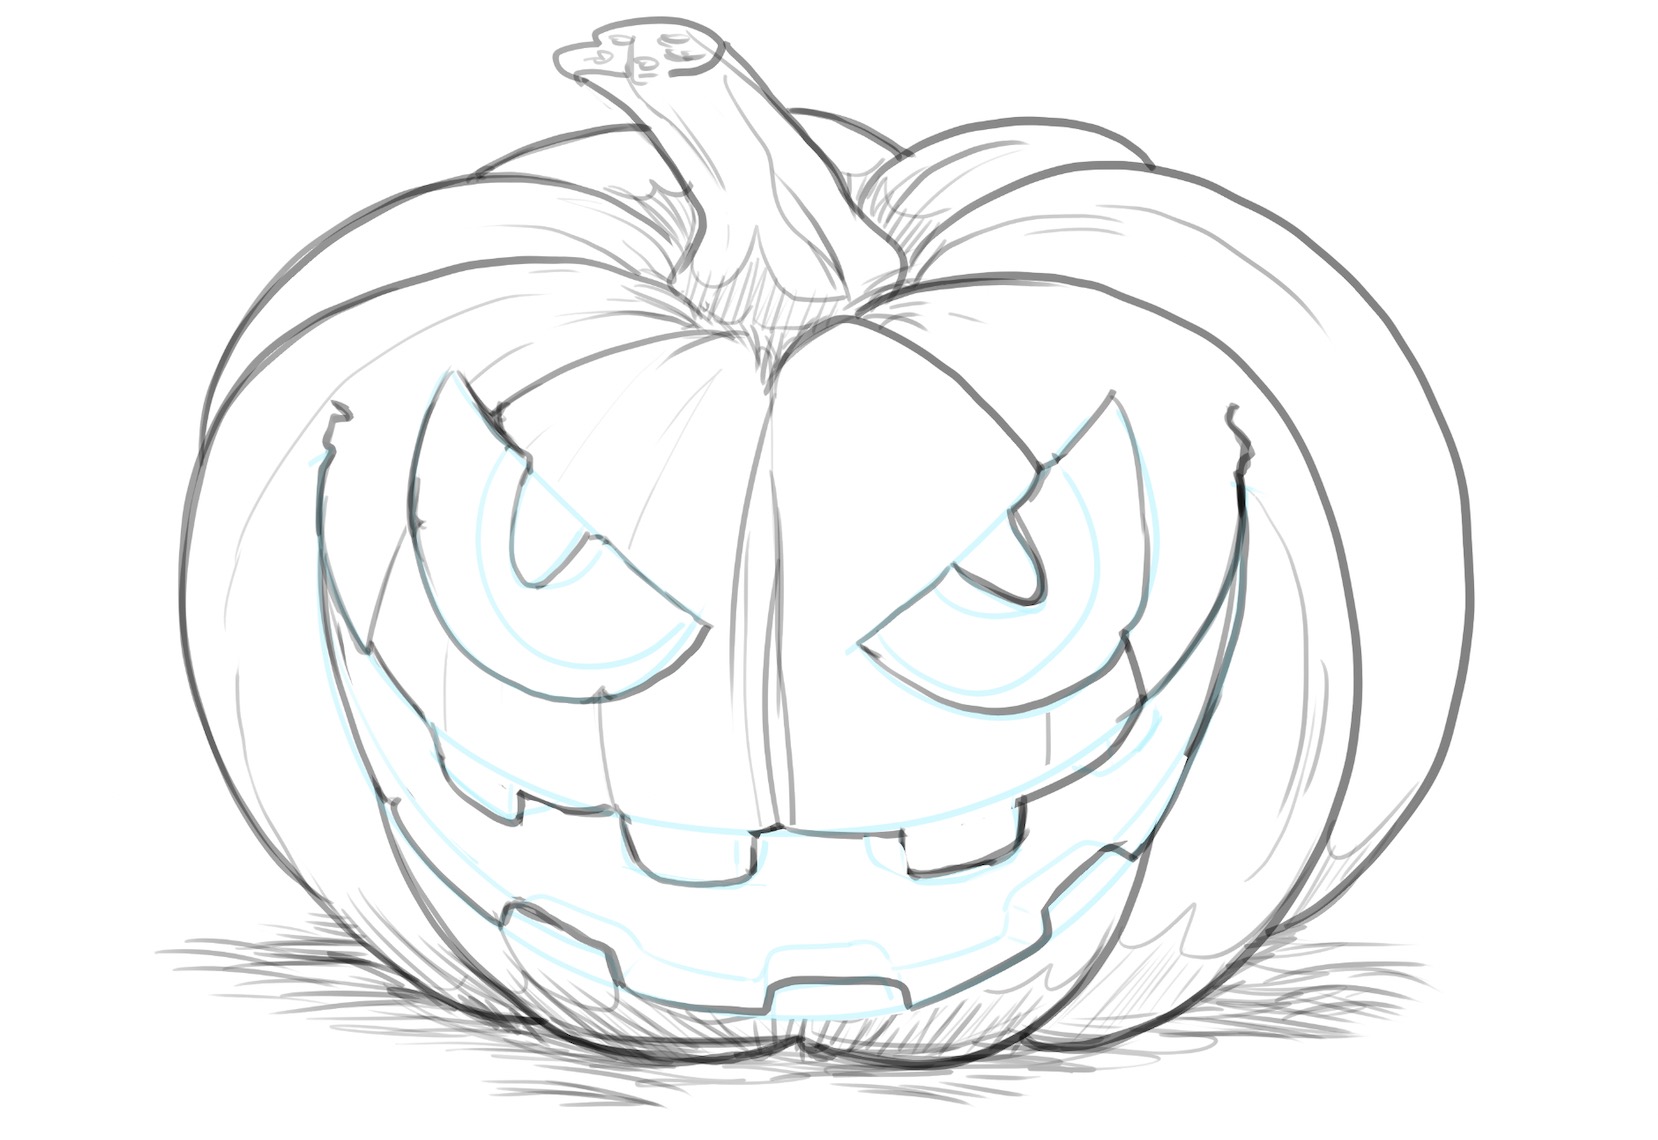
We still need the eyes to have more dimension:
5. Remove The Guidelines And Shade Your Pumpkin Drawing
Recommended tools: HB and 4B pencils, blending stump, kneaded eraser
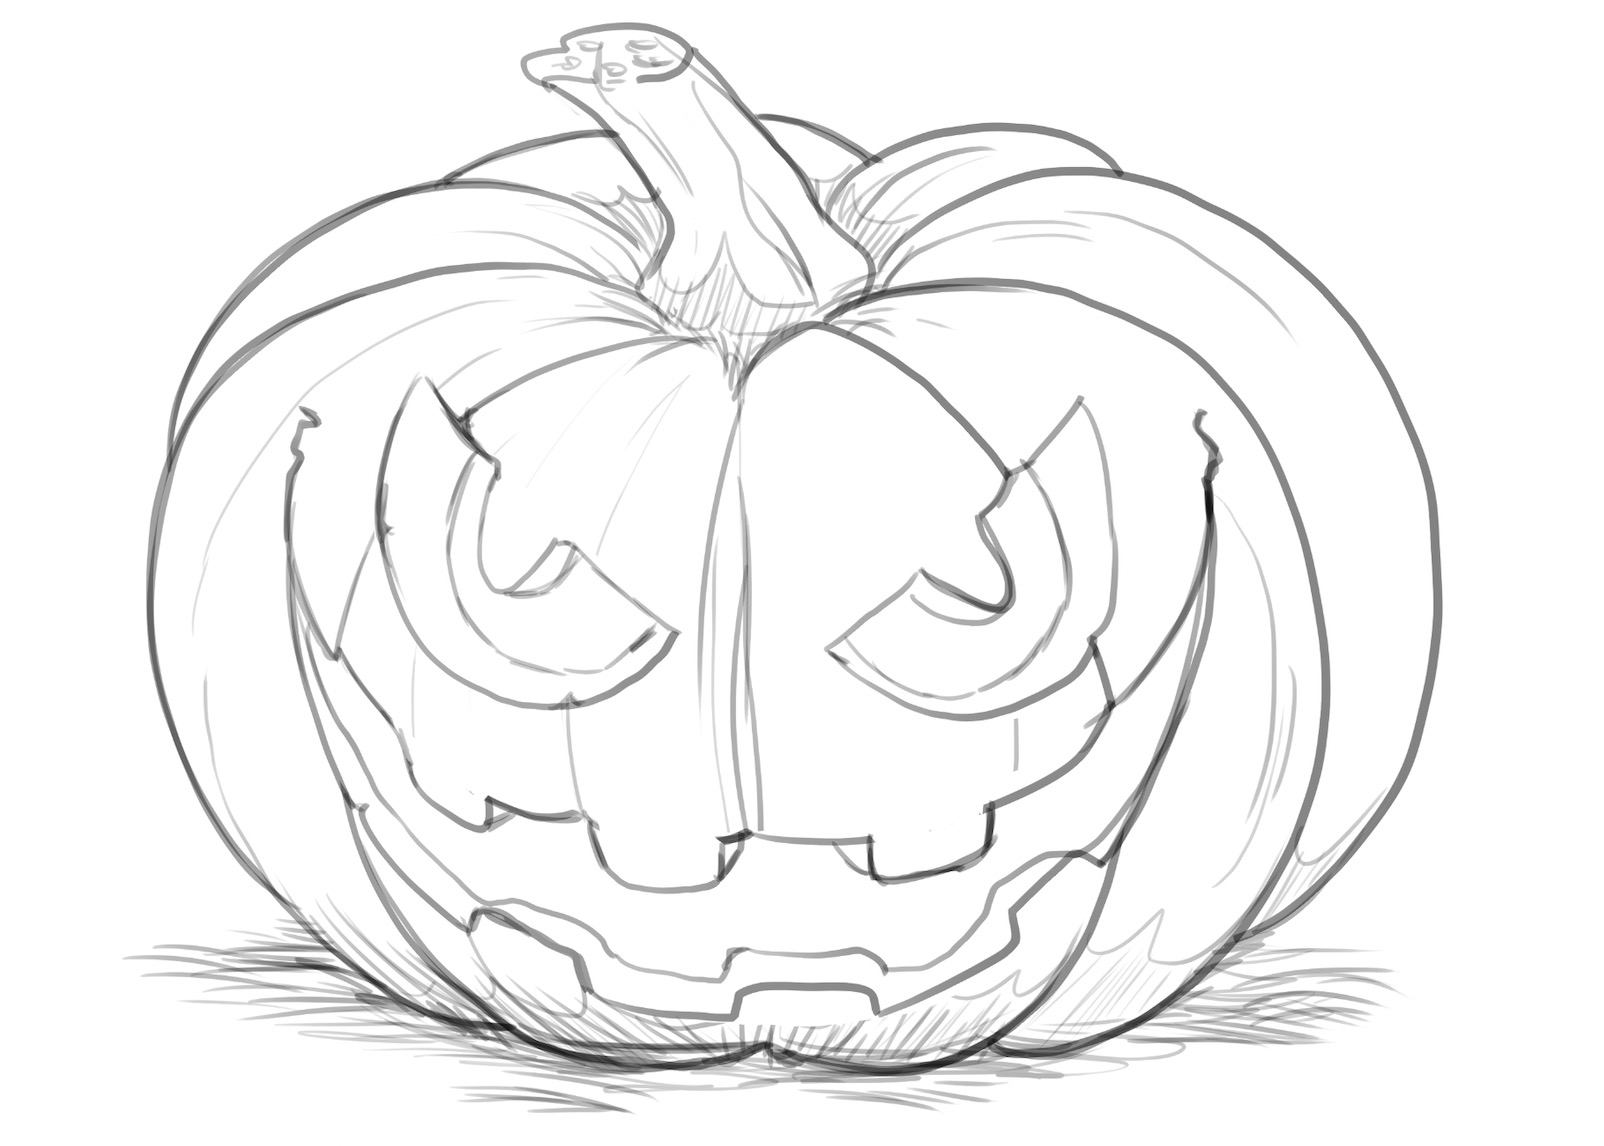
Once the basic Halloween pumpkin drawing is ready, you should remove the guidelines you no longer need.
While doing so, be careful not to mess up the rest of your drawing:
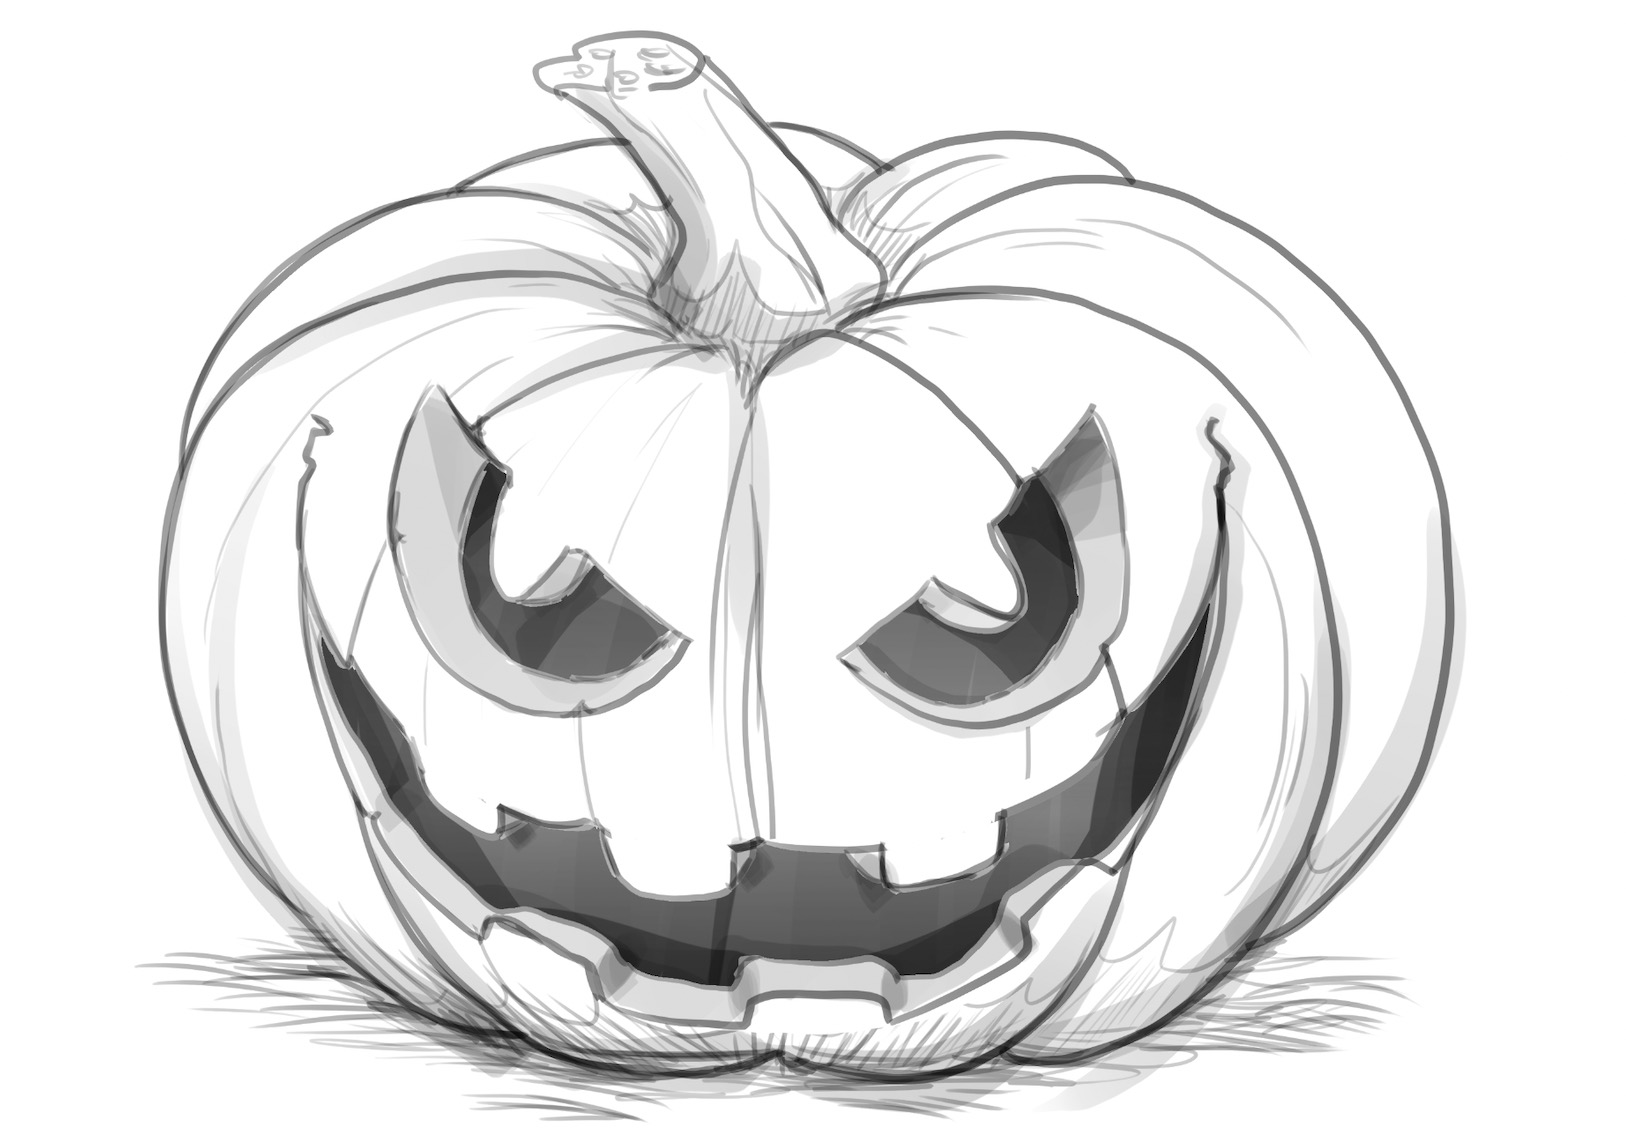
We recommend combining the HB and 4B pencils for shading to create different shades of grey.
For example, the inside of the pumpkin needs to be darker than the rest of the drawing.
So, when shading the parts of the pumpkin visible through the eyes and the mouth, use the 4B pencil.
Don’t forget about the shadows either — for the teeth and the “pupils.”
These parts should be the darkest of all:
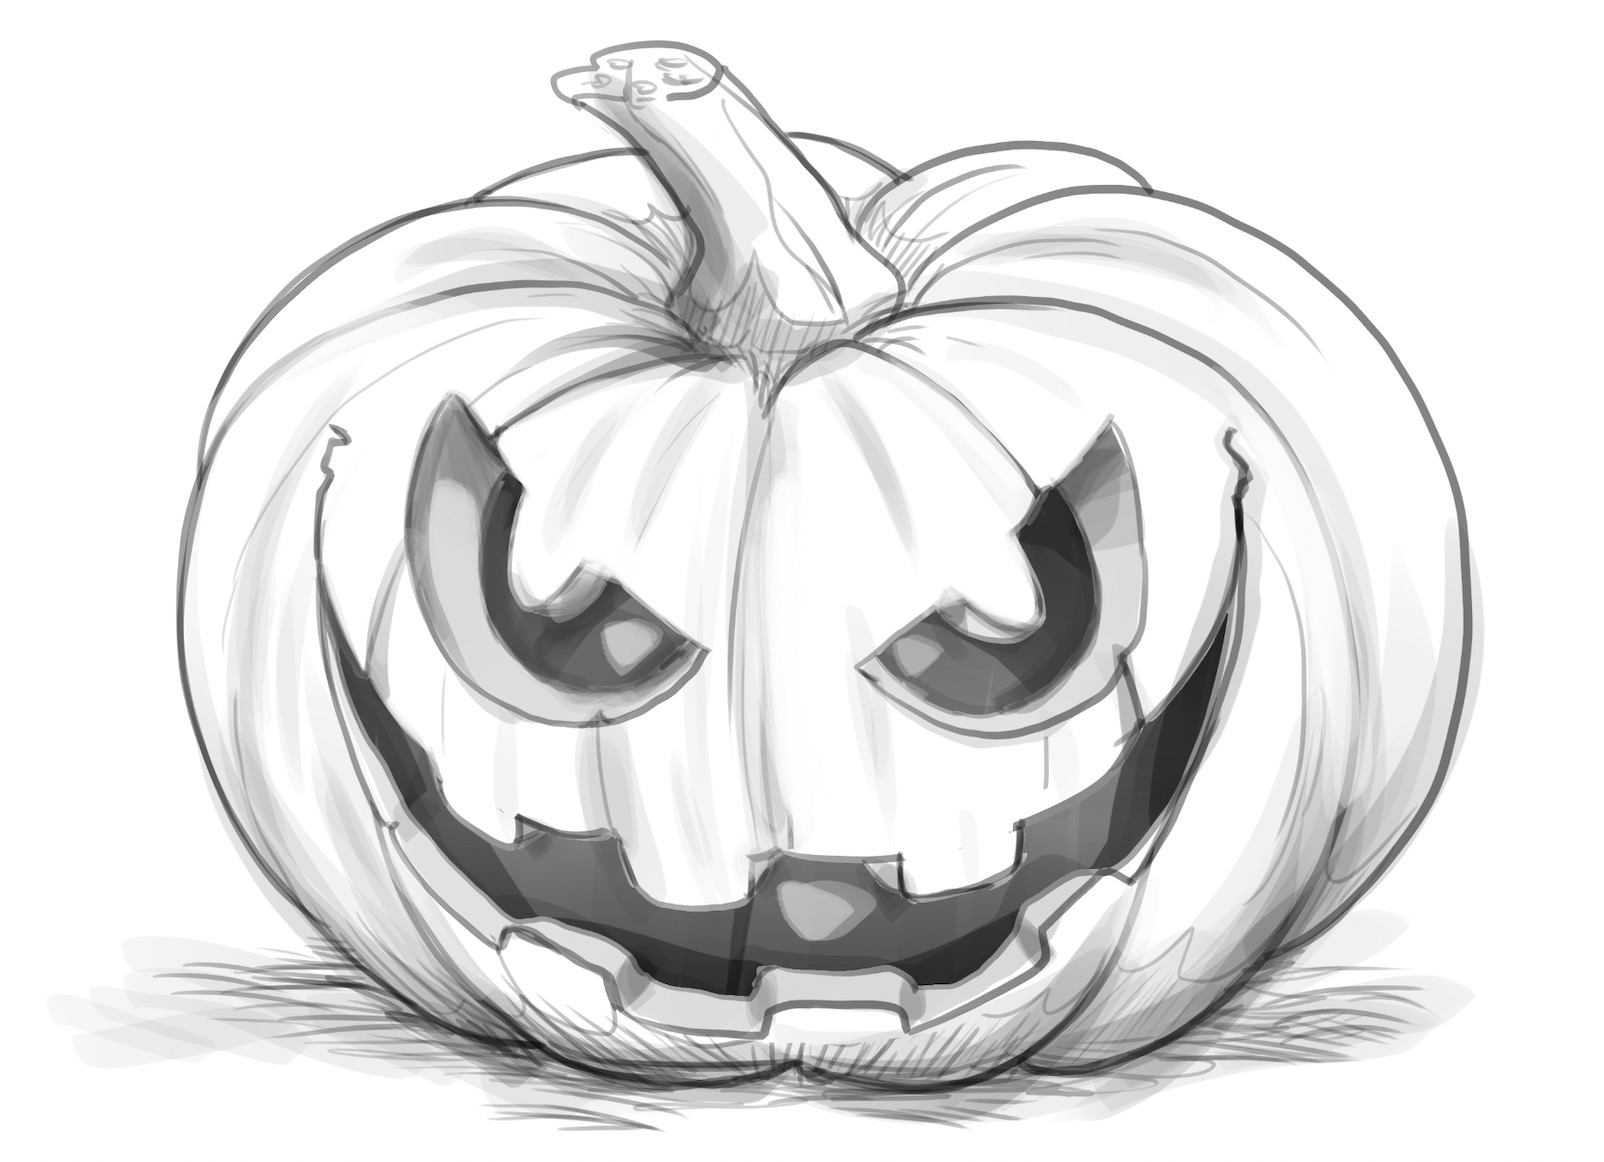
To finalize your Halloween pumpkin drawing, go over the ribs and add some grey shade around them.
Do the same for the ground under the pumpkin — adding shade will give the drawing more dimension.
And lastly, use your blending stump to highlight some parts of the sketch, especially inside the pumpkin:
Finished Your Pumpkin Drawing? Draw These Next!
After you master the skill of the festive Halloween pumpkin drawing, we encourage you to keep on drawing!
The more you draw, the better at it you become, so why not explore more of our step-by-step tutorials, including:
- How to draw a rose
- How to draw a tree
- How to draw a flower
- How to draw a face
- How to draw anime faces
- How to draw a horse
And many more!
Visit our blog and YouTube channel to explore our extensive collection of tutorials at BIOWARS!
Meet The Artist
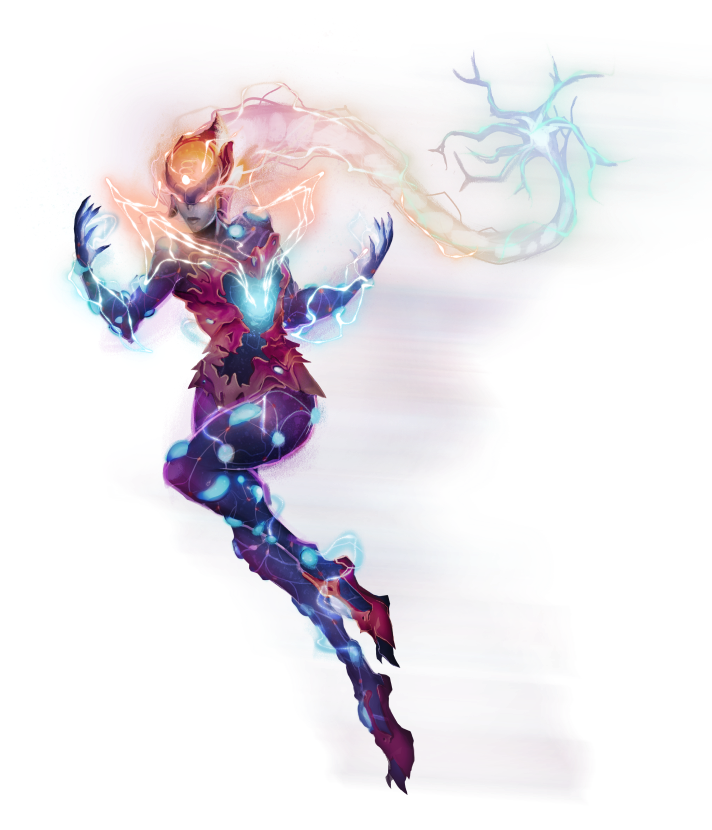
The artist behind this guide on simple Halloween pumpkin drawing is Goncalo Lopes — a professional artist from Portugal who designed the protagonists of the BIOWARS comic book!
Goncalo brings extensive experience from the entertainment industry.
He has contributed to significant projects like Transformers, Godzilla, GI Joe, TMNT, Adventure Time and more.
Now, he’s excited to dedicate time to creating engaging art tutorials for our audience. Don’t miss out — be sure to follow us for step-by-step drawing guides and helpful tips!
A Recap On How To Draw Halloween Pumpkin
Pumpkin drawing is a fun and creative way to capture the spirit of fall.
With proper techniques — like starting with simple shapes and adding texture and depth through details and shading — you can create a scary pumpkin that will evoke a spooky Halloween atmosphere!

