Related Resources
Did you know that foxes are apparently the only animals to use the Earth’s magnetic field to determine the position of their prey in high grass and deep snow?
These animals are very smart and they rely on their internal compass to discover the distance of the prey and the direction in which they should go.
Not only are foxes intelligent, but they’re also playful and adorable, so we get your desire to learn how to draw them — and we can help!
If images work better for you, keep reading to discover illustrations for each step.
Sketching Tools For Your Fox Drawing
When you’re exploring how to draw a fox, these tools can come in handy:
- An H pencil for creating the guidelines and outlining the fox
- An HB pencil for detailing and softly shading the sketch
- A 4B pencil for enhancing the lines and shading
- A kneaded eraser to erase the shapes you’re not happy with
- Lightly textured sketch paper to draw on, since its surface allows you to easily erase mistakes or guidelines later on
These are just recommendations — not even our BIOWARS artist has all of these tools. You can use whatever pencil and paper you’re most comfortable with! Now, let’s explore how to draw a fox — the easy way!

How To Draw A Fox In 6 Steps
The easiest way to learn how to draw a fox is to sketch its body parts step by step.
We’ll show you how to create the guidelines first and then connect them into a cohesive whole.
Step 1. Draw The Base
Recommended tool: H pencil
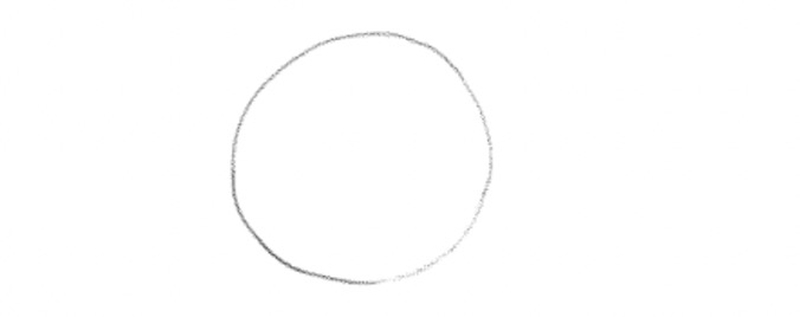
The first step to drawing a fox is to sketch a circle.
That’s going to be the base for its head.
Don’t worry about drawing a perfect circle — as long as the shape is round-ish, you’re good!
Oh, and pay attention to where you position the circle.
You’re going to need room for the rest of the fox’s body, so make sure you leave enough room on the right side of the circle:
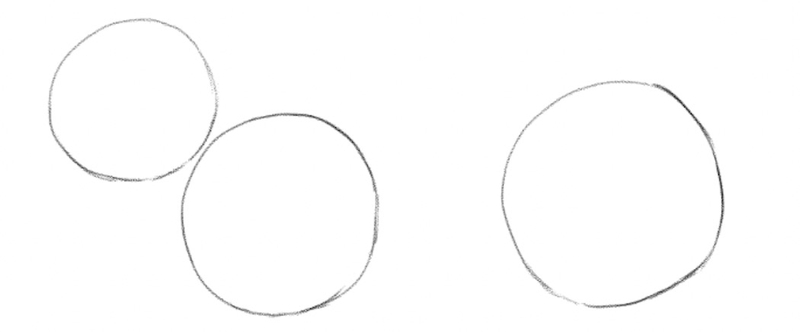
Next, let’s add two more circles — one for the fox’s chest and the other to mark its backside and where its back legs will be.
Place the circle for the chest next to the head outline, but leave some room between the circles. The chest outline should be slightly bigger than the head.
As for the third circle, make sure it’s the largest of the three. The bottom of this circle should be aligned with the bottom of the second circle, like so:
Step 2. Draw The Ears And The Snout
Recommended tool: H pencil
Let’s draw the ears next.
Foxes have triangular, upright ears.
When drawing triangular shapes, your lines should be soft, like this:
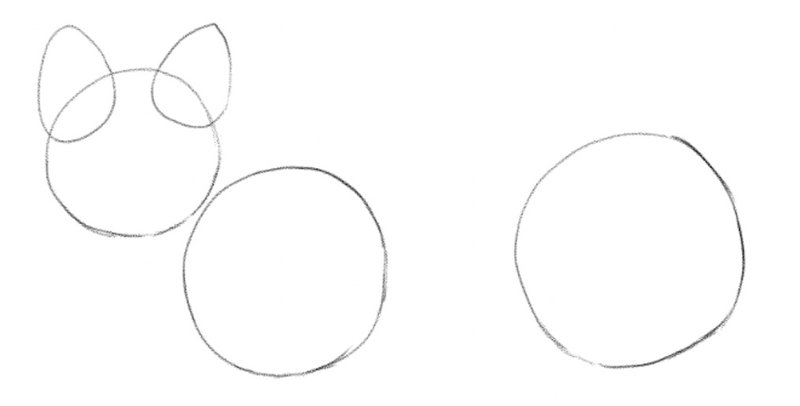
Foxes have elongated snouts, so to draw one, sketch a tear shape and place it right below the middle of the fox’s head. Again, make sure to use soft lines:
![Tear shaped snout added to the sketch. Image used in the “Fox Drawing Guide In 6 Steps For Beginners [Video + Images]” blog post.](https://www.biowars.com/wp-content/uploads/2023/03/fox-drawing-snout.jpg)
Step 3. Draw The Legs
Recommended tool: H pencil
Now it’s time to give the fox something to stand on.
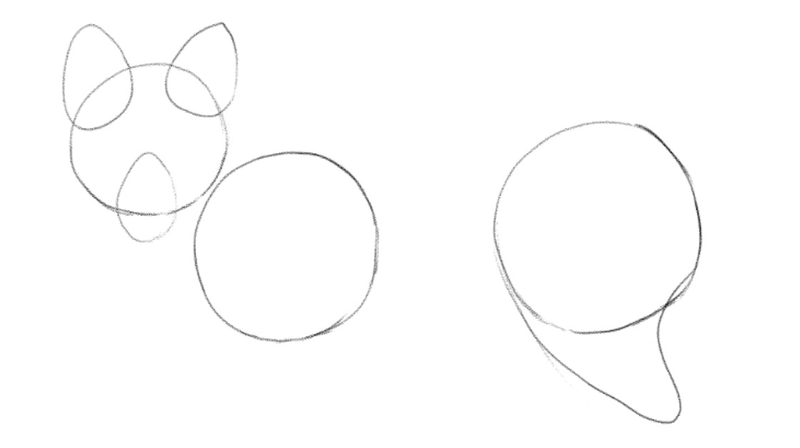
For starters, let’s sketch a rear left thigh.
To do this, you can draw an upside-down wave shape and attach it to the third circle you drew earlier:
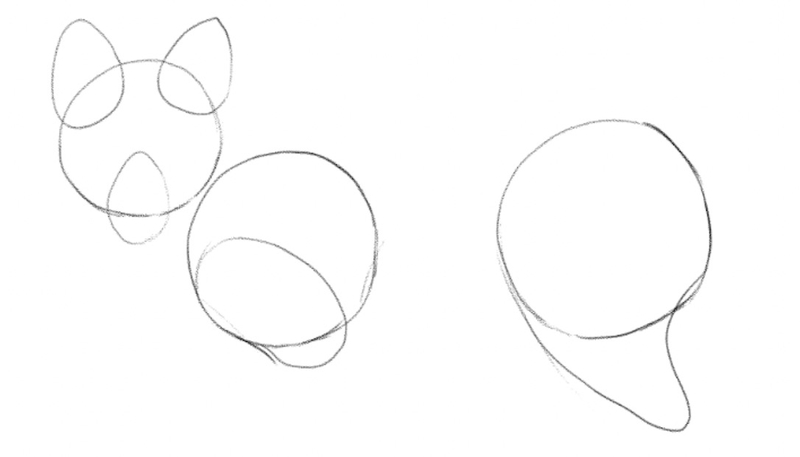
As for the front-left thigh, you can draw it by sketching a bean-like shape.
Have the bean shape cover almost one-half of the chest circle and go slightly below it, like so:
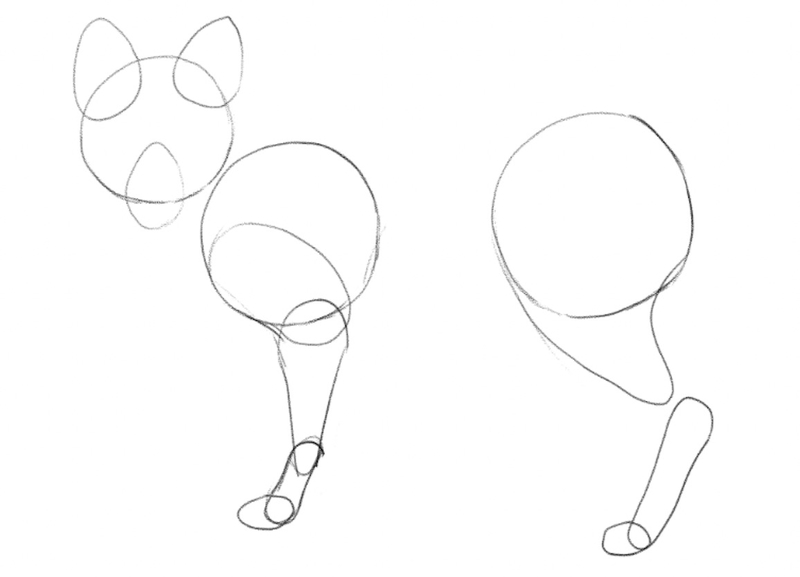
Once the thighs are in place, let’s finish drawing the rest of the fox’s legs.
To do this, we’re going to use rectangles with soft edges.
As for the back left leg, you don’t even have to attach the shin to the thigh. We’ll connect them later.
So, for now, position a rectangle diagonally and add a tiny round-ish shape at the bottom for the fox’s foot.
To finish drawing the front left leg, extend the thigh by drawing an upside-down triangle with soft lines.
Attach a soft rectangle to it to draw the shin.
Lastly, add a small circle for the fox’s front left paw, like this:
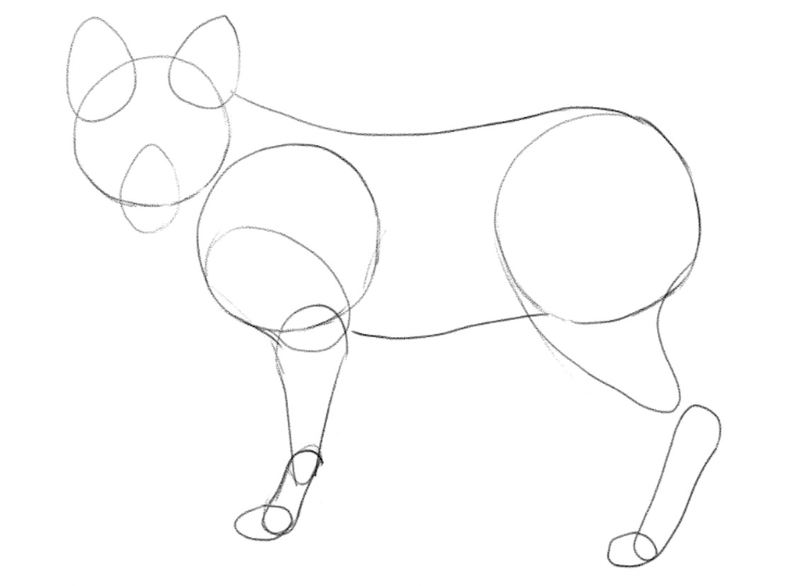
Step 4. Draw The Rest Of The Fox’s Body
Recommended tool: H pencil
Now let’s finalize the outline of the fox’s body.
First, let’s connect the left ear to the third circle, to form the fox’s back.
Then, attach the thigh to the bottom of the third circle to get the fox’s belly:
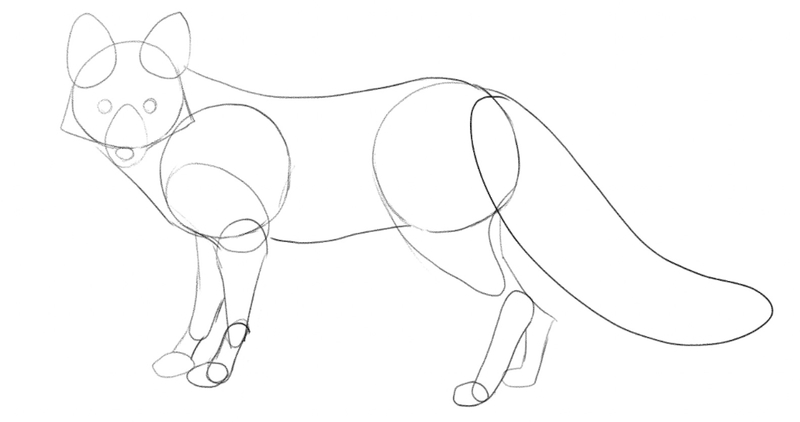
Now, let’s draw the body parts that are missing.
As for the head, draw the eyes and the tip of the nose by sketching three tiny circles.
Then, extend the head’s outline on the sides by drawing two short, straight lines. Next, connect them with a slightly curved line that touches the bottom of the circle you drew to outline the head.
The goal is to sketch a bell-like shape so that we can create the distinct shape of the fox’s head.
When you’re done with the head, add the tail.
Foxes have big, fluffy tails, so be generous when creating your outline.
Last, let’s add the front and back legs on the right side.
Use the same shapes you used to draw the legs on the left side, like so:
Step 5. Add The Details
Recommended tool: HB pencil
Now, let’s grab an HB pencil to make the drawing more cohesive and add more details to it.
(You can also simply apply more pressure to your pencil of choice!)
Let’s start with the fox’s head.
Go over the ears, the cheeks and the snout and disregard the guidelines you no longer need.
Create little zig-zag lines here and there to depict the fur:
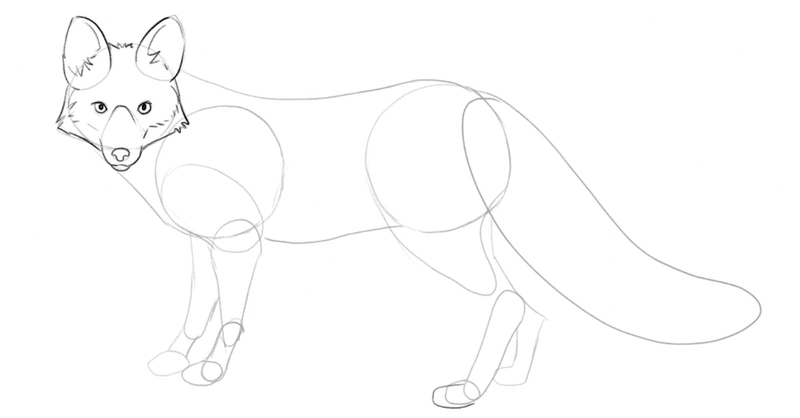
Let’s add the irises and finish drawing the snout and the ears:

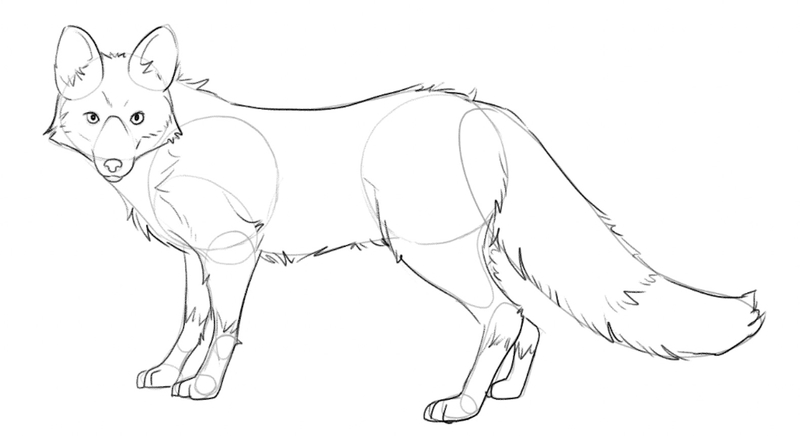
Next, go over the rest of the outline and keep adding the zig-zag lines for the fur.
Draw the paws and pay extra attention to the tail and make it as fluffy as possible:
Step 6. Erase The Guidelines And Shade Your Fox Drawing
Recommended tools: HB and 4B pencils, kneaded eraser
Now it’s time to finalize your fox drawing.
First up, grab an eraser and remove the guidelines you no longer need:
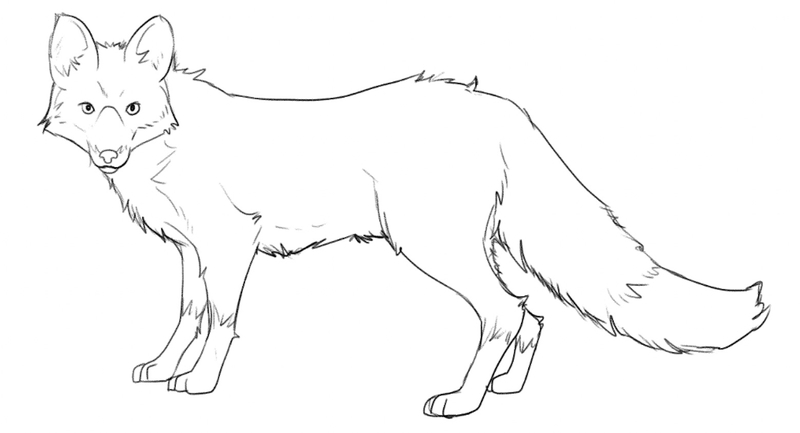
When shading your fox drawing, you don’t have to overdo it.
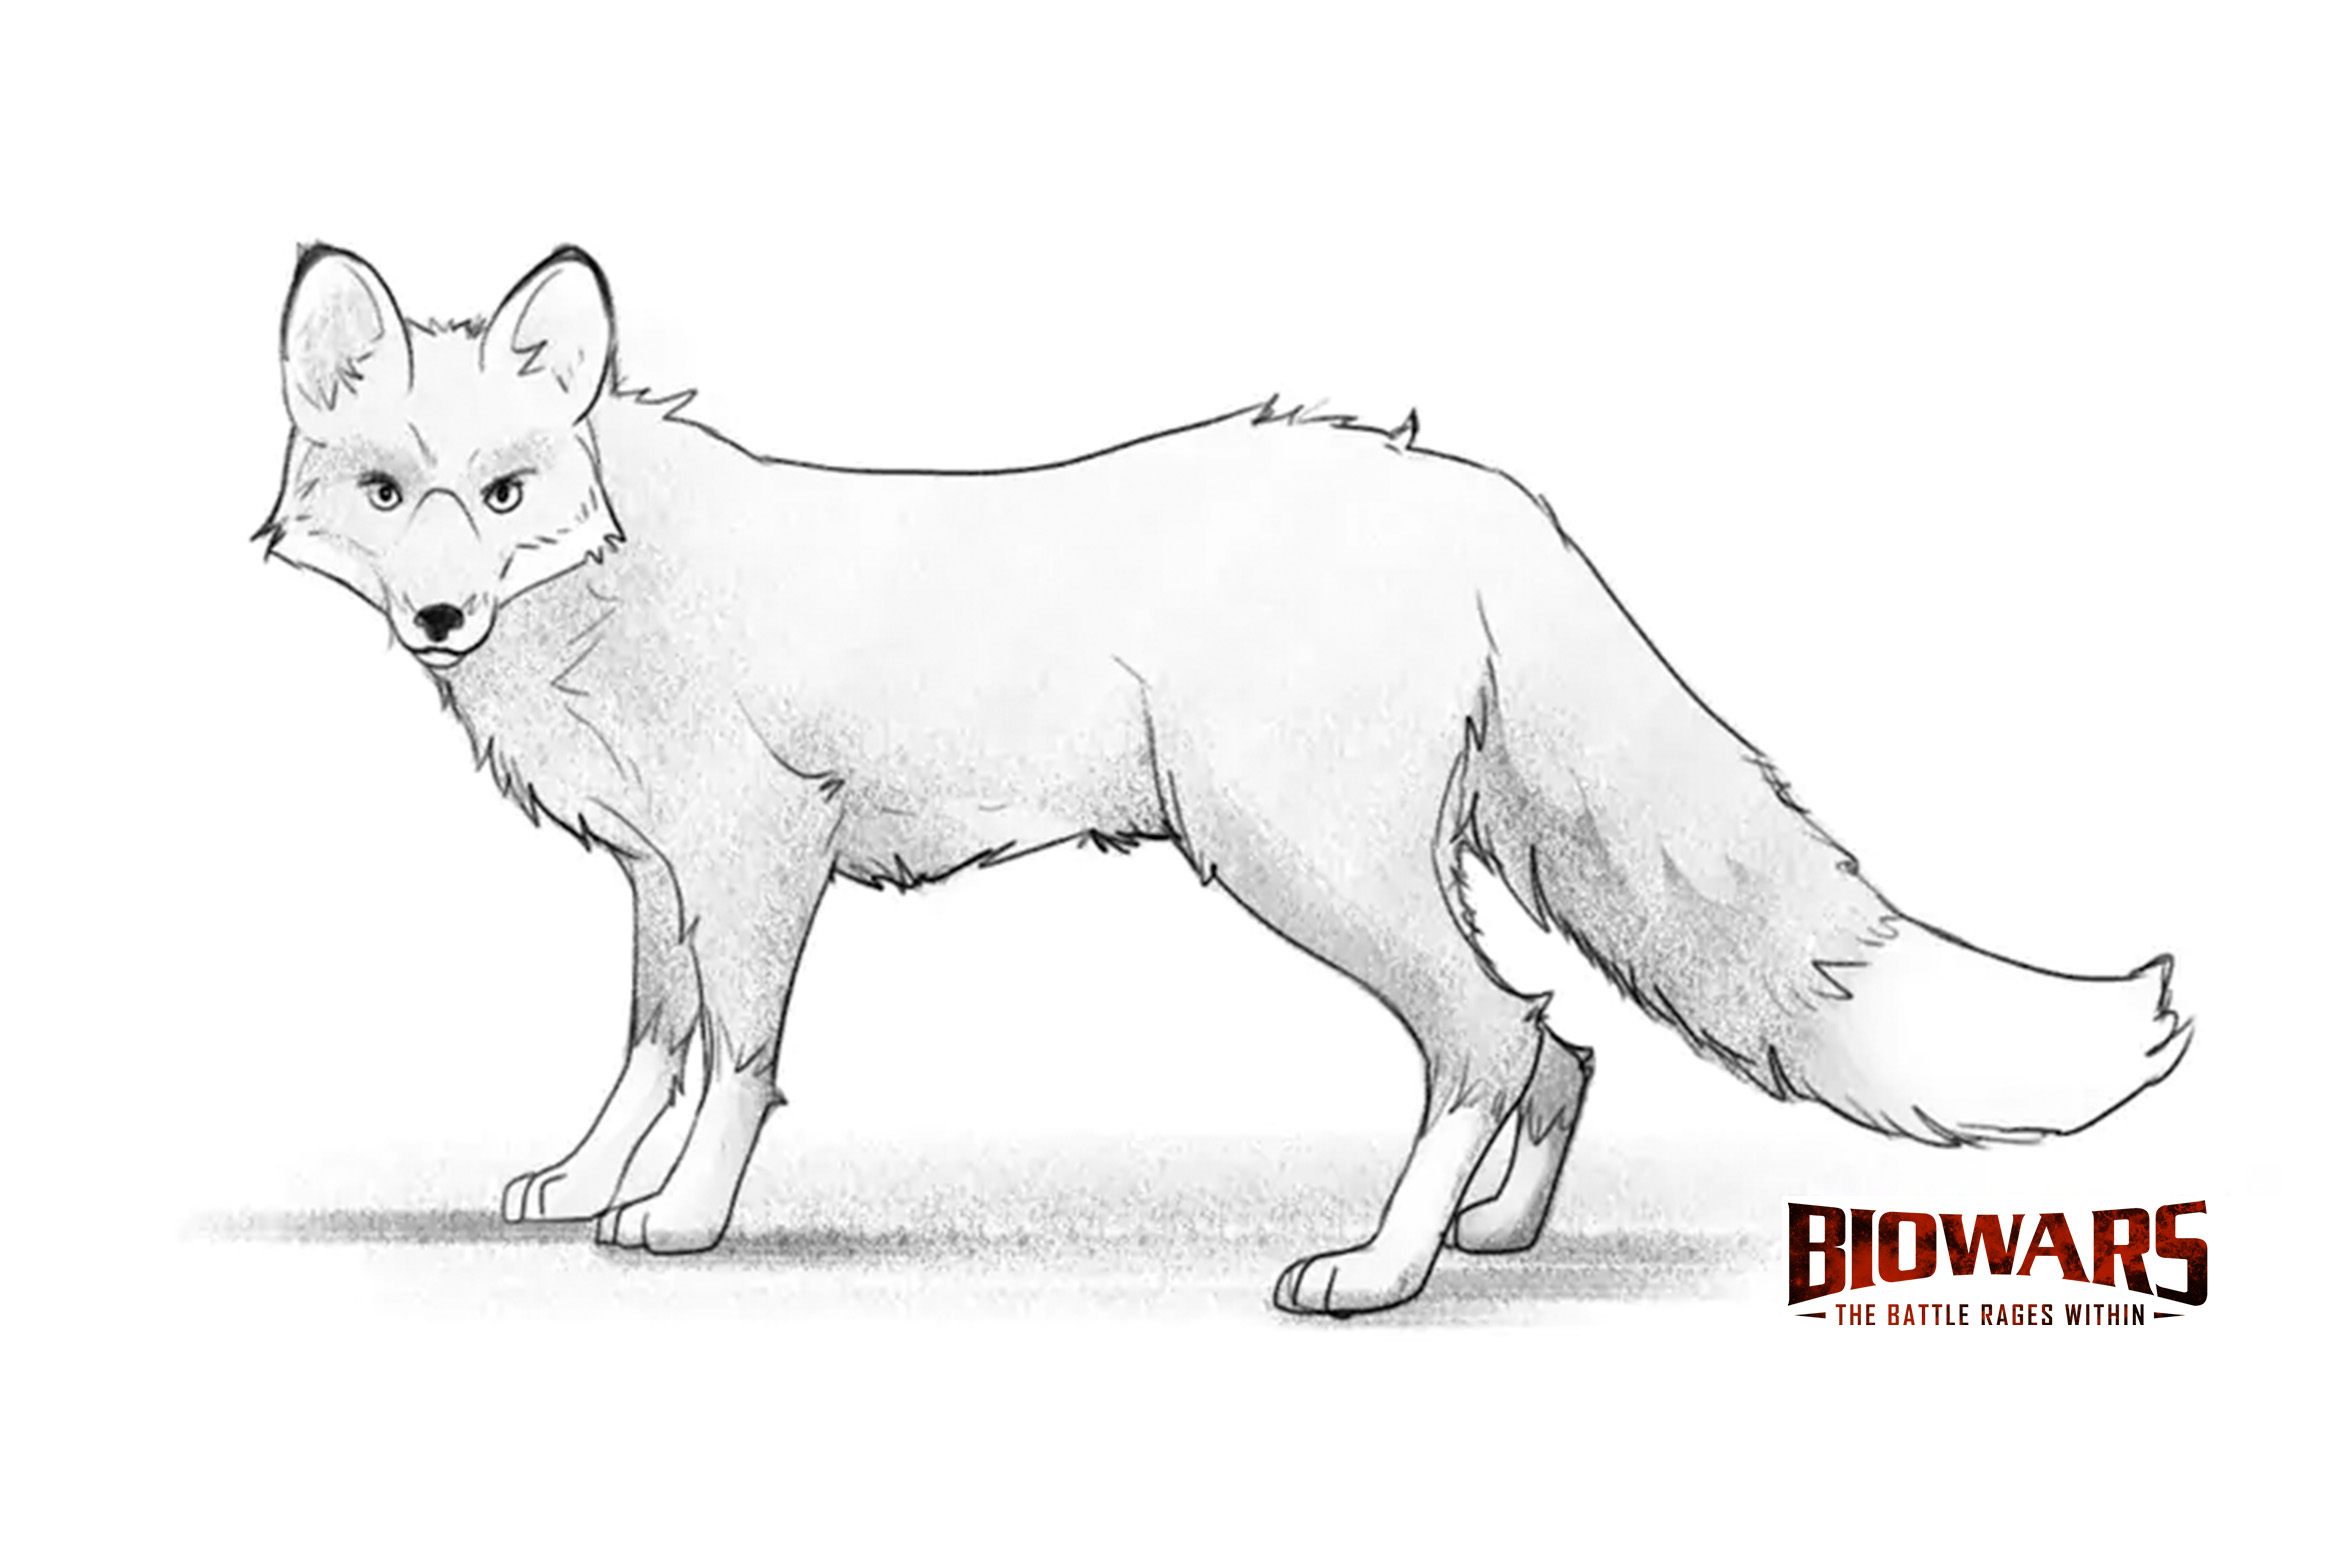
It’s okay to shade the entire sketch in a light grey hue with your HB pencil and use the 4B pencil for the nose and the pupils since we want them pitch black.
Leave the tip of the tail white and color the belly in a very light grey-ish shade.
To add dimension to your drawing, shade the ground beneath the fox’s body, like this:
![Finished fox drawing. Image used in the “Fox Drawing Guide In 6 Steps For Beginners [Video + Images]” blog post.](https://www.biowars.com/wp-content/uploads/2023/03/fox-drawing-final.jpg)
Finished Your Fox Drawing? Try These Next!
Now that you know how to draw an adorable fox, keep practicing your drawing skills!
Explore more of our beginner-friendly guides and learn how to draw other animals, including:
- How to draw a cow
- How to draw a bird
- How to draw a fish
- How to draw a penguin
- How to draw a bat
- How to draw a wolf
- How to draw a horse
- How to draw a cat
- How to draw a dog
- How to draw a turkey
- How to draw a bird
If you want to add human characters to your comic book or sketches, we also have guides on person drawing, such as:
- How to draw a person
- How to draw a face
- How to draw eyes
- How to draw a nose
- How to draw a mouth
- How to draw ears
- How to draw head angles
Meet The Artist
The artist behind this tutorial is Goncalo Lopes.
He comes from Portugal and, aside from illustrating BIOWARS comic book characters, he’s also worked on Transformers, GI-Joe, TMNT, Adventure Time, Godzilla and many other exciting projects.
Aside from showing you how to draw a fox, Goncalo created many other beginner-friendly art guides, so make sure to check out our YouTube channel for more helpful art content!
A Recap On Easy Fox Drawing
When learning how to draw a fox, the most important thing is to start small and outline different parts of the fox’s body one by one.
Use geometrical shapes such as circles, triangles and rectangles to create the guidelines.
Once you define the shape and the size of the body, you can go in and start adding the details.
Zig-zag lines are the best choice when sketching fur, so make sure to add them to your sketch — especially around the fox’s belly, tail, head and legs.
Once you finish outlining, it’s time to shade your fox drawing.
Use light grey hues to color your sketch and bring your fox to life!
