Related Resources
Did you know that more than 80% of Earth’s land plants and animals live in forests?
Forests cover about 30% of the surface of the Earth. They are biologically rich and diverse communities bursting with life. They are indispensable for the planet’s well-being and our survival because trees give us oxygen and clean the air we breathe by removing carbon dioxide — a harmful gas.
Trees can be evergreen or deciduous, depending on whether they shed their leaves or not.
We’ll show you how to draw a forest that contains both types of trees and is bursting with life:
If illustrations work better for you, keep reading to explore step-by-step images that you can explore at your own pace!
The Tools You’ll Need To Draw A Forest
The tools that could make your forest drawing easier include:
- An H pencil: A hard lead is the best choice when creating a rough sketch and outline because it allows you to create light strokes you can easily erase if needed or build on at later stages of tree drawing.
- An HB pencil: This kind of pencil has a lead that’s neither too dark nor too light. That makes HB pencils ideal when detailing and subtly shading your forest sketch.
- A 4B pencil: 4B pencils are our go-to choice for shading because of the dark trace they leave on paper. You can use them when shading parts of the trees and grass.
- A kneaded eraser: A kneaded eraser can handle whatever you do with it, which means that you can change its shape and size depending on what you want to erase. You can also use it to highlight whatever part of your drawing you like.
- Lightly textured sketch paper: Choosing paper wisely can make drawing more enjoyable. That’s why we recommend opting for lightly textured paper because your strokes will easily glide over it.
You don’t have to use all of these tools. You can go with whatever pencil and paper you like — all that matters is that your creative juices are flowing and you want to learn how to draw a forest!

How To Draw A Forest In 6 Steps
When you’re learning how to draw a forest, the best thing to do is sketch it step-by-step, one tree at a time.
We’ll show you how to create a forest drawing from scratch in only six steps!
Step 1. Define The Forest Area
Recommended tool: H pencil
The first thing to do before we start drawing a forest is to define its size.
To do that, we’re going to draw a straight, horizontal line from one end of the paper to the other.
Make sure to leave more room below the line; that’s where we’ll draw the majority of the forest later on, but, you should have some space above the line as well since we’ll also add some details there:

Step 2. Outline The Evergreen Trees
Recommended tool: H pencil
Next, let’s draw the evergreen trees one by one.
Since we want to keep the process of drawing a forest as simple as possible, at this stage, we’ll just outline the trees.
To do so, draw a small rectangle as the tree trunk.
Then, let’s outline the tree’s shape by sketching a triangle, like this:

Next, let’s outline a large evergreen tree behind the tree you just drew, like so:
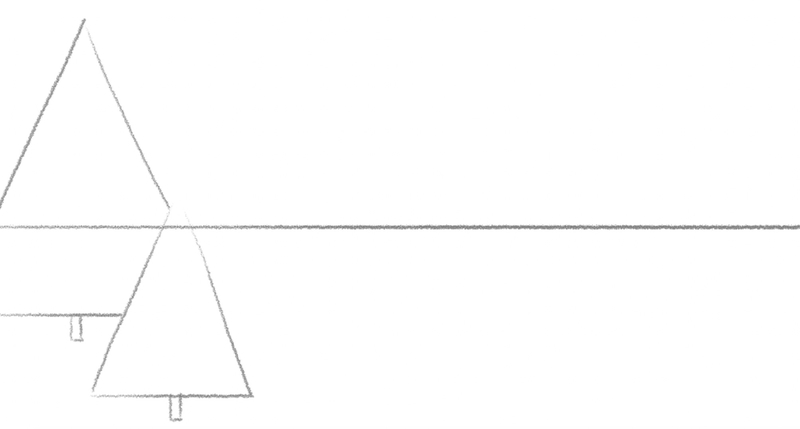
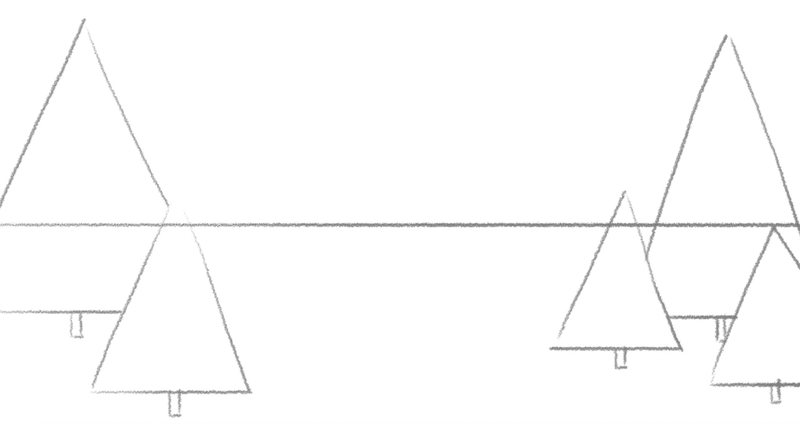
Now, let’s draw some more evergreen trees on the right-hand side of the paper.
You know the drill by now — use rectangles as tree trunks and triangles to shape the crown of each tree.
We’ll sketch two smaller and one larger evergreen tree, but you can experiment with the size of the trees however you like!
Step 3. Outline The Deciduous Trees & The Stream
Recommended tool: H pencil
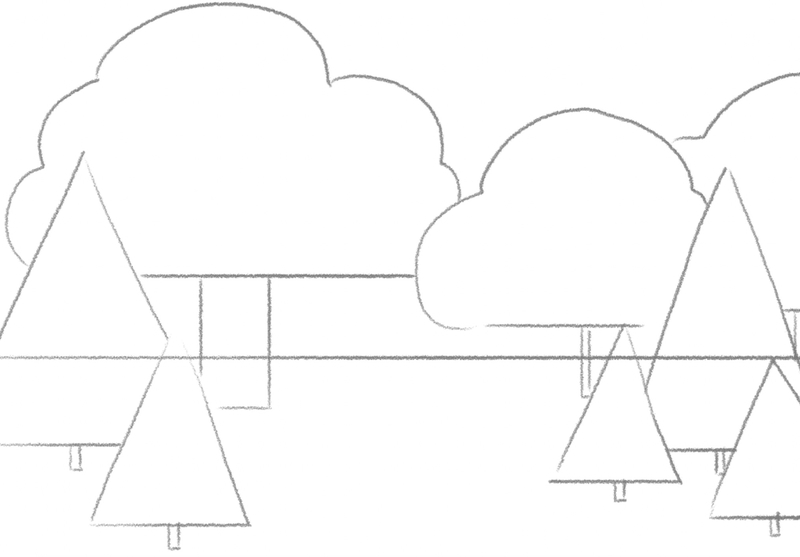
To draw a deciduous tree, again, use a rectangle shape to sketch the tree trunk.
As for the crown, draw a straight line at the bottom and connect its ends to create a cloud-like shape, like so:
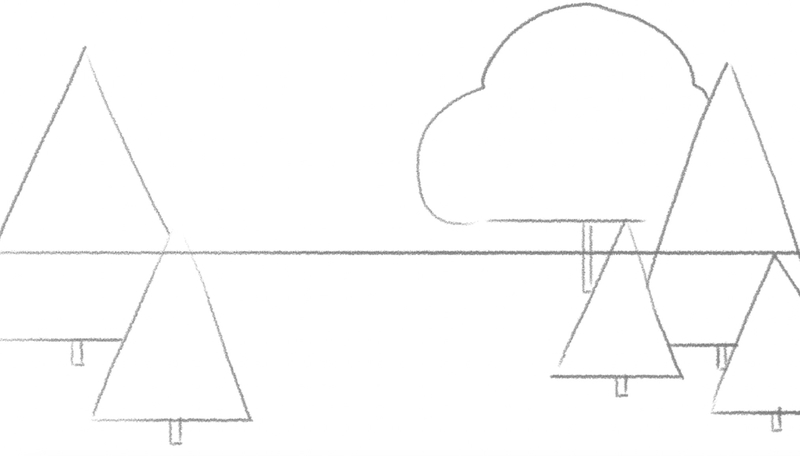
Let’s add a few more deciduous trees to the forest drawing.
Not every tree needs to be visible as a whole. Some can only have their crown peeking out in the back.
As for the size of the tree trunks, forests are super rich and diverse, so feel free to draw some of the trunks wider and taller than others:
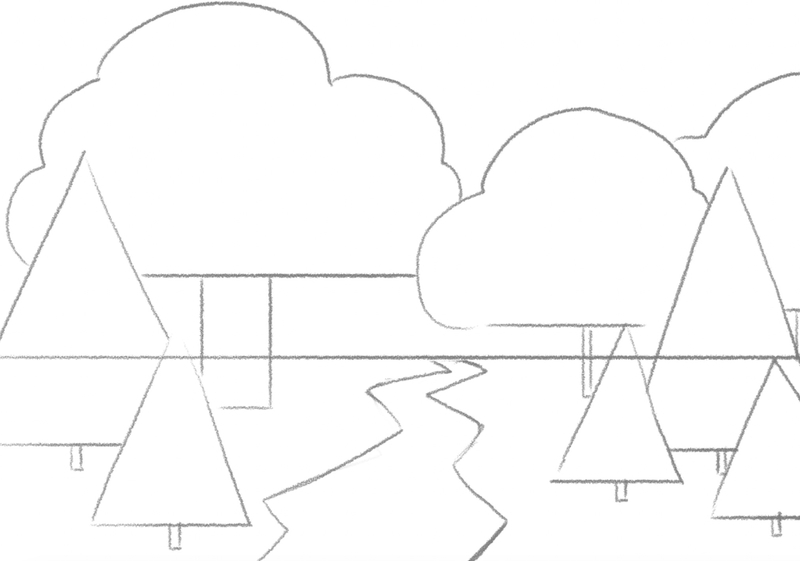
Next, let’s add a forest stream to the drawing!
To sketch it, let’s draw two zigzag lines.
Start from the horizontal line you drew at the start and point the lines toward the bottom edge of the paper.
Pay attention to the perspective, to give the stream the right depth and dimension:
Step 4. Soften The Lines
Recommended tools: HB pencil
Now it’s time to change the pencils (or apply more pressure to your pencil of choice).
We want to soften the outlines, so we need a slightly darker lead than the H pencil.
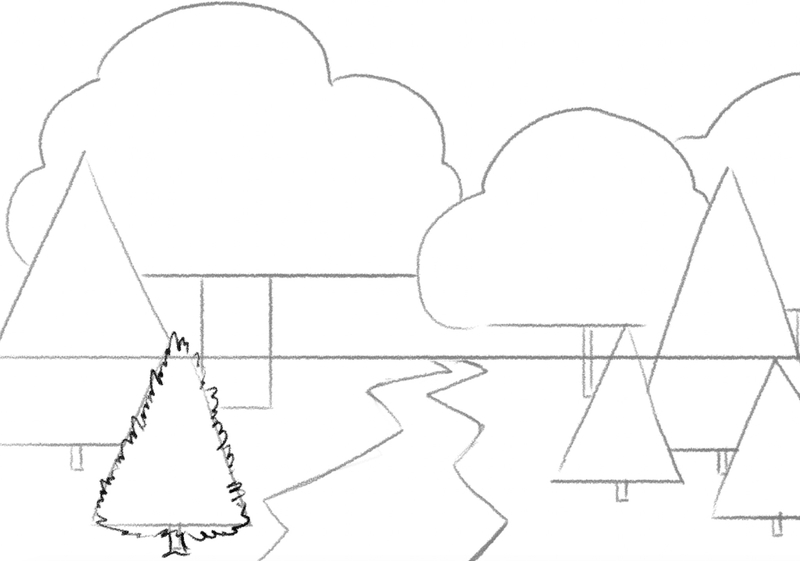
For starters, let’s make the tree trunk a little more pronounced by going over the outline with a darker lead.
At this point, we want to enhance the appearance of the tree crowns.
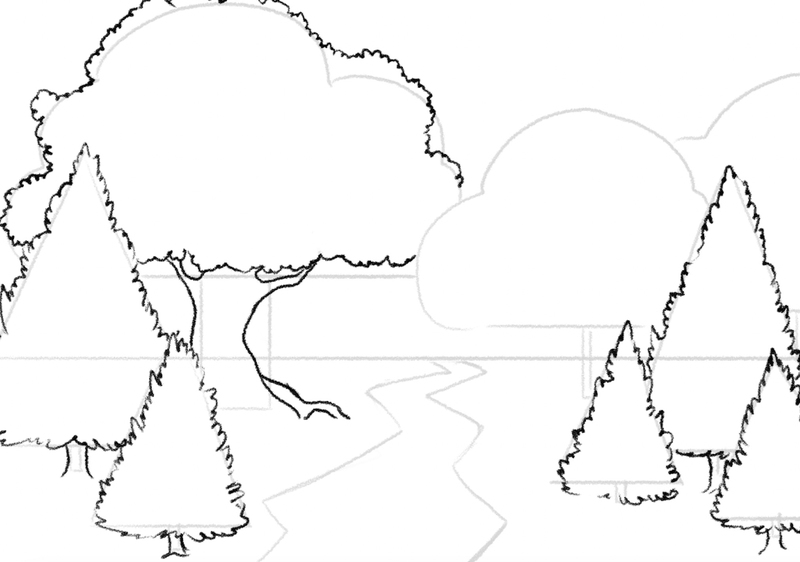
So, let’s start with the smallest deciduous tree and go over the crown by drawing a squiggly line, like so:
Draw some more squiggly lines and go over the other evergreen trees:
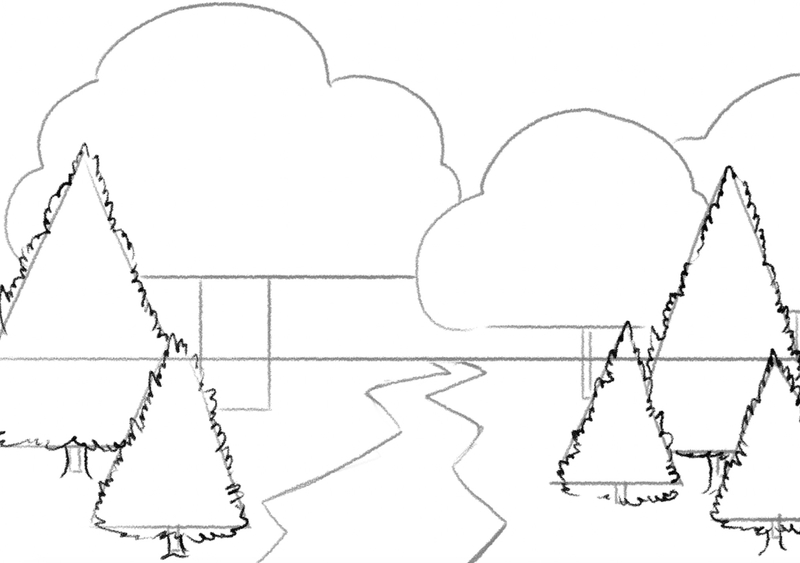
When you’re done defining the shapes of the evergreen trees, it’s time to go over the deciduous tree outlines.
Use the same technique, but feel free to play a bit with the crown and trunk shapes.
You don’t have to blindly follow the outline; instead, you can add a few branches and make the crown a bit larger, like this:
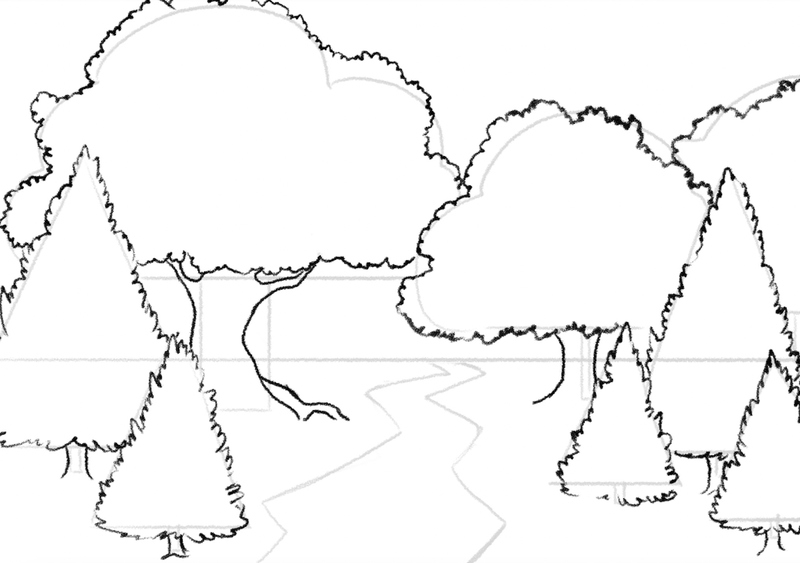
Continue enhancing the other deciduous trees until your forest drawing looks like this:
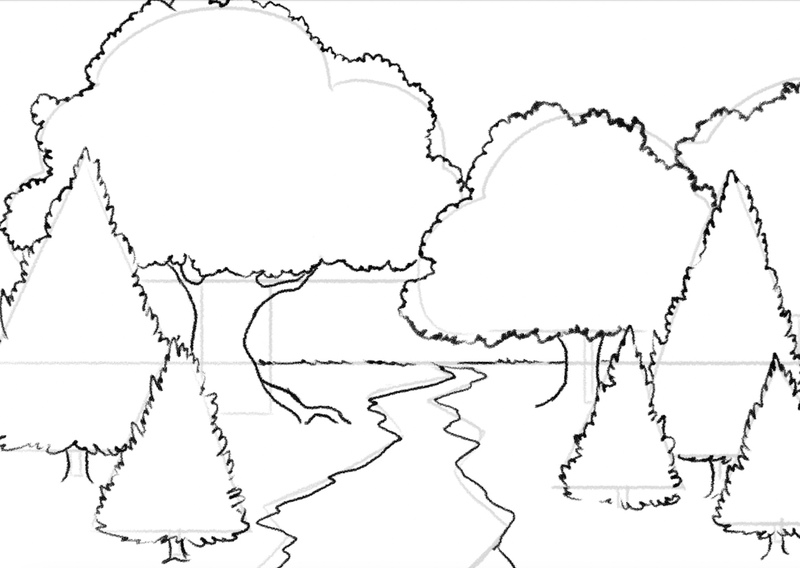
Now, use the same pencil to go over the stream outline, to make it pop.
Again, there’s no need to blindly follow the outline.
Oh, and while you’re here, enhance the horizontal line that you drew at the very beginning. Instead of leaving it straight, make it a bit spiky, to depict the grass:
Step 5. Add Details
Recommended tools: HB pencil, kneaded eraser
Now’s the time to enrich the sketch with some details.
Let’s scatter a few stones on the forest ground and add some inside the stream, like this:
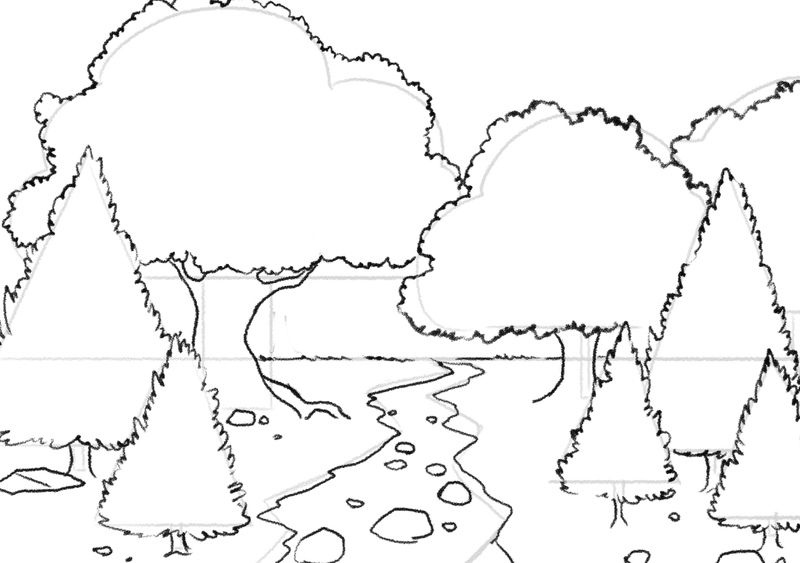
Once you draw the stones, it’s time to add some details to the trees.
Before you do that, grab your eraser and remove the outlines.
Now, there’s no need to draw the foliage in great detail. Instead, you can use the squiggly lines again to make both the deciduous and evergreen trees richer, like so:
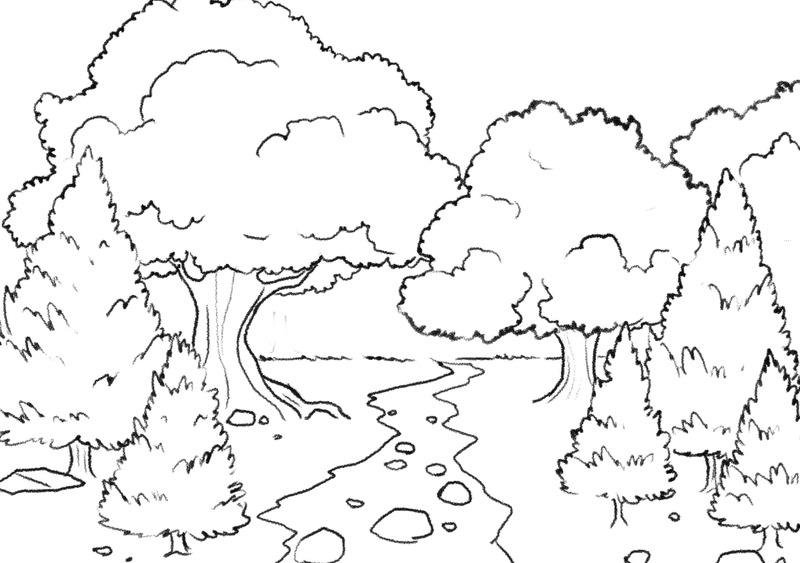
Although you can leave your sketch like this, we recommend drawing some trees in the background, to add more depth to the forest:
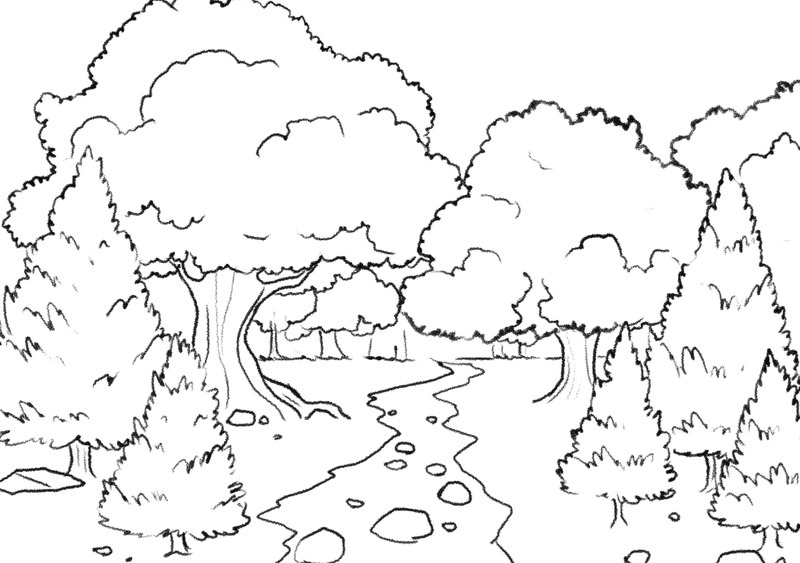
Next, let’s add dimension to the stream by drawing the banks. You can do this by sketching two lines on the inside of the stream’s outline.
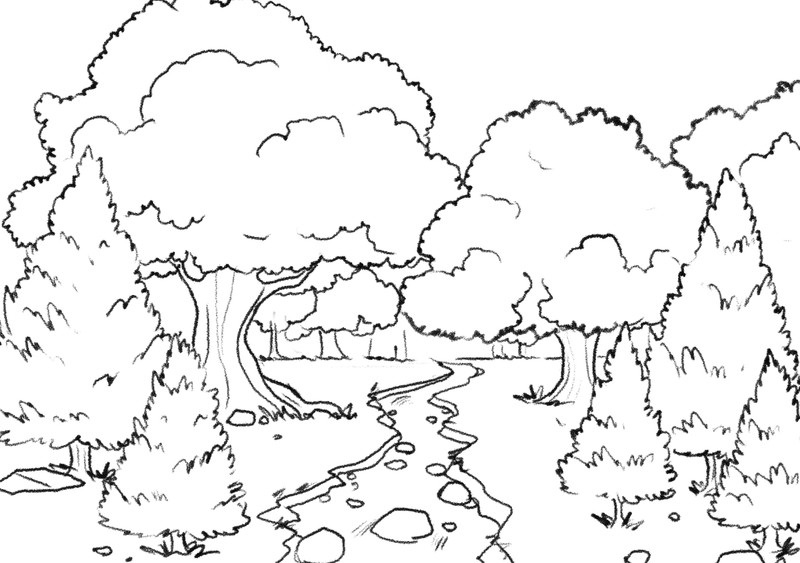
You can also draw some jagged lines around the tree trunks to depict the grass:
Step 6. Shade Your Forest Drawing
Recommended tools: HB pencil, 4B pencil, kneaded eraser
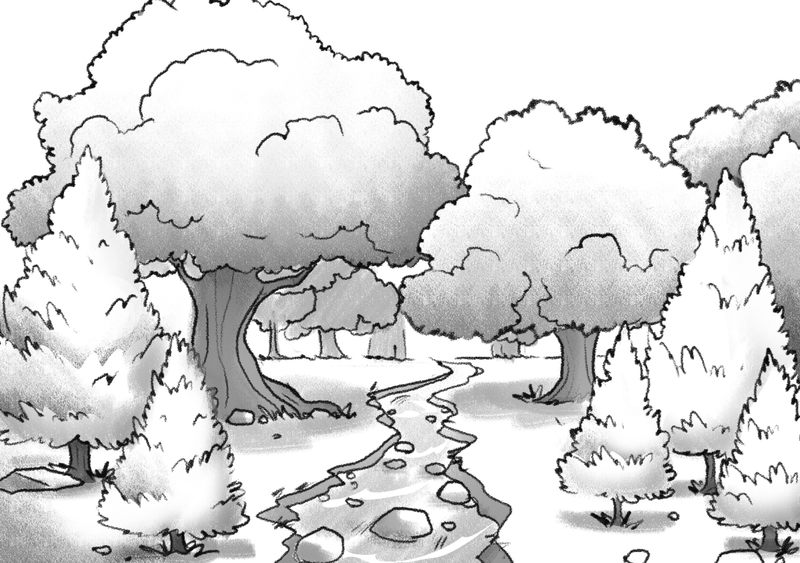
To finalize your forest drawing, let’s shade it!
First, decide where the light is coming from.
We positioned the sun high above the forest, so its rays are falling straight onto the forest.
That’s why we want to keep the tree tops lighter than the trunks.
You can use your HB pencil to add light grey tones to your sketch.
We used the 4B pencil to make the outlines more pronounced and create a dark grey hue for the tree trunks and the stream bank.
As for the trees far in the back, you can color them in a single shade of grey.
Just don’t forget to shade the space under the trees, like this:
Finished Your Forest Drawing? Try These Next!
Ready to move to the next challenge?
We have a lot of beginner-friendly tutorials ready for you, such as:
- How to draw a tree
- How to draw a strawberry
- How to draw a lotus flower
- How to draw a rose
- How to draw a mushroom
- How to draw a desert
We also created a bunch of guides on how to draw animals:
Plus, we have several tutorials on drawing a person, including:
- How to draw a face
- How to draw eyes
- How to draw a mouth
- How to draw hands
- How to draw feet
- How to draw a person
And many others!
We encourage you to explore the BIOWARS vast collection of beginner-friendly tutorials and use them to improve your drawing skills!

Meet The Artist
The man behind this beginner-friendly guide on forest drawing is Goncalo Lopes.
He’s the lead BIOWARS artist who’s worked on many famous comics, games, TV series and films.
Transformers, GI-Joe, TMNT, Adventure Time and Godzilla ring any bells? Yep, Goncalo worked on those and he’s now helping you improve your drawing skills!
Follow our YouTube channel and learn how to draw!
A Recap On Forest Drawing
When you’re learning how to draw a forest, we recommend using geometrical shapes and several types of lines to outline the ground and the trees.
Use rectangles, triangles, circles, as well as squiggly and jagged lines to create your sketch.
Then, add some details, such as the stones, to enrich your forest drawing, and shade certain areas to bring it to life.
FAQs
1. How do I create depth and perspective in my forest drawing?
To add depth to your forest drawing, you should make objects smaller the further they are from the observer. Trees and other elements should decrease in size the further in the back they are to simulate the effect of distance. Also, you can draw distant trees with softer edges and less defined features compared to those in the foreground.
2. How should I shade a forest?
First up, determine the direction of light. This will dictate where shadows fall on the trees and other elements. Then, identify areas of the forest that should be shaded, such as the forest floor, and spaces covered by neighboring trees. These areas will generally be darker.
3. How do I draw the forest floor?
We recommend sketching simple shapes and textures to depict the rocks, the debris and the leaves if you like. You can also add details like fallen branches and foliage to enrich your sketch.


