Related Resources
Did you know that the biggest wave ever recorded was 1,719 feet tall? That’s higher than the Empire State Building!
Sure, there may have been larger waves in the history of our planet, but luckily for us, such gigantic waves aren’t that common.
If you plan on drawing a restless sea in your comic book or you simply wish to practice drawing waves — this guide is for you!
A professional comic book artist will take you through the steps of easy wave drawing and show you how to quickly sketch a wave!

Watch BIOWARS Artist’s Video On Easy Wave Drawing
The lead comic book artist behind BIOWARS — a comic book about the battle between the immune system and invaders attacking it — created a simple video guide to show you how to draw a wave:
If illustrations work better for you, keep reading to discover images for every step of the wave drawing.
You can also explore all of our how-to guides to improve your drawing skills. For example, if you’d like to add some fish to your drawing, check out our beginner-friendly tutorial on fish drawing!
Sketching Tools For Your Wave Drawing
Tools you might want to use for your wave drawing include:
- An H pencil: These pencils have a hard lead that leaves a light trace on the paper, and that’s just what you need when sketching. In case you make some mistakes, it’s easier to erase them when the lines are thin and light, as they are with an H pencil.
- An HB pencil: We recommend using a medium-hard lead for adding details and softly shading your sketch with light grey hues.
- A 4B pencil: A 4B lead is the softest and darkest of the three pencils. It’s best for shading your wave drawing and adding dark grey, almost black tones to your sketch.
- A kneaded eraser: Kneaded erasers are highly malleable and you can tweak them into whatever shape you want, depending on the shapes you want to erase. That’s why we recommend you add them to your stack of art supplies!
- Lightly textured sketch paper: This paper’s soft surface is perfect for beginners because your pencil can easily glide over it. Plus, it’s also easier to erase unneeded lines.
Of course, you don’t *have* to use these tools. Feel free to try them out, but use whatever tools you’re comfortable with!
Even the BIOWARS lead artist doesn’t use all of these tools in the video. It’s perfectly fine to use just one pencil and whatever paper and eraser you have. All that matters is that you’re willing to learn how to draw waves!
How To Draw A Wave In 4 Steps
Drawing a wave may seem scary at first because of all the details, but we’ll break the process into several steps so that you can easily follow it.
1. Set The Stage
Recommended tool: H pencil
The first thing we’ll do is draw a horizontal line.
This line represents the tranquil sea (or the ocean) from which the big wave will soon rise:

2. Outline The Wave
Recommended tool: H pencil
Next, let’s define the shape of the wave.
To do this, we need to first draw a single curved line.
Start just below the horizontal line (somewhere around its middle), curve the line and then point it upward.
Then curve the line again, to create a large shape like so:

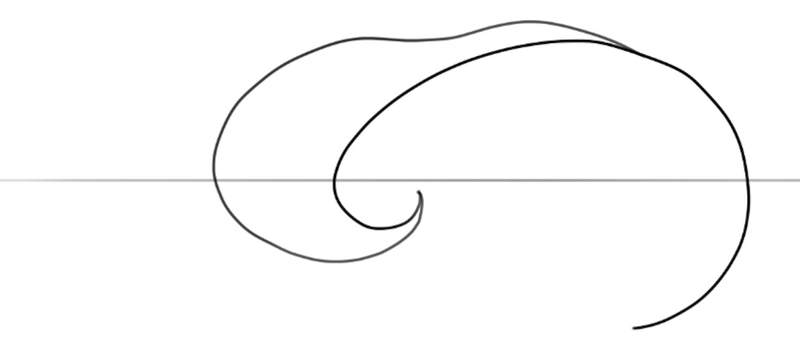
Now, let’s add some width to the wave.
Start around the middle of the curve you just drew (this part of the wave is called the lip) and sketch a wavy line.
Point the line to the left and then curve it down, to connect it to the wave’s starting point:
Next, attach a wavy line to the curve you just drew, like this:
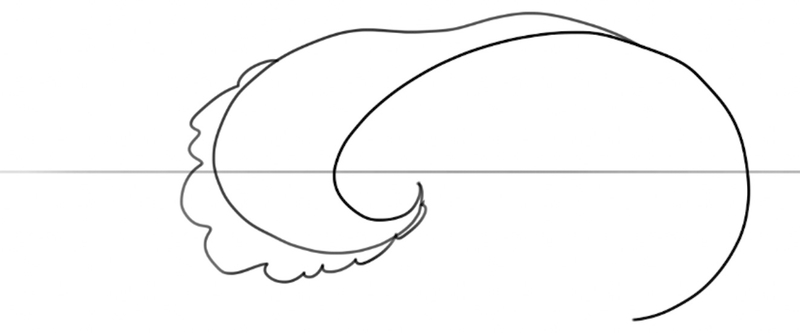
Waves are mainly caused by winds, which cause the water to circulate and rise.
We’ll now add details to depict the water that’s falling down — the so-called white water.
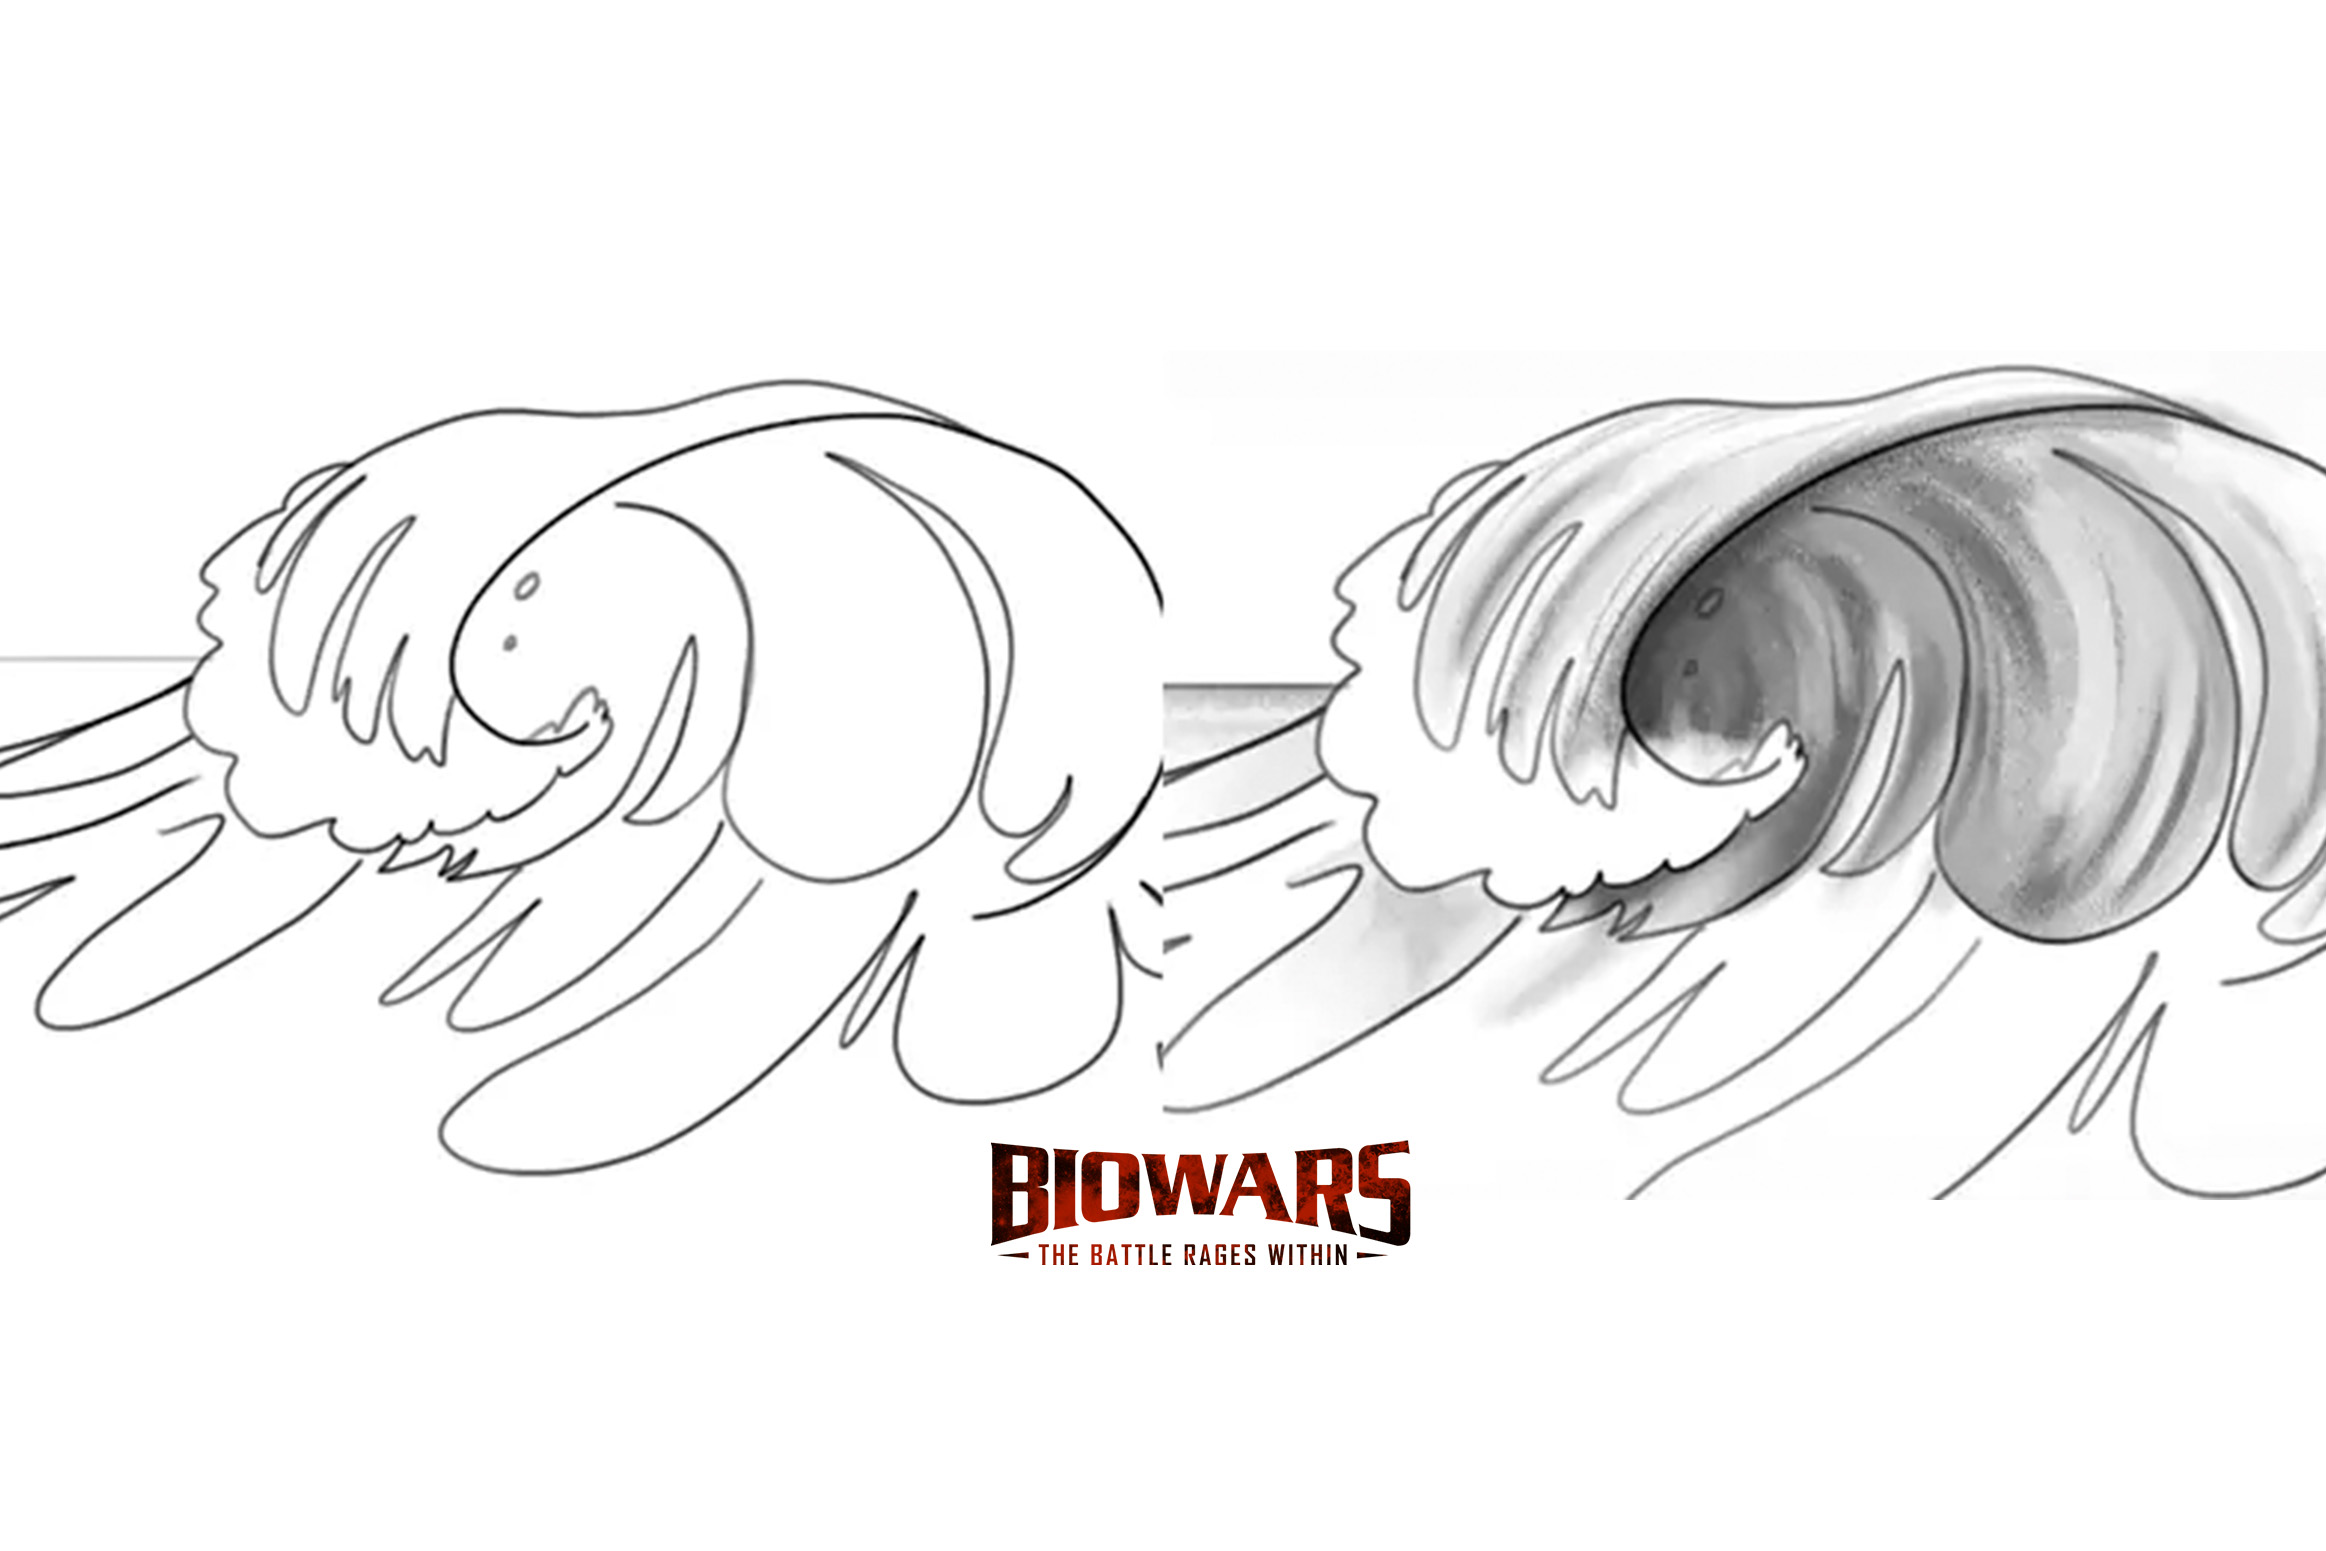
Let’s draw a bunch of spiky connected shapes of various sizes on the wave, like so:
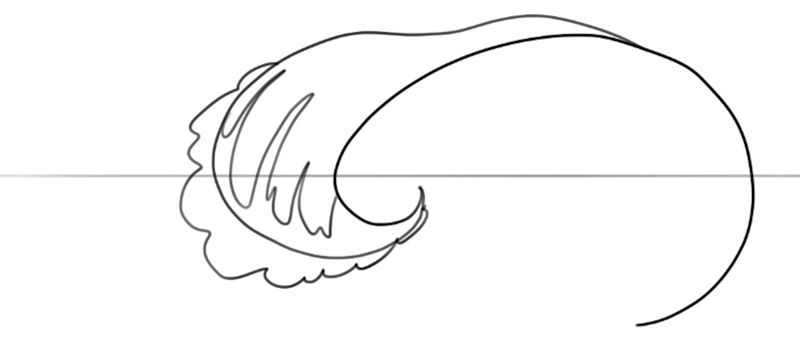
Now, let’s sketch the water on the inside of the wave, i.e. the wave pocket.
You can draw it in one stroke by starting from the wavy line on the left. Mix spiky and round shapes as you get close to the right side of the wave:
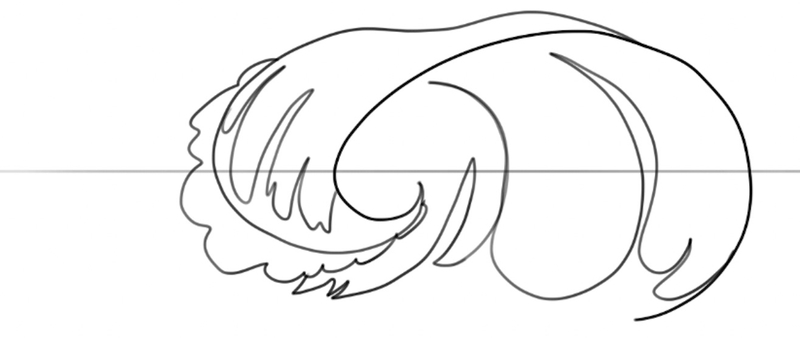
We’ll now use a similar mixture of spikes and curvy lines and add it in front and below the wave’s basic shape to draw the trough.
We want to depict the water as it gently rises up, so make sure your shapes are slightly angled and that they stretch from one end of the wave to the other, like this:
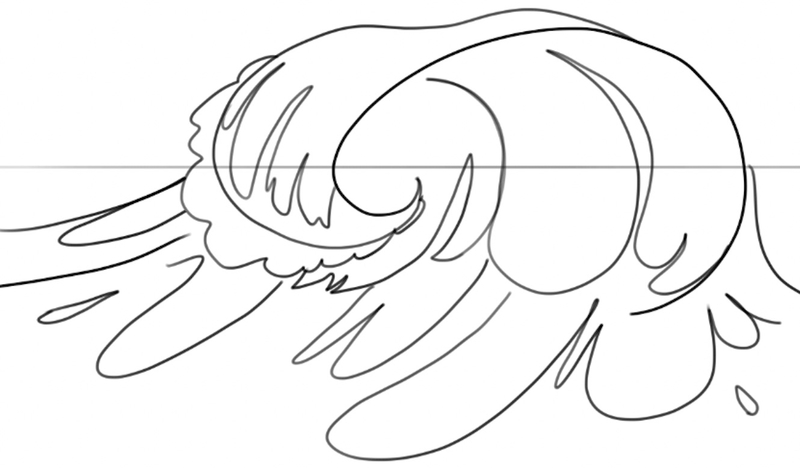
3. Finalize The Wave Outline
Recommended tools: H pencil, kneaded eraser
To finalize the wave outline, let’s first erase the part of the horizontal line that goes through the wave.
You can also erase the curved line that separates the wavy line and the spikes we added to depict the water falling down.
Then, we can add some drops of water here and there, because waves can be very powerful (depending on the strength of the wind) and cause a lot of water to rise above the sea level.
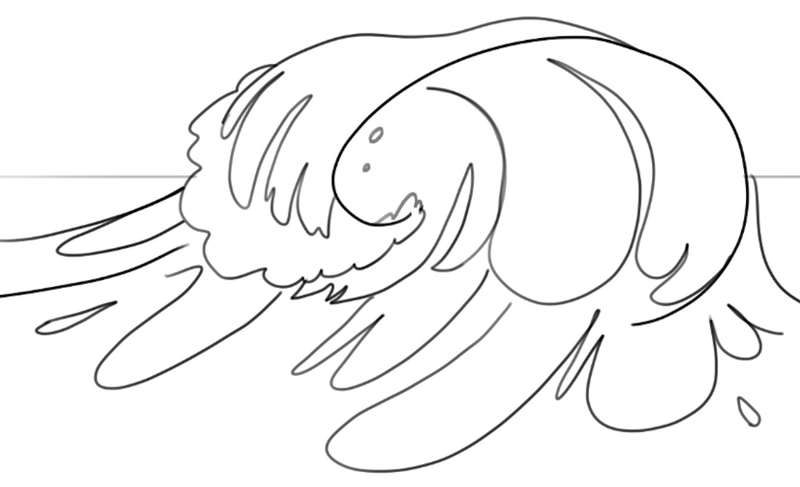
4. Shade Your Wave Drawing
Recommended tools: HB and 4B pencils, blending stump, kneaded eraser
To shade the wave, let’s combine the HB and 4B pencils.
We’ll use the HB pencil for lighter grey tones and the 4B lead to add dark greys to the sketch.
Of course, you can use just one pencil and apply different levels of pressure on it to create light and dark shades of grey.
The top of the wave and the white water need to remain light, i.e., white, so make sure not to shade them.
On the other hand, the wave face sees the least light of all parts of the wave, so we need to keep that part darker than the rest:
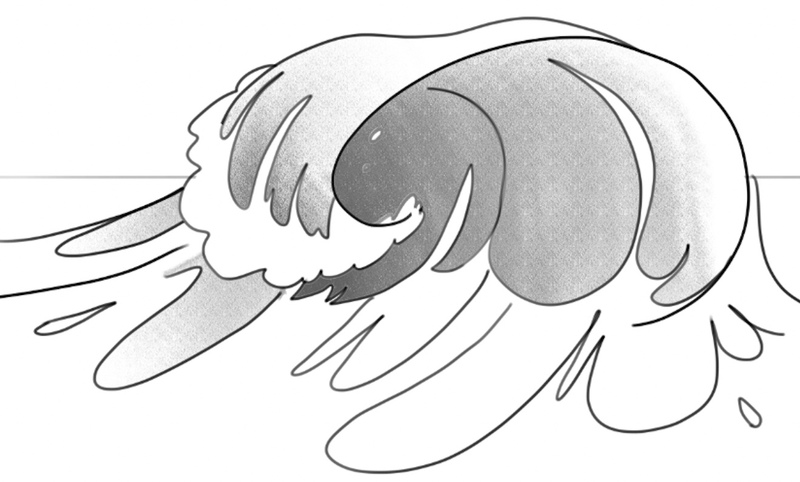
Continue to add light and dark greys around the wave.
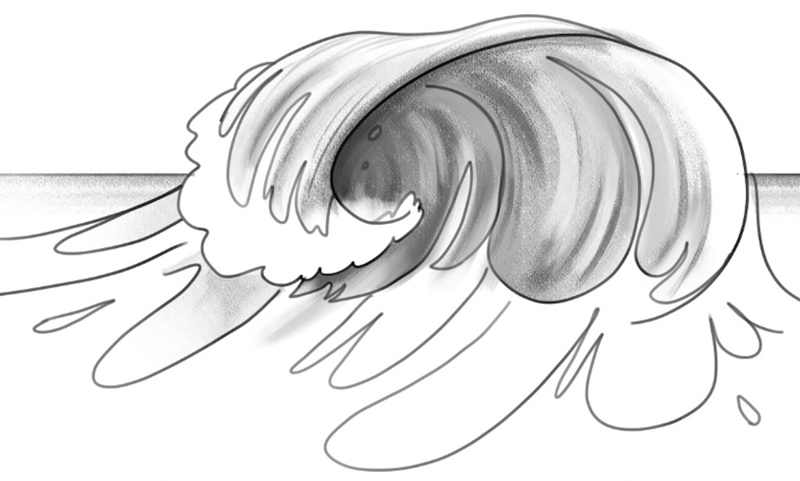
You can also use a blending stump to make the transitions from darker to lighter shades (and vice versa) smoother. (Your fingers work just fine in case you don’t have a blending stump!)
We recommend using an eraser to add highlights to parts of the wave, like this:
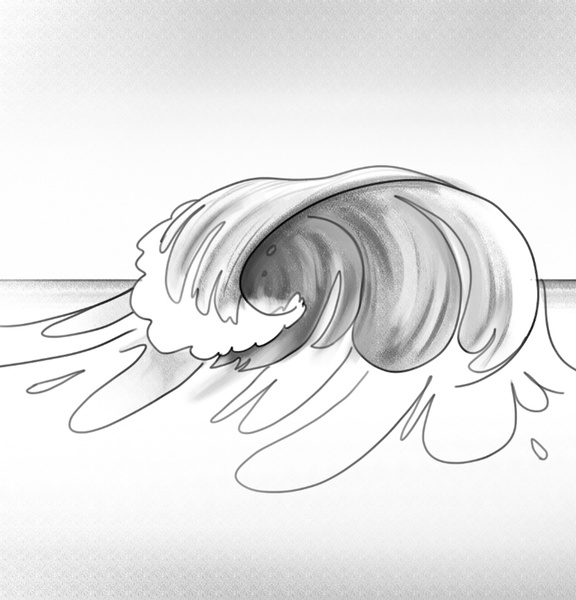
You can also softly shade the rest of your paper, to add more dimension to your sketch. The closer to the edges you get, the darker the greys become:
Finished Your Wave Drawing? Try These Next!
Now that you’re done drawing a wave, it’d be a shame to stop here.
Continue to improve your artistic skills with our tutorials on:
If you want to add human characters to your comic book, we also have a lot of guides on person drawing, such as:
And if you’d like to learn how to draw animals, we got that covered, too:
We have many more step-by-step guides on our blog — check them out!
A Recap On Wave Drawing
When learning how to draw wave, the most important thing is to start small and sketch parts of the wave one by one.
The first step is to draw a line for the sea level, and then, you can sketch the wave curl.
Use curvy and wavy lines to depict the wave’s lip and its restless surface.
Sketch spiky shapes along the wave’s lip and add splashes of water around your drawing to make it richer.
Once you finish outlining, it’s time to shade the wave.
By combining light and dark grey hues and blending them together, you can bring your wave to life!

