Related Resources
Did you know that fire can only burn on Earth?
On every other planet, there’s simply not enough oxygen (at least not on the planets and in the places we’re familiar with so far).
Fire needs oxygen, a source of heat and fuel to burn. When these three elements combine, you get a chemical reaction that produces heat and light.
In this guide, we’ll show you the steps to quick fire drawing and share tricks to help you easily sketch flames for your next comic book:
Sketching Tools For Easy Fire Drawing
When learning how to draw fire, the tools that could come in handy include:
- An H pencil: Hard leads are perfect for the sketching phase. Since they leave a light trace on paper, you can easily erase the guidelines and errors.
- An HB pencil: A medium-hard lead is neither too hard nor too soft. This quality makes it ideal when adding details to the flames and lightly shading the fire.
- A 4B pencil: Soft lead is our go-to choice when shading because it creates dark grey hues.
- A blending stump: This pencil-like tool has two pointed ends and is made up of tightly rolled paper. It allows you to easily blend the lines when shading and create soft transitions from lighter to darker areas and vice versa.
- A kneaded eraser: Soft kneaded erasers are highly customizable, and you can change their shape and size depending on how big the lines are that you want to erase. You can also use this eraser to highlight specific elements of your fire drawing.
- Lightly textured sketch paper: This paper’s smooth surface is easy to draw on, which also makes erasing mistakes easier.
Feel free to use whatever tools you’re most comfortable with!
As you can see in the video, even the BIOWARS artist uses just one pencil, so don’t feel obligated to use all of the suggested tools. Always go with the pencil and paper you’re most comfortable with!
Now, let’s get to learning how to draw fire!
How To Draw Fire In 4 Steps
When learning how to draw fire (and pretty much everything else), the best thing to do is start small and draw the elements one by one.
1. Draw The Flames
Recommended tool: H pencil
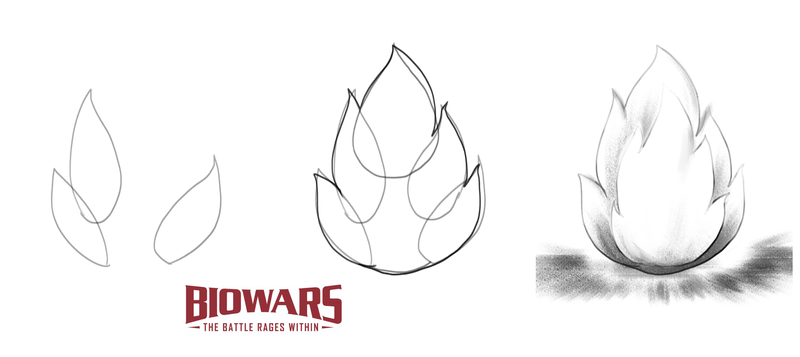
We’ll show you how to draw fire by sketching two layers of flames, starting with the taller and wider layer.
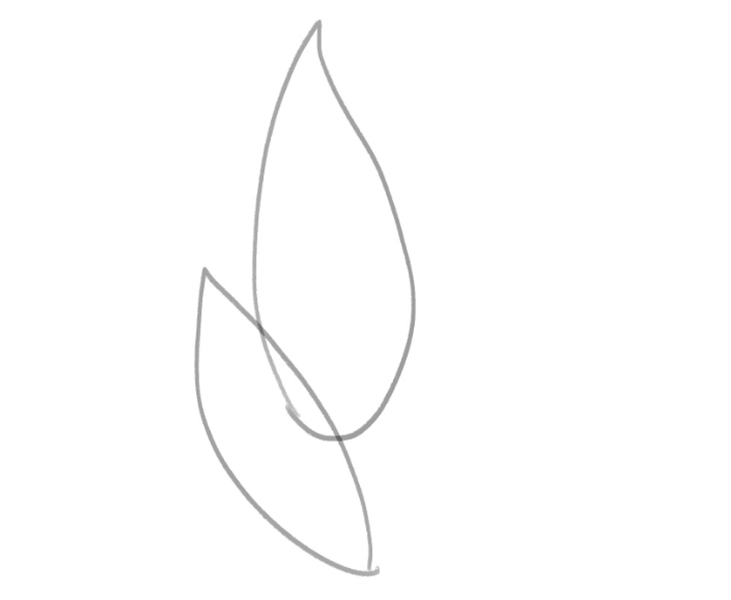
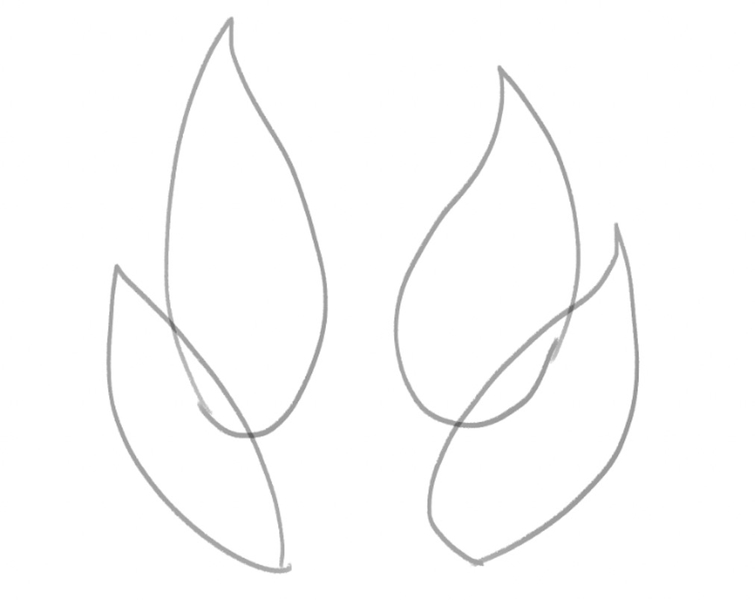
First, let’s outline a flame on the left-hand side.
Make sure to leave enough room above and around the flame to have space for the rest of the flames.
To draw the first flame, start by sketching a thin leaf-like shape; the line on the far left should be more curved than the flame’s inner side, like so:

Add the second flame to the sketch and attach it to the middle of the first flame.
Let’s make this flame larger, more vertical and tear-shaped, like this:
Now, let’s add some flames on the right-hand side.
Sketch a flame that has a similar shape as the flame at the bottom left.
The two flames should also be of similar size.
It’s also important to make the bottom angle of the two flames in line with each other:
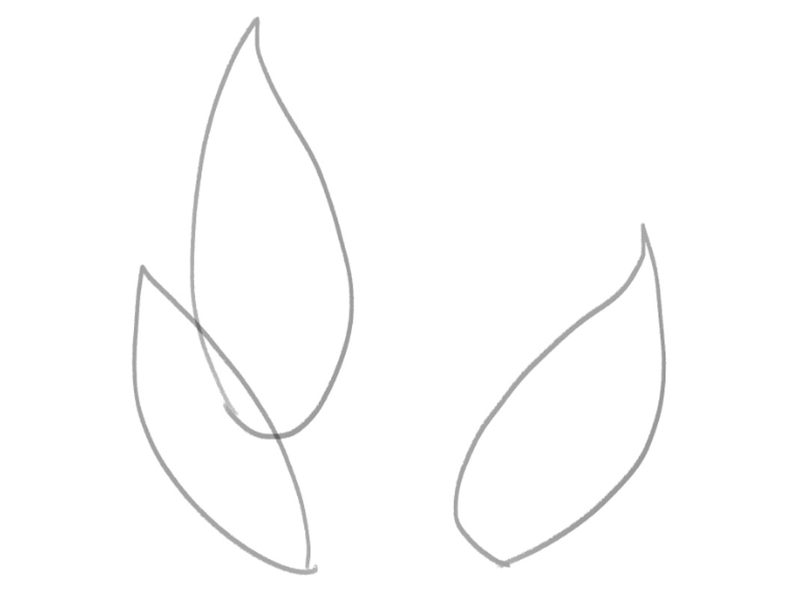
Draw another flame on the right and make it parallel to the second flame on the left.
The two don’t have to be the exact same size, but they should be similar, like this:
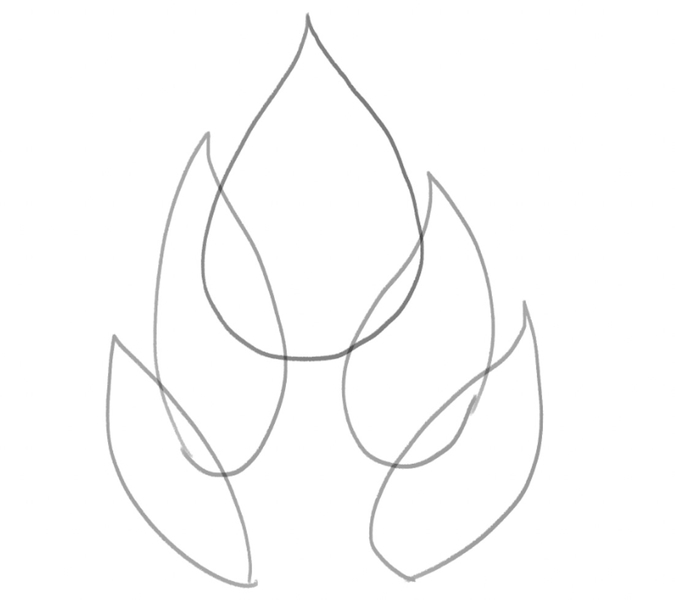
Now, to connect the flames on either side, let’s draw one large tear shape in the middle:
2. Connect The Flames
Recommended tool: H and HB pencils
Next, let’s connect the flames at the bottom with a slightly curved line:
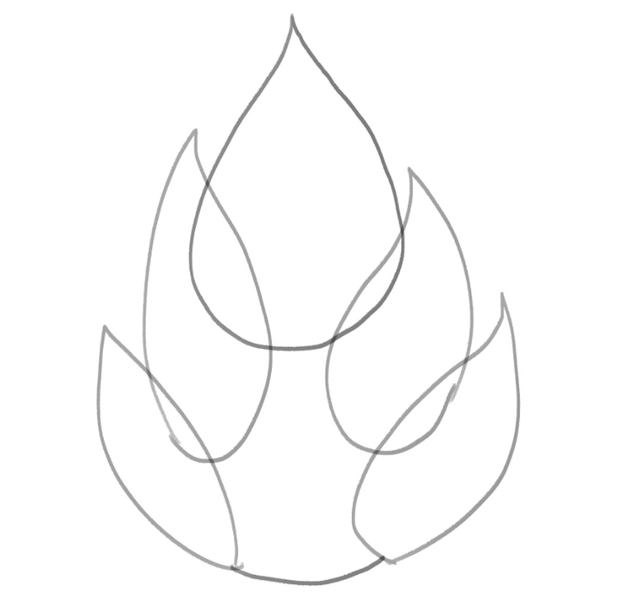
Now’s the time to connect all of the flames together to form the outer fire outline.
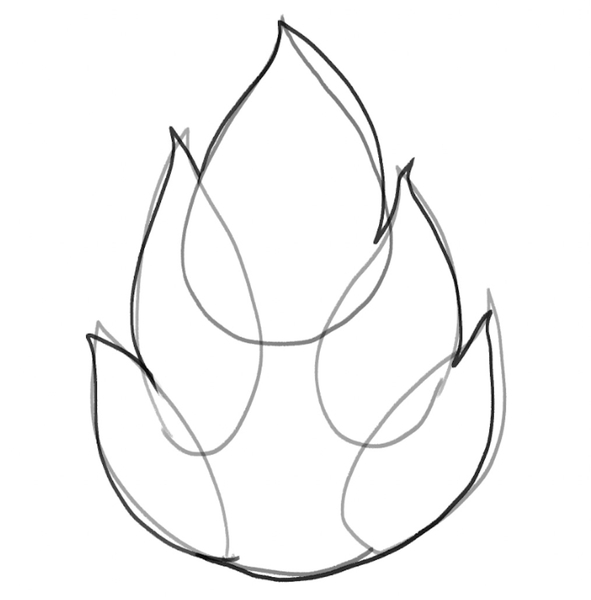
To do this, grab your HB pencil or simply apply more pressure to your pencil of choice.
Then, go over the outer lines of every flame and connect them into one, like this:
3. Delete The Unneeded Parts And Draw The Inner Flames
Recommended tool: H and HB pencils, kneaded eraser
Once you sketch the outer layer of the fire, you can erase the guidelines that you no longer need.
Carefully erase the lines on the inside of the fire to make room for the second layer of flames.
Then, use your HB pencil again and draw the exact same flame shapes as the first time, but make them much smaller now, like so:
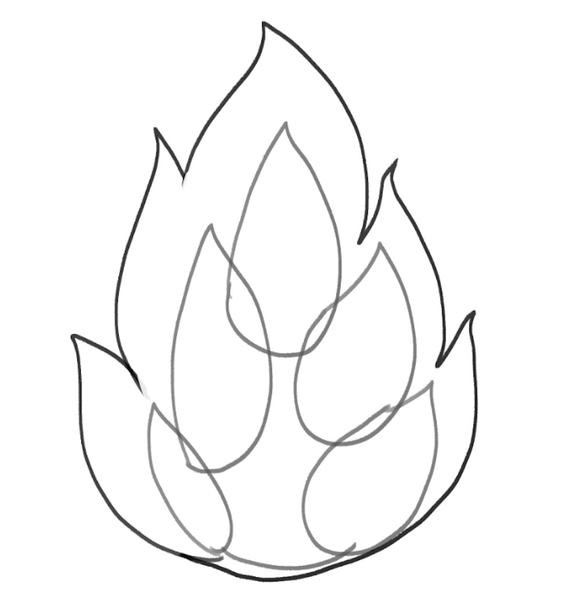
When you finish outlining the inner flames, use an HB pencil to go over their outer lines and connect them in a cohesive whole:
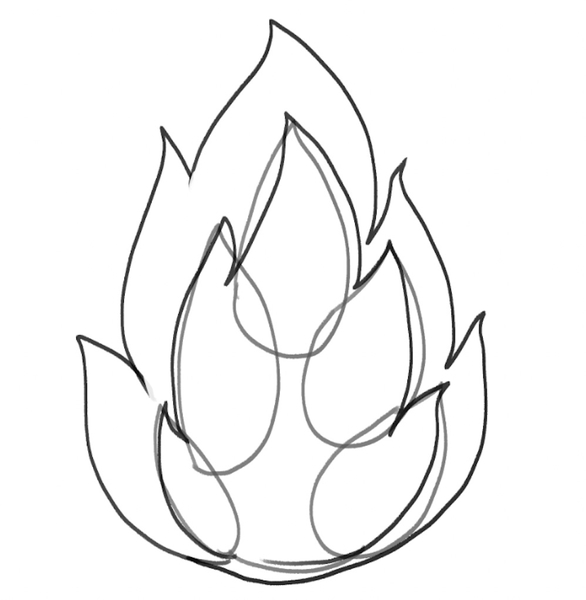
To finalize the fire outline, erase the remaining guidelines so that your sketch looks like this:
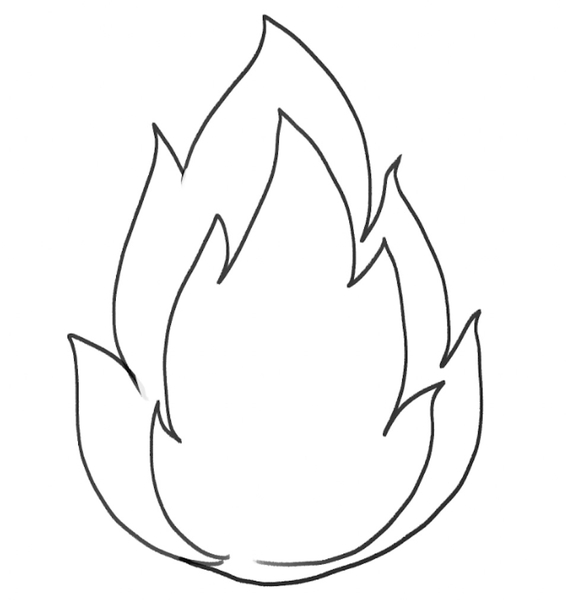
4. Shade Your Fire Drawing
Recommended tools: HB and 4B pencil, blending stump, kneaded eraser
Although the majority of flames burn in different shades of orange and yellow, they can also be red, blue and even white. That depends on the temperature and the fuel’s chemical composition.
We won’t be experimenting with colors this time since it’s better to master the basics of drawing first, but we will show you how to shade your sketch, to add some life to it.
To shade your fire drawing, we recommend combining HB and 4B pencils because they allow you to create various shades of grey.
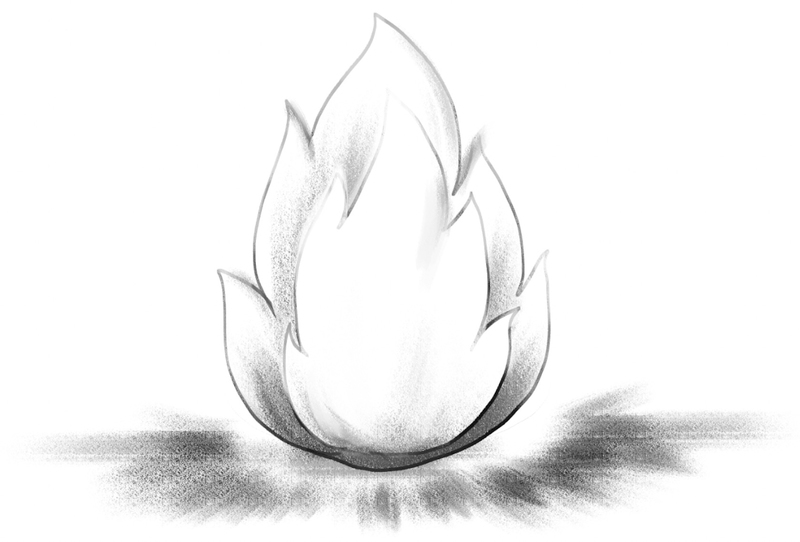
For example, you can add a darker shade of grey around the smaller flames. Since we don’t want the fire to look like it’s floating in the air, we also colored the area below it.
As for the smaller flames, let’s color the bottom half in a light grey hue, like so:
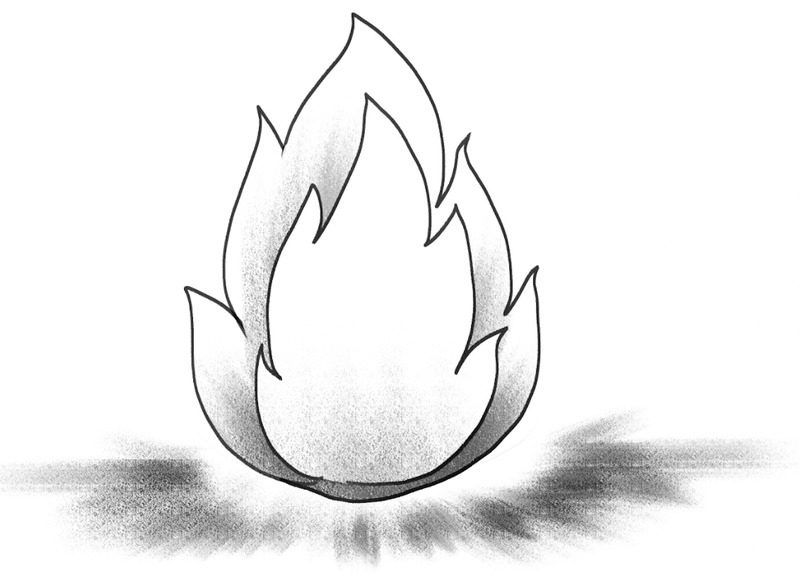
The final step in fire drawing is to blend the grey shades to make them look softer and more natural.
You can use a blending stump to that end or a finger.
To highlight parts of your drawing, feel free to use an eraser.
Here’s what the finished fire drawing looks like:
Finished Your Fire Drawing? Try These Next!
Now that you’re on fire (see what we did there ), it’d be a shame to stop drawing and practicing.
Check out some more of our tutorials, including:
We also have a lot of guides on person drawing, such as:
And if you’d like to learn how to draw animals, we got that covered, too:
We have many more step-by-step guides on our blog — check them out!
Meet The Artist
The man behind this guide on fire drawing is Goncalo Lopes — a professional artist coming from Portugal.
Aside from being the lead BIOWARS artist for the past decade, Goncalo has also worked on some pretty big projects, including Godzilla, TMNT, Adventure Time, Transformers, GI-Joe and many others.
When he’s not redesigning BIOWARRIORS and their enemies and making new art content for the BIOWARS website, Goncalo enjoys creating beginner-friendly art tutorials that will help our readers get their creative juices flowing and perfect their artistic skills in no time.
A Recap On Easy Fire Drawing
When learning how to draw fire, start small and draw the flames one by one.
You don’t have to go into too much detail; instead, outline one layer of fire by drawing a total of five flames — two on each side and one in the middle, and connect the rest at the top.
When you form the outer layer, continue to sketch the flames within the larger ones. The steps are the same except that the inner layer of flames is much smaller than the first.
When you finish outlining the flames, go over the outer edges to connect each piece into a cohesive fire.
Then, apply different levels of pressure to your pencil or combine different leads to create different shades of grey and shade your fire drawing!
