Related Resources
Did you know that the first car was made in 1886?
Since the first three-wheeled models, the cars have come a long way.
They’re fast and beautiful, but drawing them is often tricky.
Beginners usually struggle to get the proportions right, and that’s why we’re here!
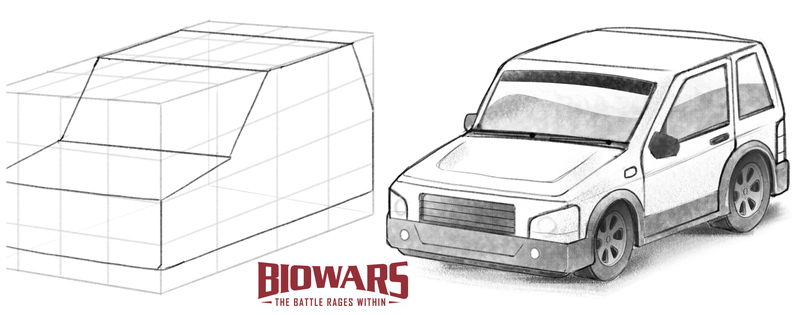
We’ll share with you tips for easy car drawing, but you can’t laugh at how old the model we’ll sketch is:
Yeah, it’s a dinosaur, *BUT* when you’re a beginner, it’s best to start small and learn how to draw basic cars first and then move on to drawing more recent models.
Oh, and if you would like to learn how to draw a car at your own pace, read on and explore the illustrations that accompany each step!
Now, jump in and let’s roll!
Sketching Tools To Draw A Car
Although you can use whatever pencil and paper you like for your car drawing, here are some tools that could come in handy:
- An H pencil: A hard lead is the best choice for sketching because of its light trace that is easy to build but also erase.
- An HB pencil: A medium-hard lead is a great choice when detailing and adding soft shade to your car drawing.
- A B pencil: The soft lead is ideal for shading because of its dark grey, almost black color.
- A kneaded eraser: Our go-to eraser is easy to stretch and compress, depending on what you need to erase. You can also use it to highlight parts of your sketch.
- Lightly-textured paper: The smoother the surface of the paper, the easier it is to draw on it, so we recommend using lightly-textured paper, especially for beginners.
How To Draw A Car In 8 Easy Steps
To show you how easy drawing a car can be, we’ll use geometrical shapes to create guidelines and add parts of the car one by one.
Now, let’s start!
1. Draw The Guidelines
Recommended tool: H pencil
When you’re a beginner drawing a car, you may struggle to get the proportions right.
But we’ll show you how to draw a perfectly symmetrical car using geometrical shapes!
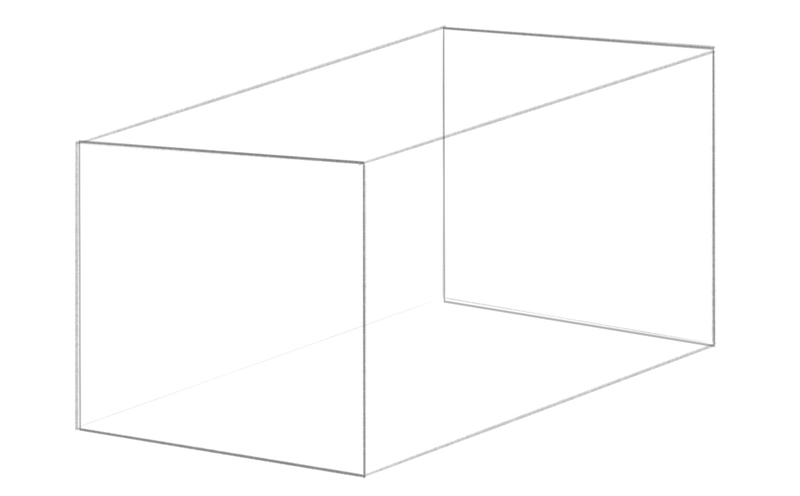
For starters, draw two squares and place them diagonally, with one square at the front and the other behind, slightly to the right.
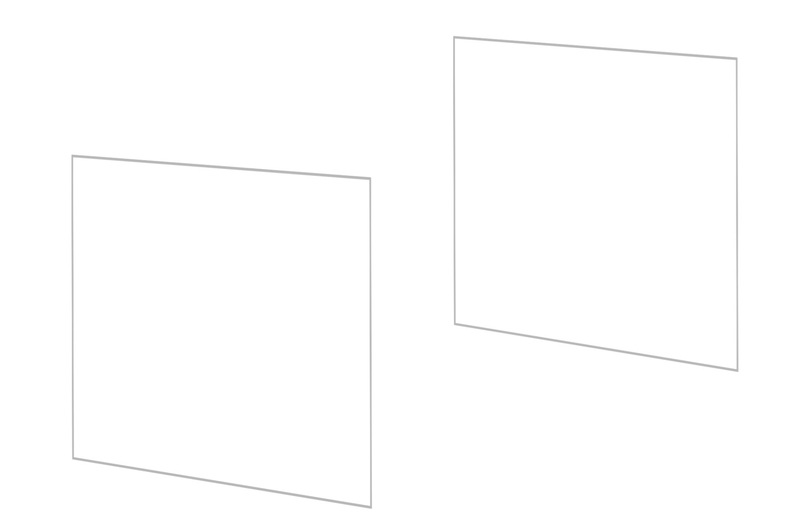
Next, connect the squares at the corners with straight lines to form a square prism, like so:
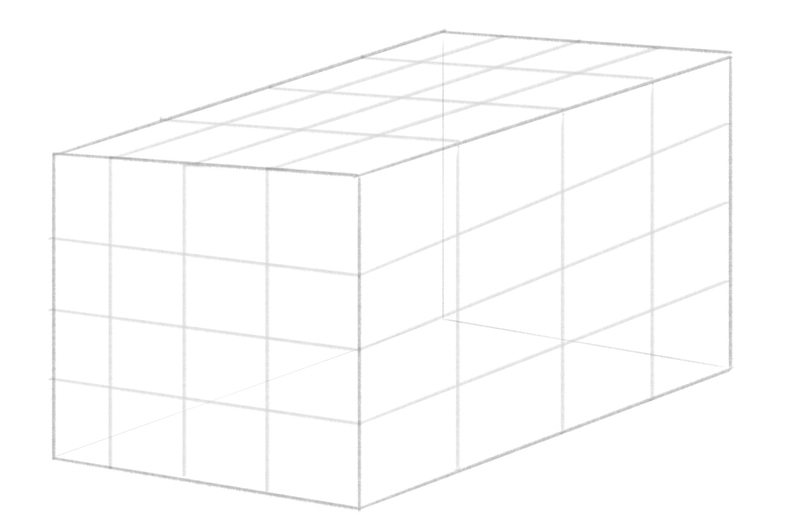
Now, to position the car properly, let’s split the large square prism into smaller shapes.
Divide the front square into 16 smaller squares.
Then, extend the lines that form the squares so that they go over the top and the right side of the large square prism.
Next, let’s divide the top of the base into four equal parts and have the lines reach the bottom of the prism’s right side, forming rectangles:
2. Outline The Car
Recommended pencil: H pencil
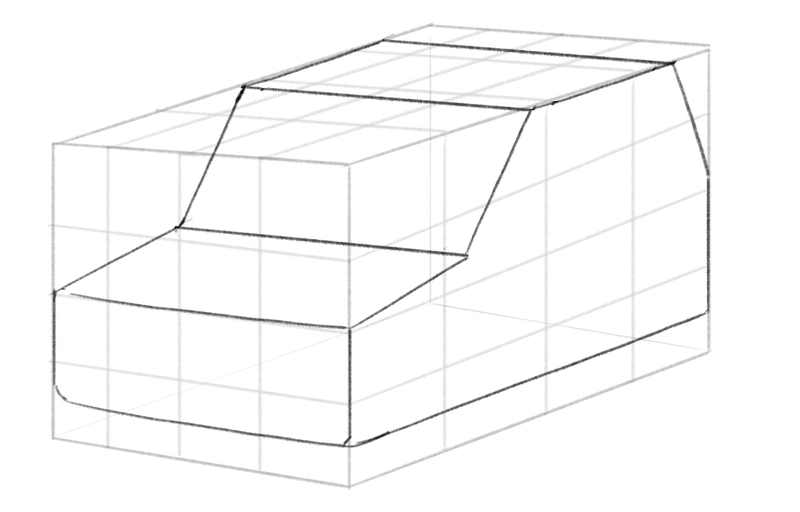
Now it’s time to start outlining the car.
For starters, let’s draw the front part, where the bumper and headlights are.
Go over the line in the middle of the front large square and connect the left and right side.
Then, go over the edges on either side of the squares in the second row and stop when you reach the middle of the bottom squares.
From there, draw a diagonal line through the middle of the rectangles in the bottom line.
Then, point the line upwards and stop slightly above the second-row rectangles.
Now, let’s draw a diagonal line and have it reach the middle of the top rectangle to start forming the roof.
Make sure that line touches the right side.
On either side of the car, have straight lines reach the rectangles in the second top row.
As you reach one-third of the rectangles, draw a horizontal line to connect the sides.
For the windshield, draw two diagonal lines from the front of the roof and point them downward.
The line on the right should reach the left side of the top middle square. Make sure that the diagonal line ends just above the square’s bottom line.
From there, draw a horizontal line that touches the second rectangle on the side and connect it with the diagonal line on the left side.
To finish drawing the bonnet, a.k.a, the hood, connect the windshield with the front part of the car, like this:
3. Draw The Hood, Wheels And Windows
Recommended pencil: H pencil
Now it’s time to add some essentials to the basic sketch.
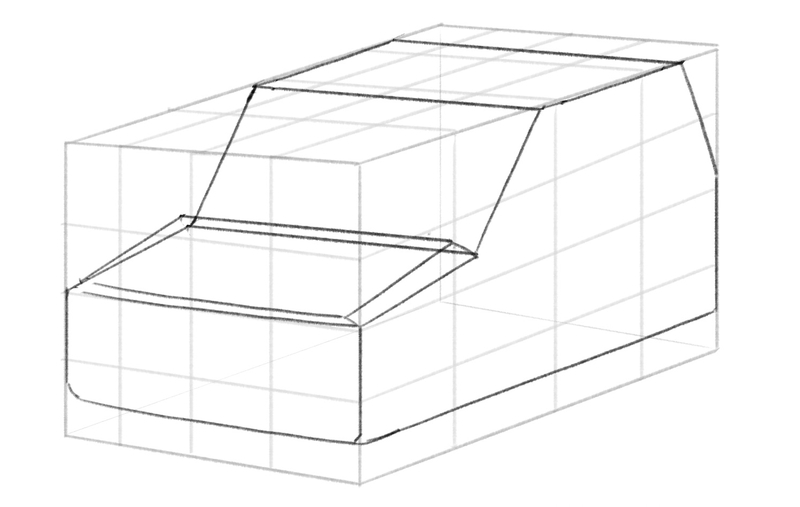
First, let’s make the hood more prominent.
To do that, draw a rectangle just above the outline of the hood you drew earlier and connect the two parts, like this:
Next comes drawing the wheels.
To outline them, let’s draw two circles on the side.
Have the front wheel cover the bottom rectangle and the majority of the one above it. Don’t forget to add a tiny circle in the middle of the wheel!
As for the back wheel, place it so that it covers about one-third of the penultimate and the better chunk of the last rectangle, like this:
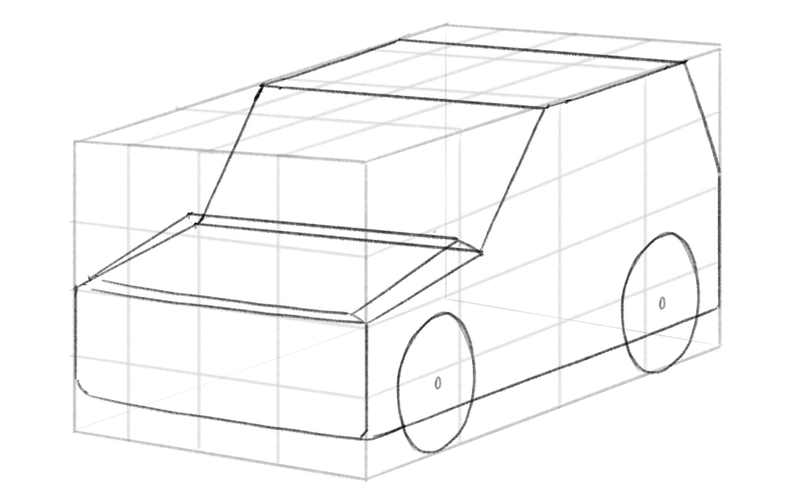
Since this is a tiny car, its windows are also quite simple and small.
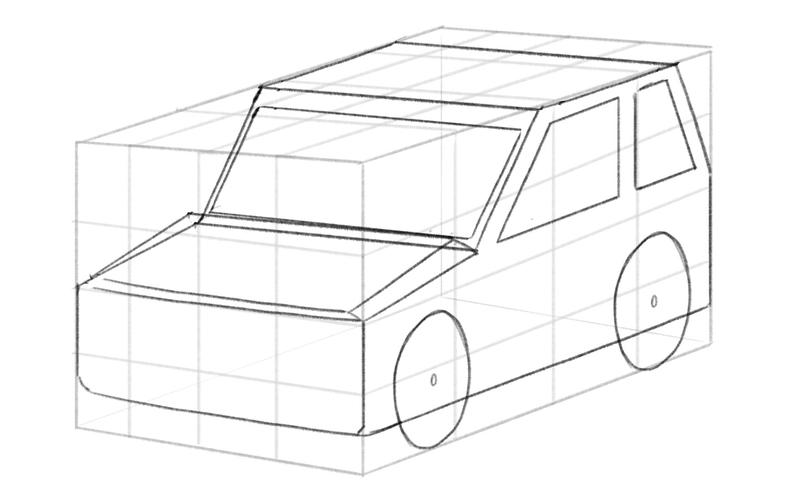
But first, let’s add more details to the windshield.
You’ll want to copy the shape you drew earlier, but make it smaller and place it inside of the larger windshield rectangle.
To draw the front window, start from the middle of the second rectangle in the third row.
Draw a diagonal line and have it end just below the rooftop.
Then, draw a straight line parallel to the roof and make sure it reaches about three-quarters of the top-third rectangle.
From there, point the line down and then connect it with the diagonal line on the left.
As for the back window, let’s make it the same shape as the one at the front, except smaller, like so:
4. Draw The Bumper And Headlights
Recommended pencil: H pencil
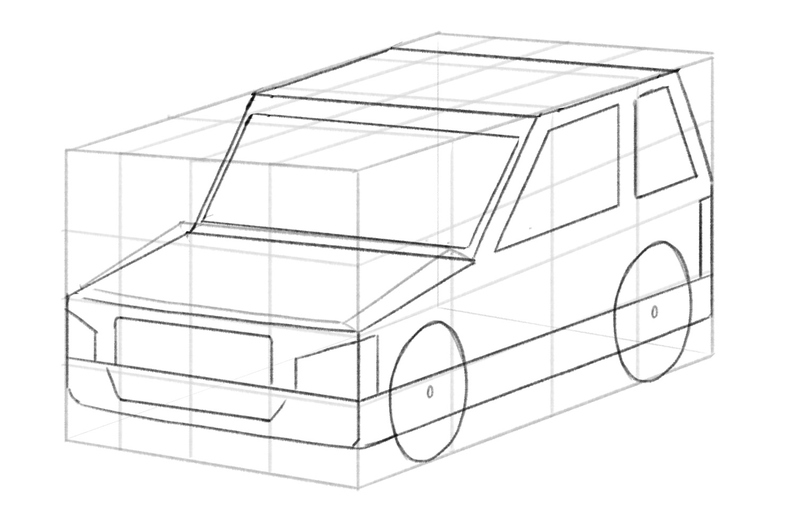
To add the bumper, again, use the guidelines you drew first.
Draw a straight line just above the top of the squares in the bottom row and extend it to the side.
Then, draw a trapezoid at the front, but turn it upside-down and make sure it touches the top of the first and last square in the bottom row.
To make the front of the car more interesting, draw a rectangle as wide as two squares above the trapezoid. This is where you’ll add a grille in a few steps!
For the headlights, use short, straight lines.
Have the right headlight cover about one-half of the first square in the second bottom row.
Use a diagonal line for the top of the headlight and then point the line downward, to connect it with the bumper.
Repeat the same on the left, but make sure that the left headlight stretches a bit to the side where the door will be, because that’s where the front corner light is.
Lastly, for the back sidelight, draw a narrow rectangle, like this:
5. Draw The Mirrors And Turn Signals
Recommended tool: H pencil
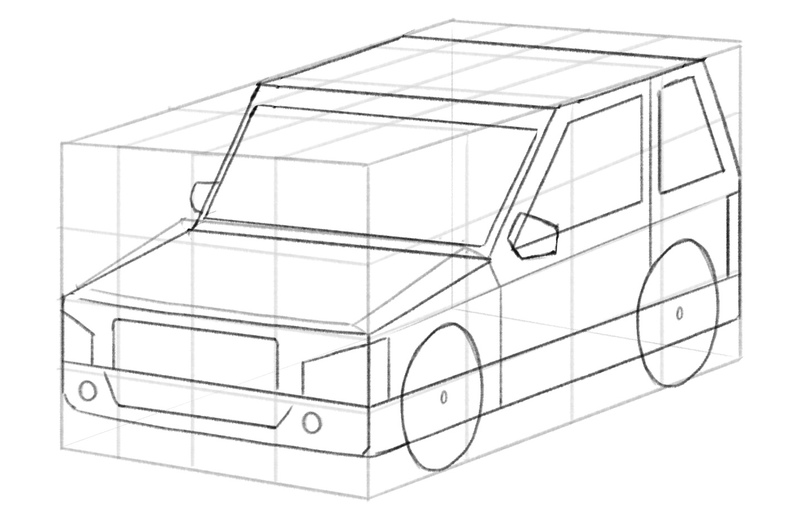
Turn signals are indispensable in every car. They’re useful and easy to draw.
You can simply sketch two small circles at the front, just below the headlights.
As for mirrors, you can’t see much of the one on the right from this angle. You can draw it as a capital “C” but less round.
The mirror on the left looks almost like a pyramid, but with a flat top.
At this point, it’d be good if you connected the top left corner of the hood (right under the windshield) with the bottom of the car to mark where the doors are:
6. Draw The Tires
Recommended tools: H pencil
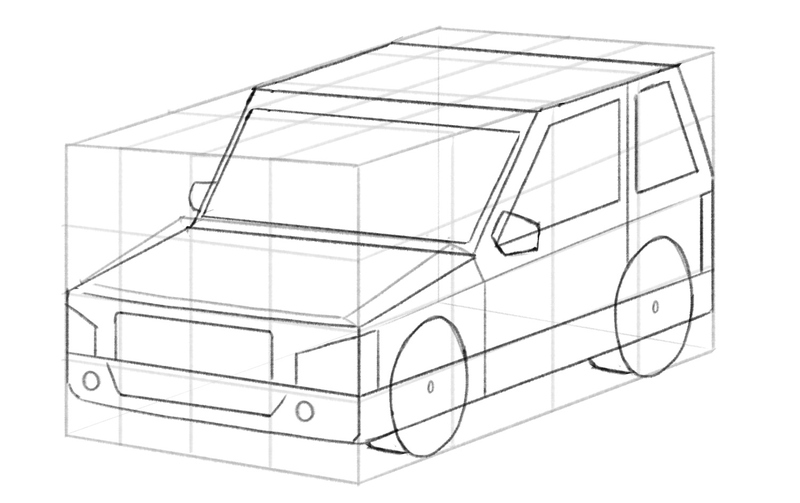
Now’s the time to give dimension to the tires.
To do that, simply connect the circles you previously drew and connect them to the bottom of the car:
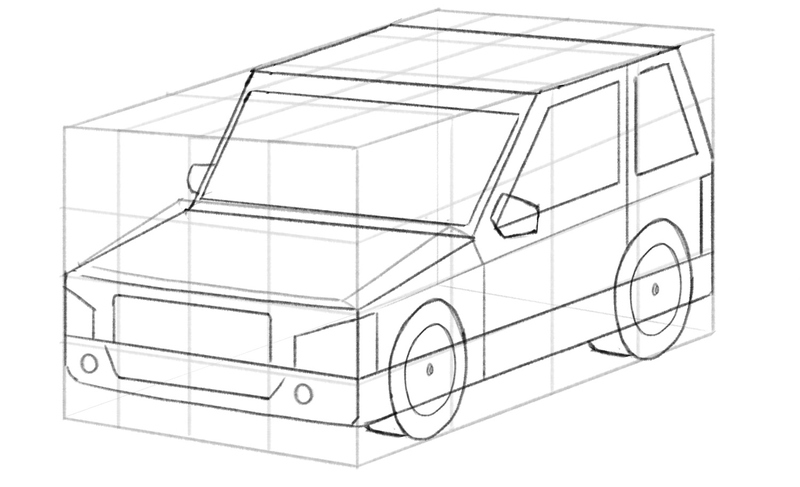
As for sketching the tires from the side, all you have to do is draw a smaller circle within the one you originally drew, like this:
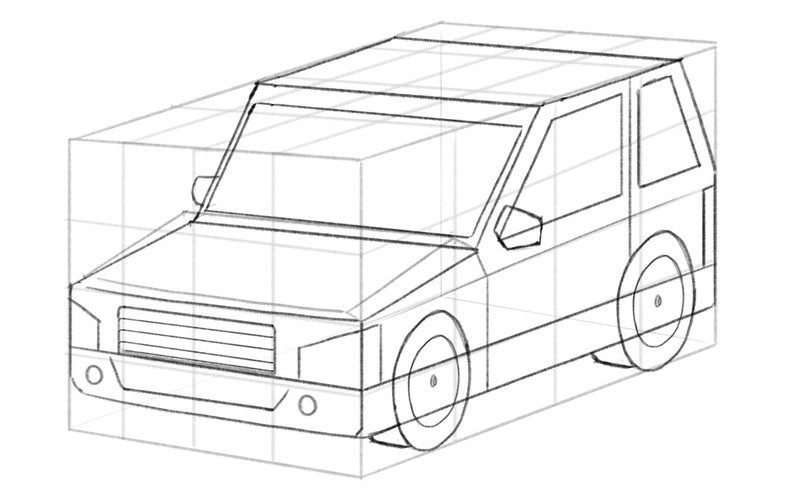
Before you finish drawing the tires, let’s finalize the front part of the car and sketch the grille.
Add straight, horizontal lines inside the rectangle-shaped part above the bumper, like this:
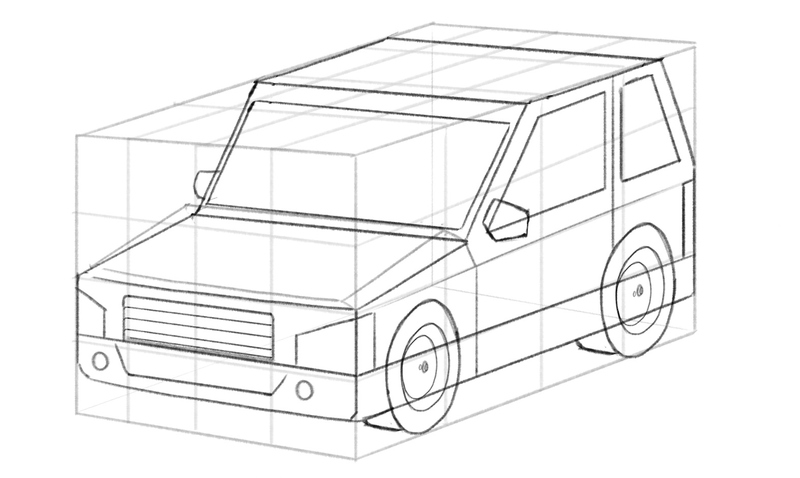
Now, let’s finish drawing the wheels.
Draw one more circle inside the tire. This is where the rims will be!
7. Remove The Guidelines And Add The Finishing Touches
Recommended tools: H & HB pencils and a kneaded eraser
Now that the basic car outline is ready, grab an eraser and carefully remove the guidelines.
With unneeded squares and rectangles gone, you can add some finishing touches to your car drawing.
For starters, make the circle at the center of both tires slightly larger.
Then, add the fenders.
To draw them, simply curve the bumper above each wheel and follow the tires’ shape:
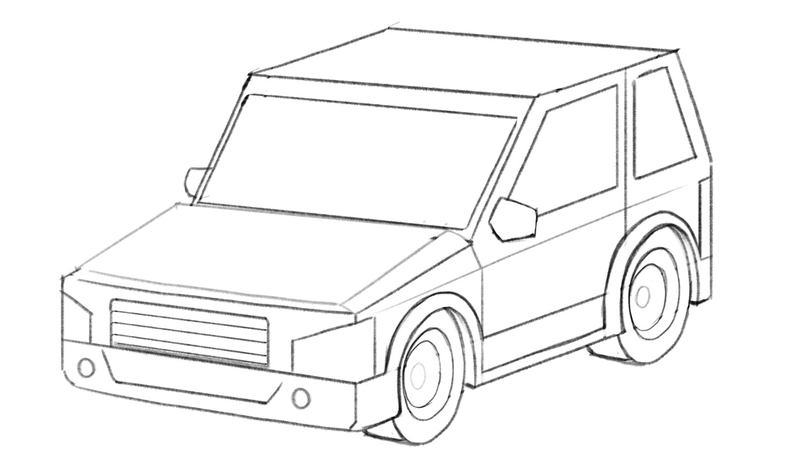
You can now use your HB pencil to go over the outline and soften some parts.
For example, a car windshield is always curved; so, let’s go over the top of the windshield and just slightly curve that line, like this:
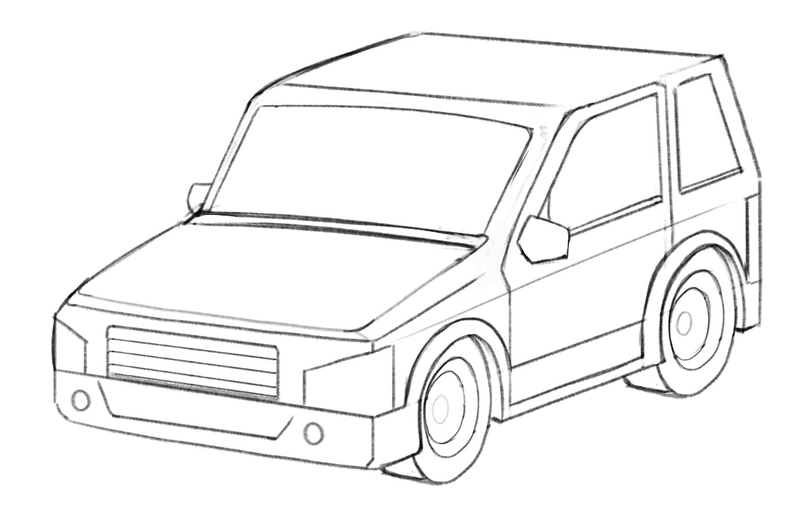
Next, with your HB pencil, softly shade the inside of the grille.
Then, slightly extend the bumper in the back and attach it to the back of the car, right where the signals are:
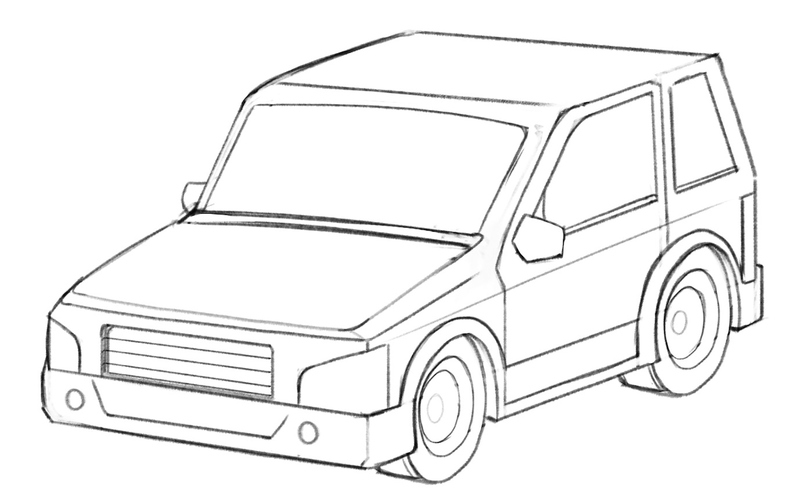
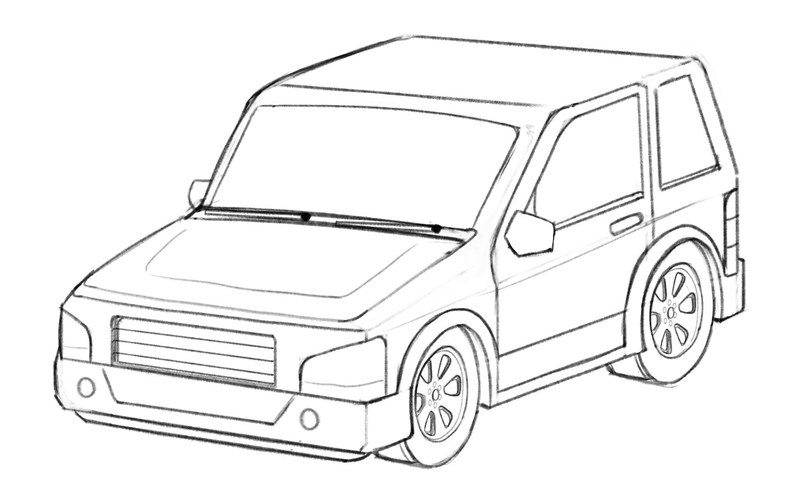
Now, let’s not forget about the windshield wipers!
They’re quite easy to sketch. All you have to do is draw two horizontal lines right below the windshield.
You should also add a door handle; you can sketch it as a small oval shape and have its right end parallel with the right side of the front window.
Oh, and add three horizontal lines to the rectangle above the rear bumper to mark signals.
Then it’s time to add the rims!
You can draw them as tiny triangles with their tips turned toward the center of the wheel, like so:
8. Shade Your Car Drawing
Recommended tools: HB & B pencils and a kneaded eraser
The final step to car drawing is to shade it!
You can combine both HB and B pencils to add a softer and darker shade to the sketch; or, you can simply apply different levels of pressure to your pencil of choice to add dimension to your car drawing.
The top of the windshield, mirrors, inside of the rims and grille, tires and the door handles should be the darkest, so feel free to shade them in dark grey/black hues.
As for the rest of the windshield and windows, feel free to draw a wave-like shape from the front of the windshield all the way to the rear window.
Then, shade that wave in light grey. You can even use your eraser to highlight parts of the windshield:
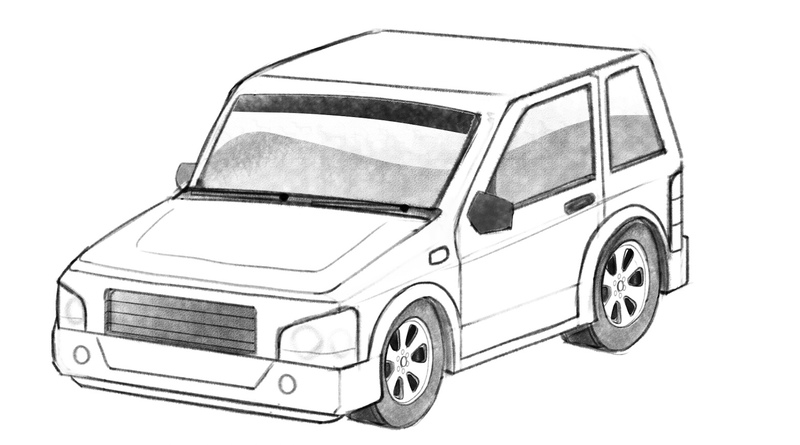
Now, shade the rims and bumper in dark grey:
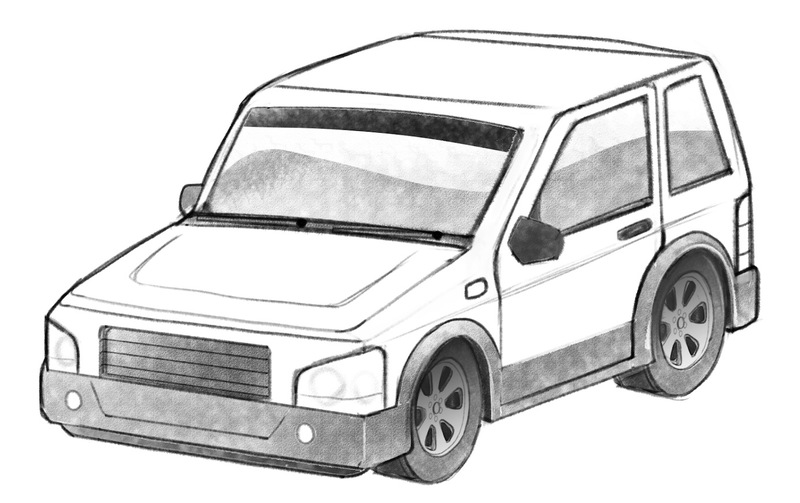
Lastly, shade the ground under the car so that the parts behind the tires are the darkest:
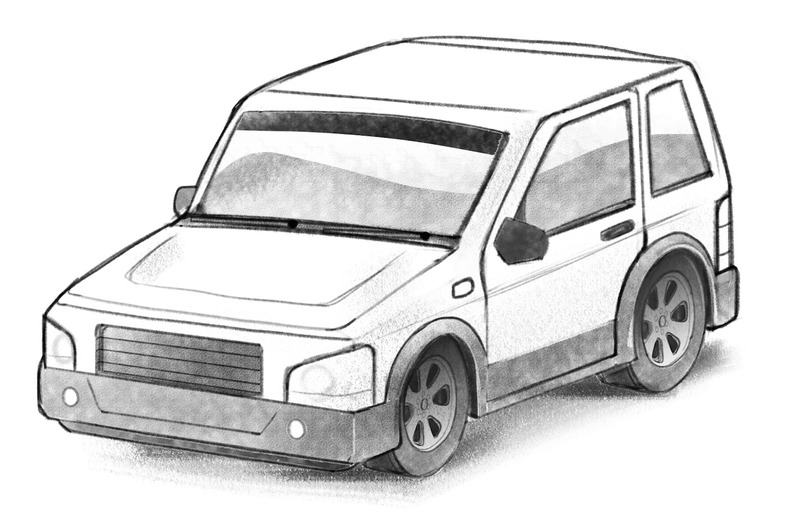
Finished Your Car Drawing? Try These Next!
Now that you’re on a roll, are you up for some more drawing?
If so, stay on the BIOWARS blog and give these guides a go:
We also have a bunch of guides on drawing animals:
And if you want to learn how to draw a person, check out these tutorials:
Meet The Artist
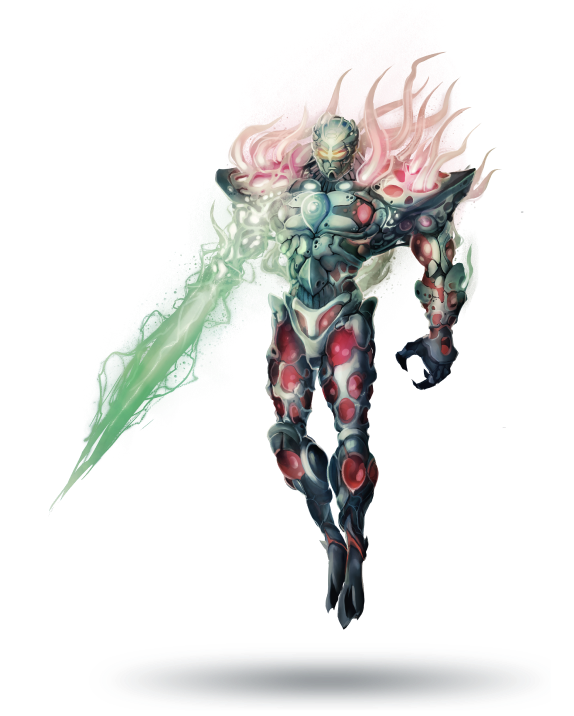
This guide was created by Goncalo Lopes — the resident BIOWARS artist who designed all the BIOWARRIORS and the menacing pathogens in our comic book.
Throughout his career, Goncalo has worked on many large-scale movies and TV shows, such as GI-Joe, TMNT, Transformers, Adventure Time and Godzilla.
He’s now here to help you improve your drawing skills, so make sure to pay attention to his tips and tricks to quickly learn how to draw like a pro!
A Recap On How To Draw A Car
When you’re a beginner learning how to draw a car, geometrical shapes are your friends.
Use squares and rectangles as guidelines and then draw a car step-by-step:
- Create the guidelines
- Outline the basic car shape
- Draw the hood, wheels and windows
- Add the bumper and headlights
- Sketch the mirrors and turn signals
- Draw the tires
- Remove unneeded details and add finishing touches to your car drawing
- Shade your sketch
When you perfect drawing a proportional old car, you’ll find it easier to draw newer models with their soft lines and simple details.
